Take the magazine attachment out of the dry
wall screwdriver.
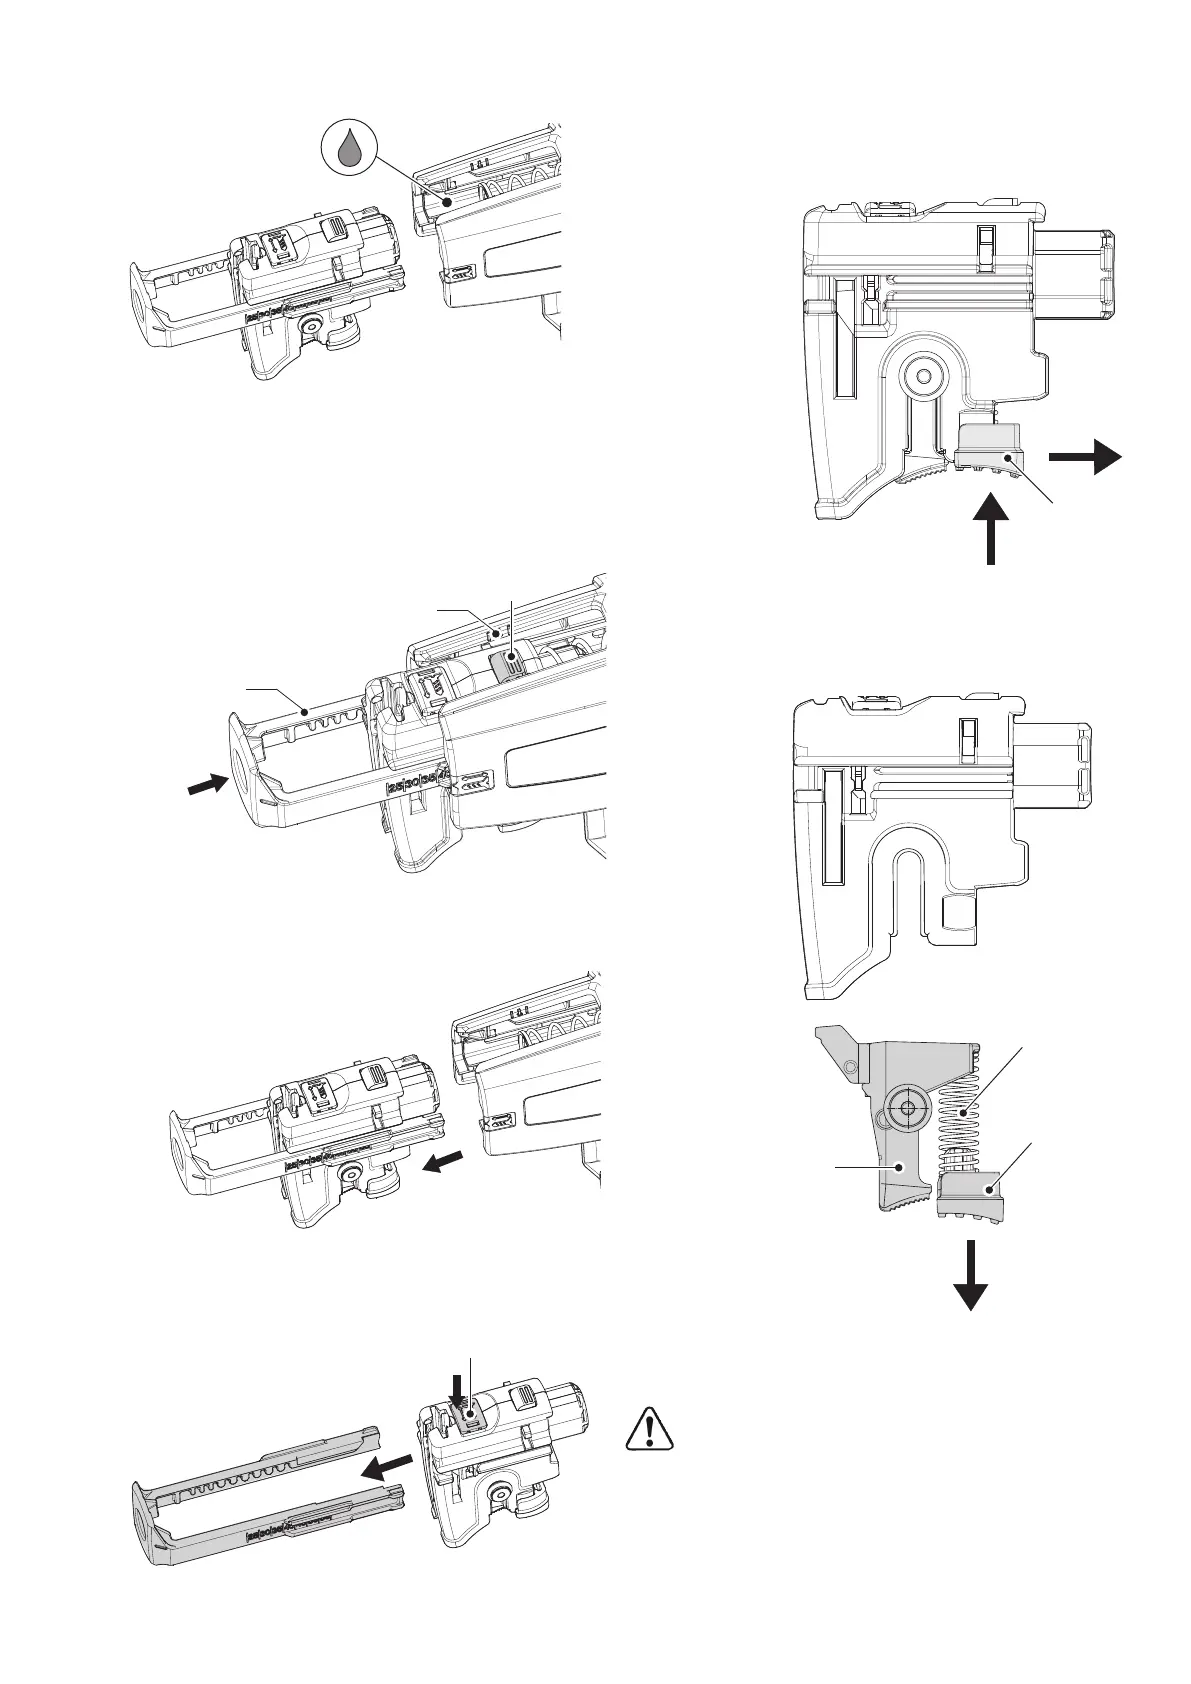
Removing the carriage
► Push the depth stop [13-3] in to the housing
as far as it will go, until the locking but
ton [13-1] is level with the marking for car
riage removal [13-2] – see figure [13].
► Press the locking button [13-1] and at the
same time pull the carriage out of the mag
azine – see figure [14].
► Push the button [15-1] and at the same
time unscrew the depth stop – see fig
ure [15].
Removing the transport lever
► Push the button [16-1] and at the same
time slide in the direction of the arrow – see
figure [16].
► Remove the released button [17-1] (figure )
together with the transport lever [17-3] and
the spring [17-2] from the carriage (fig
ure [17]).
► Clean the individual parts, replace faulty or
worn parts and then reassemble in reverse
order.
When reassembling the transport lever in
the carriage, ensure the spring [17-2] is posi
tioned correctly within the transport lever. In
correct assembly can prevent the collated
screws from being transported properly.
English
15

 Loading...