Colour Material Symbol
Yellow Wood
Red Laminate, mineral ma
terial
Green Plaster- and cement-
bonded chipboard and
fibreboard
Blue Aluminium, plastic
9.8 Changing the saw blade
WARNING
Risk of injury
► Remove both battery packs from the power
tool before performing any work on the
power tool.
CAUTION
Risk of injury from hot and sharp insertion
tool
► Do not use any blunt or faulty insertion
tools.
► Wear protective gloves when handling an
insertion tool.
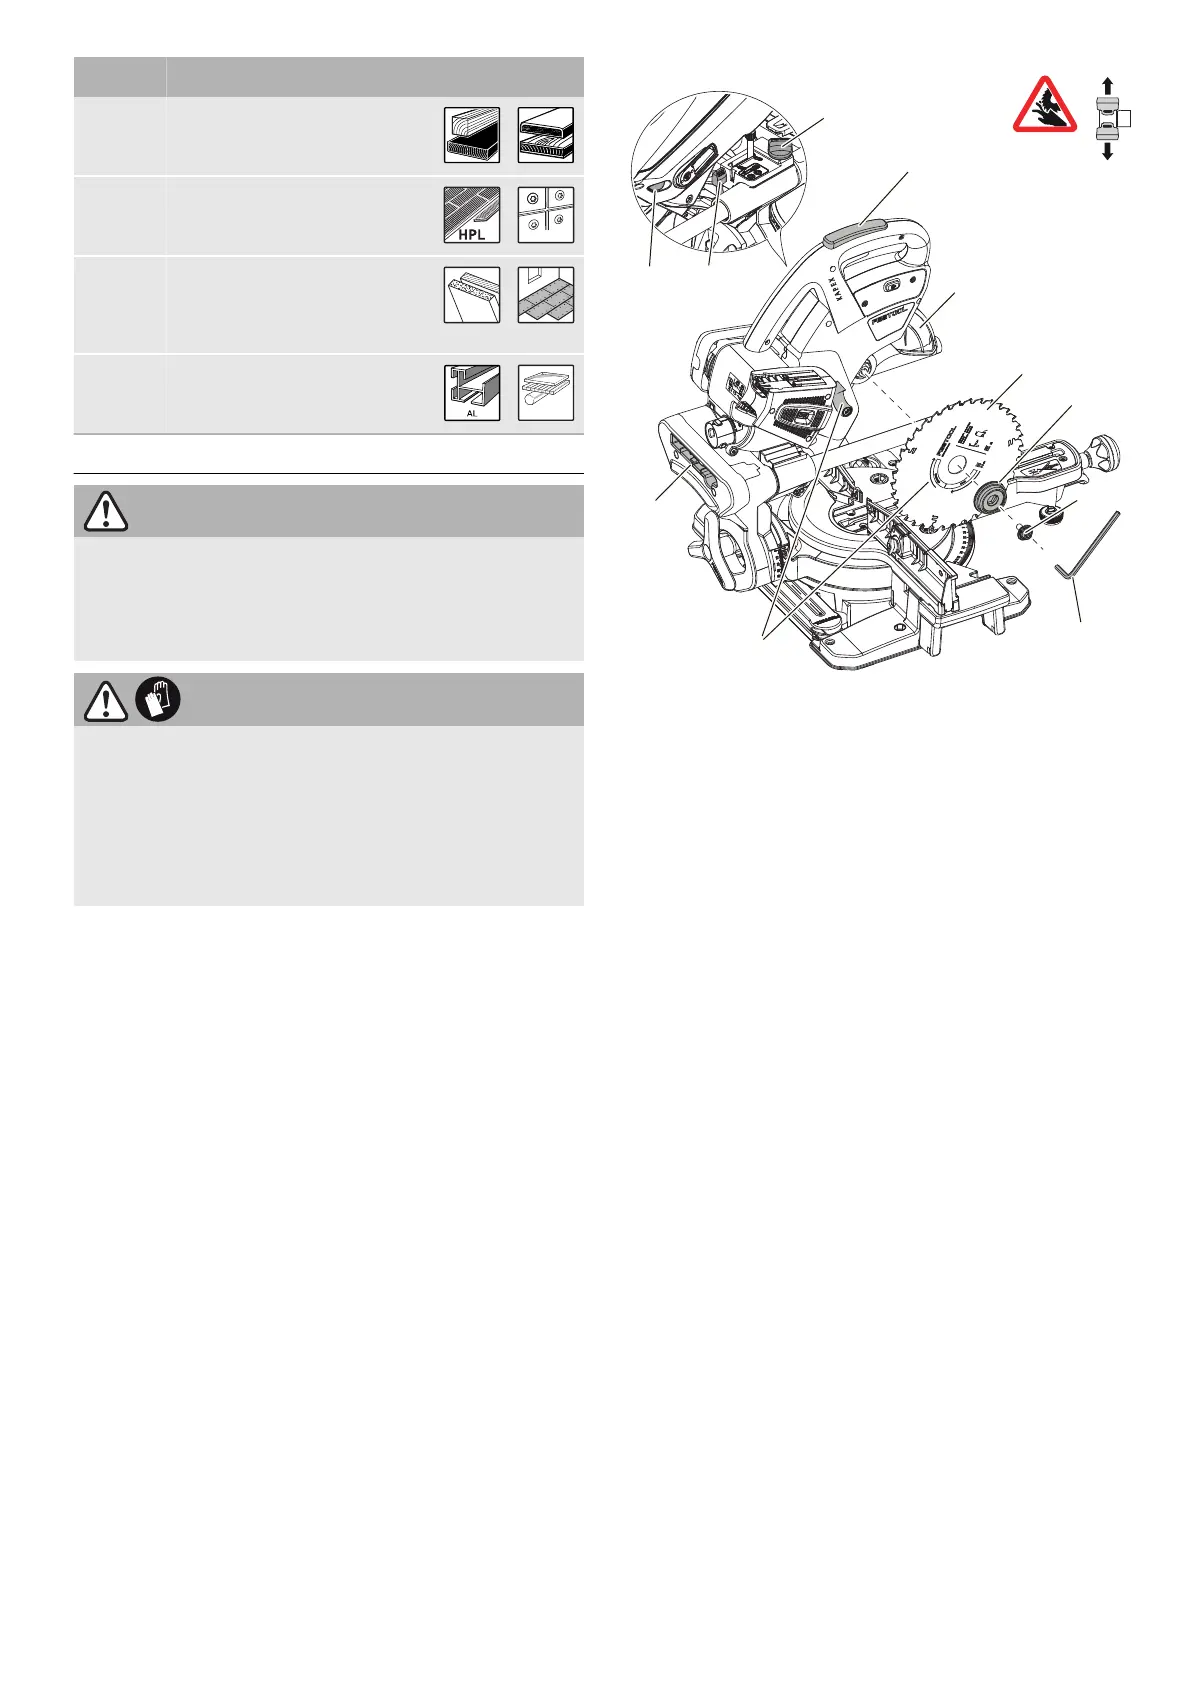
Preparing the machine
► Move the saw unit into the rear position and
lock it in place using the rotary knob [9-3].
► Move the saw unit upwards until it reaches
the limit stop.
► Pull the lever for the transport locking de
vice [9-2].
► Remove the hex key [9-9] from the holder in
the key storage box [9-11]
.
9-3
9-4
9-1
9-11
9-2
9-5
9-10
9-6
9-7
9-8
9-9
Removing the saw blade
► Press and hold the spindle stop [9-1]
.
► Use the hex key [9-9]
to turn the saw blade
until the spindle stop clicks into place.
► Use the hex key to undo the screw [9-8]
(left-hand thread, turn in the direction of
the arrow).
► Remove the screw and flange [9-7].
► Release the spindle stop.
► Press and hold the safety button [9-4]
.
► Lift and hold the pendulum guard [9-5]
with
one hand.
► Remove the saw blade [9-6].
Inserting the saw blade
WARNING! Check the screws and flange for
contamination and only use clean and undam
aged parts.
► Insert the new saw blade [9-6].
WARNING! The writing on the saw blade
must be visible. The saw blade's direction of
rotation must correspond to the direction of
the arrow [9-10].
► Insert the flange
[9-7] in such a way that
the flange, holding thread and saw blade all
interlock perfectly with each other.
► Press and hold the spindle stop [9-1]
.
► Use the hex key
[9-9] to turn the saw blade
until the spindle stop clicks into place.
► Insert the screw [9-8] and tighten it against
the direction of the arrow.
English
19