CAUTION
Certain cleaning agents and solvents are
harmful to plastic parts.
► Some of these include, but are not limited
to: Gasoline, Acetone, Methyl Ethyl Ketone
(MEK), Carbonyl Chloride, cleaning solu
tions containing Chlorine, Ammonia, and
household cleaners containing Ammonia.
Customer service and repairs
must
only be carried out by the manufac
turer or service workshops. Find the
nearest address at:
www.festoolusa.com/service
Always use original Festool spare
parts. Order no. at:
www.festoolusa.com/service
Observe the following instructions:
► Damaged safety devices and components
must be repaired or replaced in a recog
nised specialist workshop, unless otherwise
indicated in the operating instructions.
► Use an extractor on all openings of the pow
er tool to remove wood chips and splinters.
Sawing chips and small parts that get
caught up in the sawing channel can be
gently pulled out through the open
ing [13-4]
.
► To ensure constant air circulation, always
keep the cooling air openings in the housing
clean and free of blockages.
► Keep the contacts on the power tool, charg
er and battery pack clean.
► When working with plaster- and cement-
bonded fibreboards, clean the tool particu
larly thoroughly. Clean the vents of the
power tool and on/off switch using dry, oil-
free compressed air. Otherwise, gypsum
dust deposits may build up inside the power
tool's housing and on the on/off switch and
harden when exposed to humidity. This may
impair the switching mechanism
Cleaning the machine regularly, espe
cially the adjusting devices and guides, is
an important safety factor.
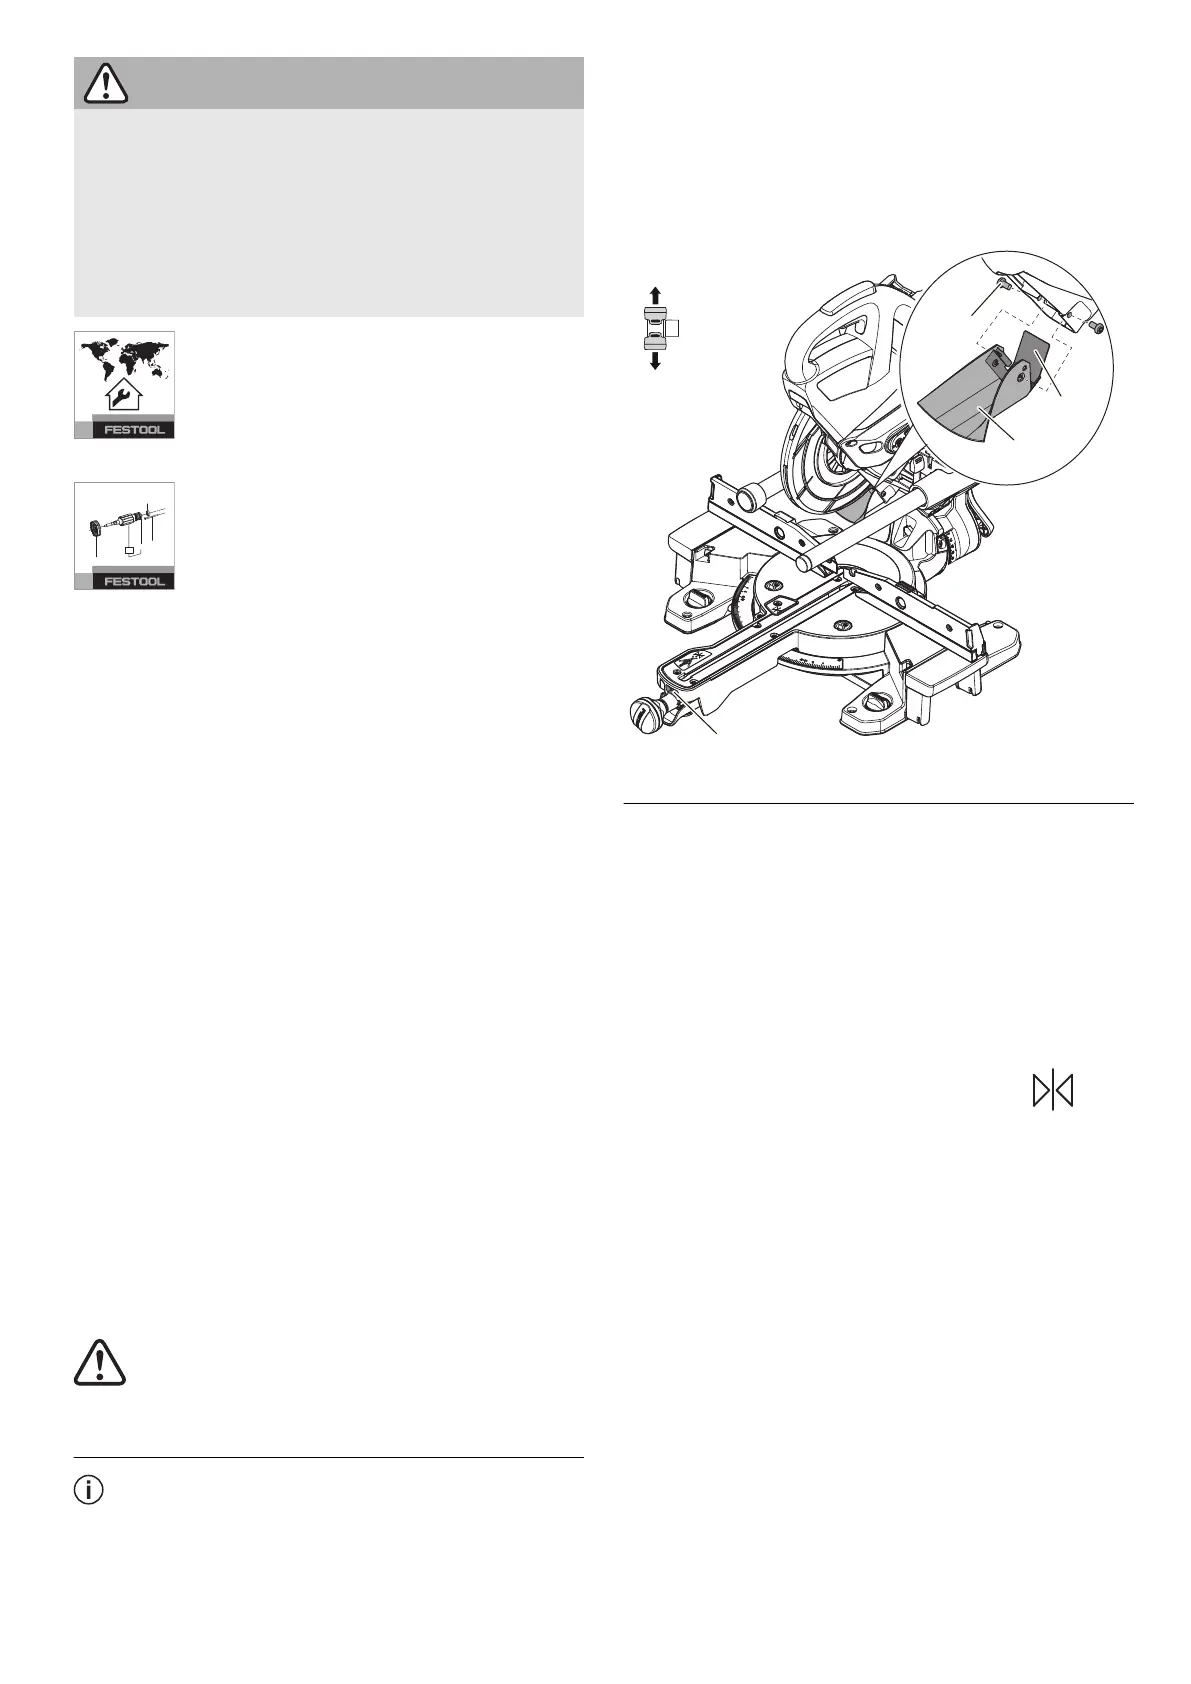
11.1 Replacing the chip deflector [13]
To ensure that dust and chips are collect
ed properly, you must only work if a chip
deflector is installed.
► Undo the screws [13-1] on the guard, re
move the chip deflector and clamp.
► Attach the clamp [13-2]
to the new chip de
flector.
► Screw the chip deflector [13-3], along with
the clamp, onto the guard.
11.2 Replacing the table top insert
[14]
Always replace worn table top inserts. Never
use the machine without table top inserts.
► Unscrew the position marking [14-3] for the
bevel.
► Undo the screws [14-1] in the table top in
sert.
► Replace the table top insert [14-2] and po
sition marking [14-3].
► Reattach the screws.
► Check that the position markings
lie
on a line that, at the same time, must run at
a right angle to the stop rulers.
English
25