18 TS 55 REQ
Plunge Cutting
CAUTION! Never make a plunge cut without a limit
stop. The back of the sawblade will lift the saw off
the guide rail, and will result in a kickback situation.
Plunge cutting is used when the cut does not start at the
edge of the workpiece. Instead, it starts in the middle of the
workpiece, and may continue to the end, or may stop short
of the end. There is a wide variety of applications for plunge
cuts. Some examples include cutting a countertop for a sink
or appliance, cutting a hardwood oor for inset tile, slotting a
cabinet frame for a pull-out bread board; just to name a few.
Notes
► Always use the limit stop when making a plunge cut to
prevent an unexpected kickback (see page 14).
► Whenever possible, put the guide rail on the side of the
cut that will be saved. If the guide rail is placed on the
offcut side, you must remember to account for the blade
thickness when positioning the guide rail (typically 2.2
mm).
► Whenever possible, set the saw depth to its maximum
setting to minimize the amount of material that is not cut
by the blade. Make sure there is nothing below the cut
that you don’t want to cut into.
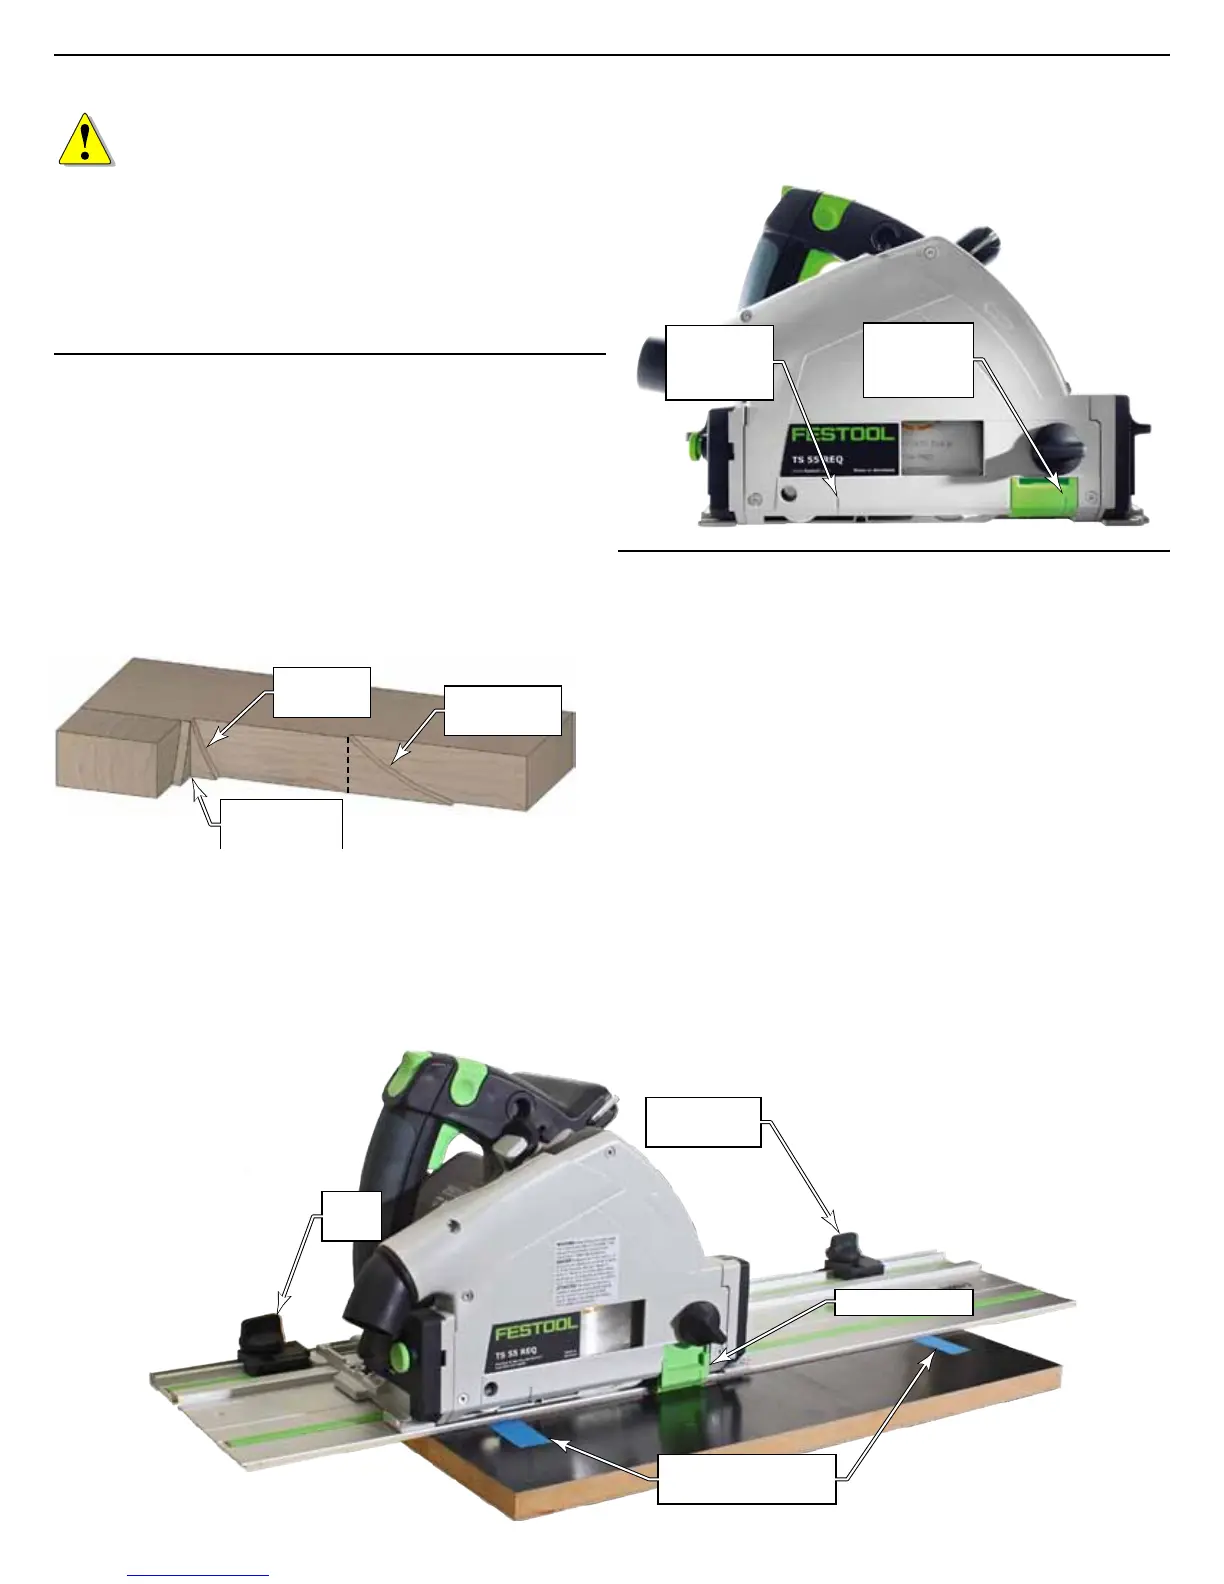
Manually cut
the corners.
Shallow
Blade Depth
Full Blade
Depth
► Mark the beginning and end of the cut (blue tape in
picture below). If the blade is at full depth, there are
index marks on the saw that indicate where the blade is
positioned.
► For 4-sided cuts where the center section is removed,
support the offcut piece before cutting all four sides to
prevent it from breaking the corners. Trim the corners
with a handsaw.
► To control the position of the saw at both the beginning
and end, you may use a second limit stop (part number
491582) at the front of the saw, as shown below.
Rear blade
position at
full depth.
Front blade
position at
full depth.
General Procedure
1. Using pencil lines, tape, or some other means, mark the
beginning and end of the cut.
2. Place the guide rail on the cutline.
3. Place the saw on the guide rail, and position it at the
start of the cut.
4. Install the limit stop on the guide rail, slide it up to the
back of the saw, and lock it in place.
5. If an optional second limit stop is used, set its position in
a similar manner.
6. With the saw rmly seated against the beginning limit
stop, start the saw and slowly plunge it down.
7. Advance the saw through the cut until the end is
reached.
► Hold the saw fully plunged until the blade comes to a
complete stop.
► Never back the saw up, as this can result in a kickback.
Optional 2
nd
Limit Stop
Mark the beginning
and end of cut.
Limit
Stop
Splinter Guard