CAUTION: READ AND FOLLOW ALL SAFETY GUIDELINES AND WARNINGS BEFORE HANDLING OR
ATTEMPTING ANY WORK ON YOUR FIELD ONE PAINTBALL MARKER. SHOULD YOU BE UNSURE AT ANY
POINT, STOP AND GET HELP FROM A FIELD ONE PAINTBALL CERTIFIED TECHNICIAN.
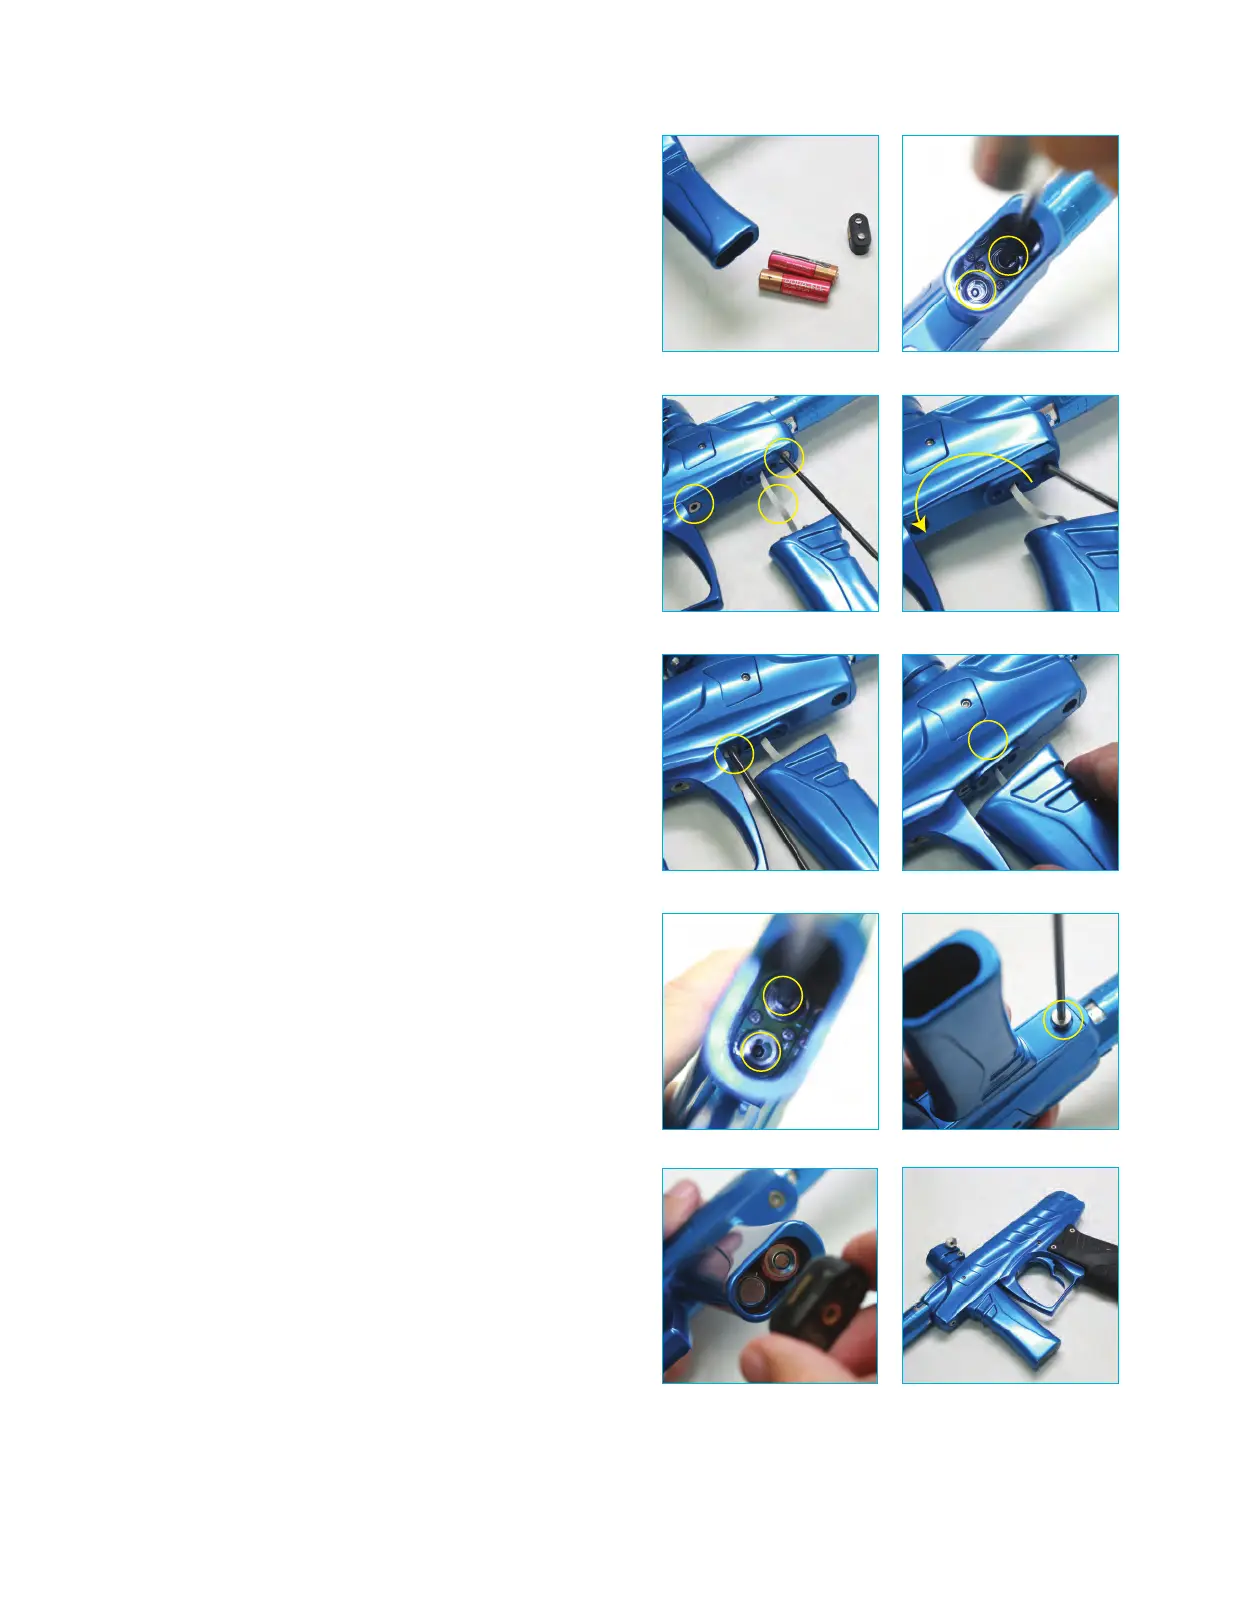
In order to change the position of the foregrip follow the following
steps.
1. Remove battery door and batteries (fig 10A).
2. Use the long 1/8 inch allen wrench to remove the 2 captured
screwes inside the foregip core. the screws are located in the
center of the springs on the battery board. (fig 10B). These
screws are captured inside the foregrip core and will not fall
out.
3. Once the the core screws are loosened. CAREFULLY
SEPERATE THE FOREGRIP FROM THE BODY. DO NOT
TUG ON THE RIBBON CABLE OR MOVE THE GRIP MORE
THAN 1.5 INCHES FROM THE REVERSAL PLATE. Remove
the reversal plate screws. (fig 10C)
4 Carfully remove the reversal plate and rotate it 180º (fig 10D)
5. Install the rear reversal plate screw. (fig 10E)
6. Insert the grip back onto the reversal plate in the new
position. MAKE SURE THE RIBBON CABLE ENTERS THE
REVERSAL PLATE HOLE ENTIRELY WITHOUT GETTING
PINCHED. (fig 10F)
6. Screw 2 foregrip core screws back into the reversal plate.
(fig 10G)
7. Screw on front reversal plate screw. (fig 10H)
8. Reinstall batteries and push on battery door. (fig 10I)
9. Make sure the foregrip is secure and that the marker turns
on.
!
!
(fig 10A) (fig 10B)
(fig 10C) (fig 10D)
(fig 10E) (fig 10F)
(fig 10G) (fig 10H)
(fig 10I)