The ES18B is also identified as FK1 and is referred to FK1 in this document.
STEP 6:
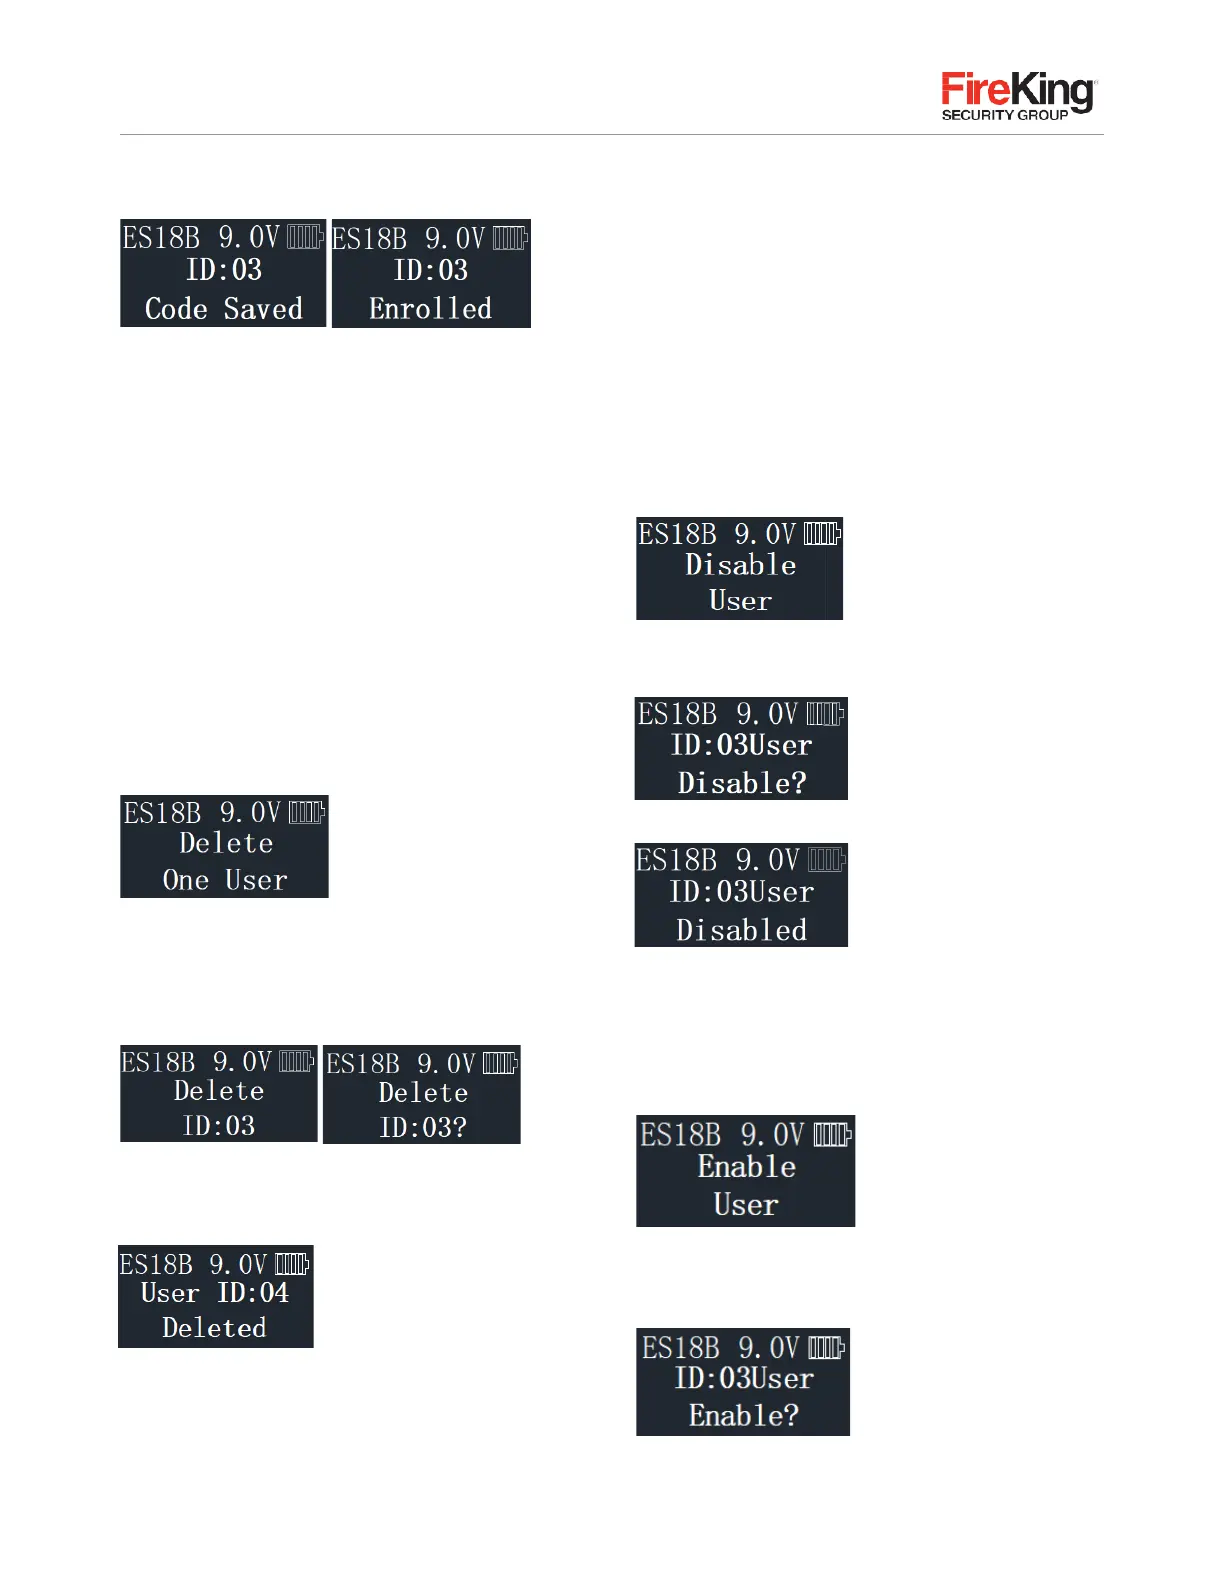
System will verify that code has been saved
The new code is now enrolled and available to be used to
open the lock.
If the code entered twice is not the same, the LCD will
display “Code Mismatch” and return to the “New Code”
interface after two seconds to re-register the user.
If the registered user password has been registered
before, the LCD will display “Code is Similar” and return to
the “New Code” interface after two seconds to re-register
the user.
2.6
Delete One User
STEP 1:
Enter a valid code
STEP 2:
Using the
▲
or
▼
scroll to the “Delete One User”
and Press “Menu/OK.”
STEP 3:
Press “Menu/OK.”
STEP 4:
The system will ask which User Code is to
be deleted, Press
▲
or
▼
until the desired USER ID
is reached.
STEP 5:
Press “Menu/OK.” This User Code is now deleted
from the system.
2.7
Disable User Code
This feature would be used in order to disable a user code
as opposed to deleting it. Disable/Enable user codes options
may be when a user’s access rights are temporarily revoked
(i.e. the user may be on vacation or otherwise away from
the business). After the code has been disabled, it can be
re-enabled at a later time, following the same process by
selecting “Enable User.”
STEP 1:
Enter a valid code.
STEP 2:
Scroll
▲
or
▼
to the menu selection
“Disable User” and Press “Menu/OK.”
STEP 3:
The system will ask which User to disable.
Scroll
▲
or
▼
to the desired USER ID and Press OK.
STEP 4:
The system will verify the User has been disabled.
2.8
Enable User Code
STEP 1:
Enter a valid code.
STEP 2:
Scroll
▲
or
▼
to the menu selection
“Enable User” and Press “Menu/OK.”
STEP 3:
The system will ask which User to enable.
Scroll
▲
or
▼
to the desired USER ID and Press
“Menu/OK.”
STEP 4:
The system will verify the User has been
enabled