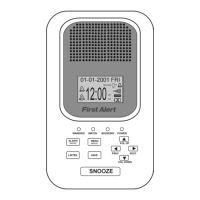
Configuración del Reloj
3
los números de las horas. Oprima y sostenga los botones para adelantar
o retroceder rápidamente en la secuencia de dígitos.
.Dé toquecitos repetidamente al botón SINTONIZAR para configurar
Nota: Asegúrese de configurar la hora de modo que los indicadores de
AM o PM estén correctos.
4
dígitos de los minutos aparecerán parpadeando esperando ser configurados.
.Oprima el botón MODALIDAD después de haber configurado la hora, los
5
los números de los minutos. Oprima y sostenga los botones para adelantar
o retroceder rápidamente en la secuencia de dígitos.
.Dé toquecitos repetidamente al botón SINTONIZAR para configurar
6.Oprima una vez más el botón MODALIDAD para finalizar la configuración del reloj.
Nota: Si reinicia la unidad o si recarga una batería totalmente agotada,
necesitará volver a configurar el reloj.
PARA ESCUCHAR EL RADIO
1.Oprima el botón para encender la unidad, se encenderá la retroiluminación LCD.
2.Dé un toquecito al botón de MODALIDAD para seleccionar la banda
AM/FM/WB (WB o banda del Clima) en la secuencia a continuación.
El indicador de radio muestra.
FM AM WB WB Alerta
3.Para sintonizar manualmente su radiodifusora favorita, oprima repetidamente
el botón de SINTONIZAR .
4.Para efectuar una búsqueda automática de radiodifusoras con buena señal,
oprima y sostenga el botón de SINTONIZAR hasta que aparezca la
secuencia de los dígitos de las frecuencias en la pantalla, y luego suelte el
botón. El sintonizador se detendrá en la primera señal fuerte que encuentre.
5.Oprima el botón VOLUMEN + / - para obtener su nivel preferido de volumen.
6.Oprima el botón en la unidad principal para colocar la unidad en modalidad
de espera después de escuchar. La retroiluminación LCD se apaga
automáticamente después de aproximadamente 20 segundos.
Notas:
Sintonice manualmente las estaciones más débiles que podrían pasar
desapercibidas durante la sintonización automática.
Si la sintonización automática no se detiene en la frecuencia exacta de la
radiodifusora, por ejemplo, si se detiene en 88.9 MHz y no en 88.8 MHz, use
el método manual de sintonización para "afinar" la sintonía a la frecuencia
exacta de la radiodifusora.
En modalidad de encendido, se apagará la retroiluminación LCD
automáticamente para ahorrar energía si no se oprime ningún botón
durante 20 segundos.
9
4
prompt for input.
.Press the MODE button after the hour is set, Minute digits flashing to
5
hold the buttons to speed up the forward or reverse scanning of the digits.
.Tap the TUNE button repeatedly to set the minute value. Press and
6.Press the MODE button again to finish clock setting.
Note: If the unit was reset or if you are charging a completely dead
battery, you need to set the clock again.
LISTENING TO THE RADIO
1.Press the button to turn on the unit, LCD backlight turns on.
2.Tap the MODE button to select AM/FM/Weather band in below
sequence. The radio indicator displays.
FM AM WB WB Alert
3.To manually tune to a desired station, repeatedly tap the TUNE
button.
4.To automatically search for stations with strong signals, press and hold
the TUNE button until the frequency digits on display begins to
scan then release the button. The tuner will stop on the first strong
signal it finds.
5.Press VOLUME + / - button to obtain the desired sound level.
6.Press the button on main unit to turn unit into standby mode after
listenning. The LCD backlight will automatically turns off after 20
seconds approximate.
Notes:
Manual tune to select weaker stations that might be skipped during
automatic tuning.
If the automatic tuning does not stop on the exact frequency of the
station, for example, it stops on 88.9 MHz instead of 88.8 MHz, use the
manual tuning method to "fine tune" to the exact frequency of the
desired station.
In power on mode, the LCD backlight will automatically turn off for power
saving if no buttons are pressed within a 20 seconds period of time.
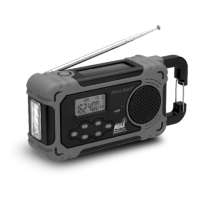
HINTS FOR BEST RECEPTION:
The AM antenna is located inside the cabinet of the unit. If AM reception
is weak, change the position of unit until the internal antenna picks up
the strongest signal.
To insure maximum FM tuner reception, the Telescopic Antenna should
be fully extended and rotated to obtain the best possible station reception.
9
 Loading...