Consejos para la mejor recepción:
La antena AM se encuentra dentro de la consola de la unidad. Si la recepción
AM es débil, cambie de posición la consola hasta que la antena interna recoja
la señal más fuerte.
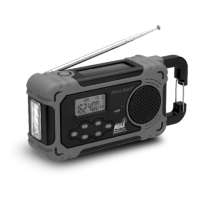
Para asegurar la mejor recepción FM, la antena telescópica deberá
extenderse totalmente y girarla hasta obtener la mejor recepción de las
radiodifusoras.
PARA ESCUCHAR EL CANAL DEL CLIMA
1) Banda del Clima
1.Oprima el botón para encender al unidad.
2.Dé un toquecito al botón MODALIDAD para elegir la banda del clima
hasta que aparezca el ícono l "WB" fijo en la pantalla.
3.Dé un toquecito al botón SINONIZAR para seleccionar la estación local del clima.
4.Oprima el botón VOLUMEN + / - para obtener su nivel preferido de volumen.
5. Para apagar el radio, oprima el botón .
Tabla de frecuencias de Estaciones de Información del Clima
CANAL
CANAL1
CANAL2
CANAL3
CANAL4
CANAL5
CANAL6
CANAL7
FRECUENCIA (MHz)
162.400
162.425
162.450
162.475
162.500
162.525
162.550
Nota: Con respecto a la Banda del Clima de NOAA: Usted necesitará identificar
cuál de las bandas recibe su reporte meteorológico local. Cuando usted se
traslada a otro lugar ya sea a otra ciudad o estado, podría ser necesario que
elija una banda diferente para obtener los reportes locales de dicho lugar.
Consejos para la mejor recepción:
Para asegurar la mejor recepción FM, deberá extender totalmente y girar la
antena telescópica hasta obtener la mejor recepción de las radiodifusoras.
2) RECEPCIÓN DE UN ALERTA METEOROLÓGICO DE EMERGENCIA
La función de Alerta del Clima le permite configurar la radio con la información
del clima a una modalidad en espera la cual automáticamente encenderá su radio
si hay una emergencia en su área. Para recibir las advertencias de alerta del clima,
encienda la unidad, sintonícela al canal más potente de NOAA, ajuste el volumen
a un nivel que pueda escuchar al momento de recibir un alerta. El radio permanecerá
en silencio hasta que se reciba un mensaje de “alerta”.
10
LISTENING TO A WEATHER CHANNEL
1) Weather Band
1.Press the button to turn on the unit.
2.Tap the MODE button to select weather band until "WB" icon appears
steadily on display.
3.Tap the TUNE button to select your local weather broadcasting.
4.Press the VOLUME +/- button to obtain the desired sound level.
5.To turn the radio off, press the button.
Weather Band Channel Frequency Table
CHANNEL
CH1
CH2
CH3
CH4
CH5
CH6
CH7
FREQUENCY(MHz)
162.400
162.425
162.450
162.475
162.500
162.525
162.550
Note: With regard to the NOAA Weather Band: You need to identify which
band receives your local weather band report. When you change locations
either to another city or state, you may need to choose a different band to
get the local report in that location.
HINTS FOR BEST RECEPTION:
To insure maximum weather band reception, the Telescopic Antenna
should be fully extended and rotated to obtain the best possible station
reception.
2) RECEIVING AN EMERGENCY WEATHER ALERT
The Weather Alert function allows you to set the weather radio to a standby
mode that will turn the radio on automatically if there is a severe weather
emergency in your area. To receive emergency weather alert warnings,
turn the unit on, tune to the strongest local NOAA weather channel, adjust
the volume to a level that you will hear when an alert is received. The radio
remains silent until an “alert” broadcast occurs.
1
display steadily.
.Tap the MODE button to select weather band until “WB” appears on
2.Tap the TUNE button to select your local weather station.
3.Tap the MODE button again to enter weather alert standby mode, WB
icon will be flashing. Unit will go on automatically when there is an alert
from the National Weather Service.
10
 Loading...