8
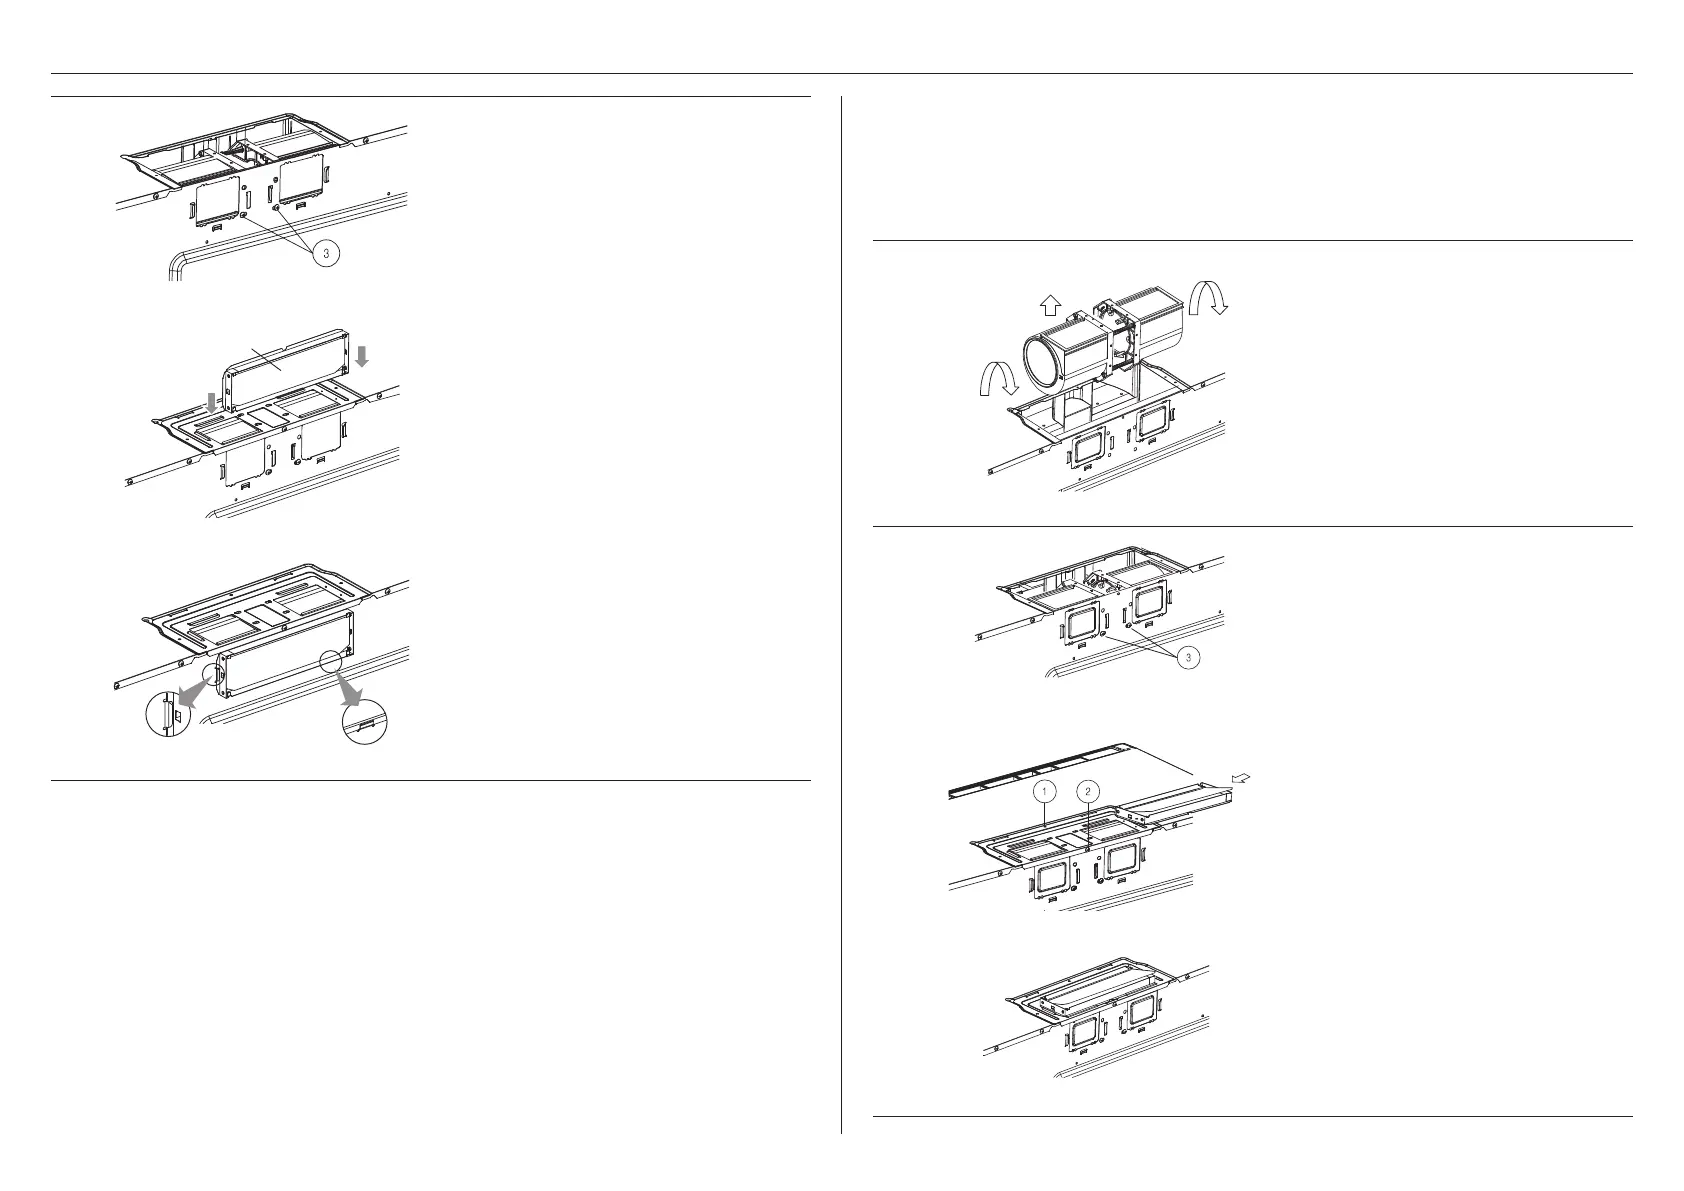
VENTILATION SYSTEM
Step
4
Figure 11
z
Place the blower unit into the opening
and secure it to the oven with the
screws (3) from step 2.
See Figure 11.
Damper
Figure 12
z
Carefully match the exhaust opening
location of the microwave and attach the
damper to the rear plate by sliding it into
the guides at the rear plate.
See Figures 12, 13.
z
Ensure that the damper hinge is on the
top and the damper swings freely into
the wall outlet.
Figure 13
C. VERTICAL VENTILATION SYSTEM
Steps 1 & 2
A-1 Ventilation motor. See Section B, steps 1 and 2 for access to the blower motor. Also see
Figure 8.
Step
3
Fan blade openings facing up
After turning
Back of oven
Figure 14
z
Turn the blower unit so that the fan
blade openings are facing upward.
See Figure 14.
Step
4
Figure 15
z
Place the blower unit into the opening.
Secure the case blow fan top, the blower
motor and cover to the microwave oven
with the screw (1, 2 and 3) from steps 1
and 2. See Figure 15.
Figure 16
z
Carefully match the exhaust opening
location of the microwave and attach the
damper to blower motor cover by sliding
it into the guides at the blower motor
cover. See Figures 16, 17.
z
Ensure that the damper hinge is on the
front and the damper swings free into
the wall outlet.
Figure 17

 Loading...