15
INSTALL TOE KICK – DD60DA MODELS
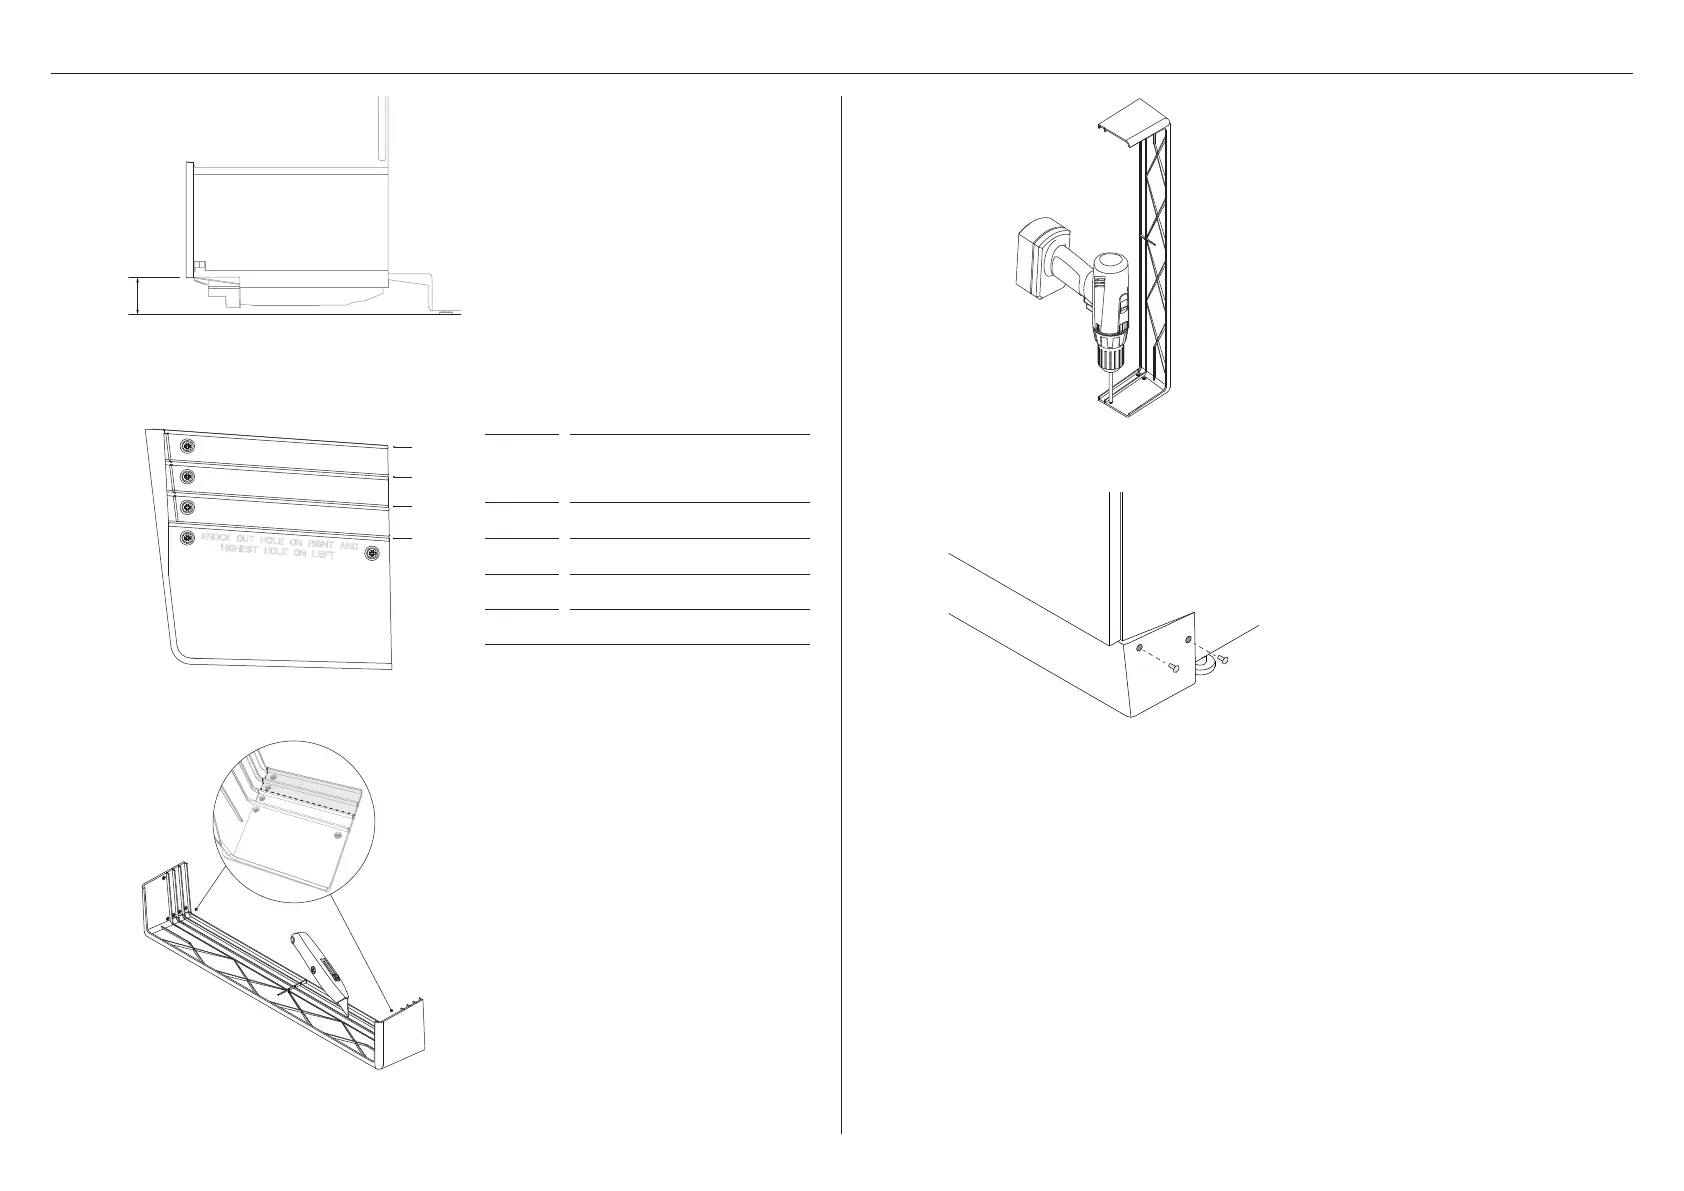
Measure the distance from the floor to
the base of the lower door panel. Refer
to the table below for the recommended
cut location.
Punch or drill out the two mounting
holes with a 5mm drill bit on each side
of the toe kick as shown.
Secure toe kick to the Dishdrawer using
the supplied pins.
If the toe kick touches the floor with a full load, more of the panel may need to be removed.
1 Remove the lower drawer. Refer to ‘Secure to cabinetry via drawer removal (method B)’ for
considerations and guidance.
2 Remove the pins securing the toe kick to the DishDrawer using a pair of needle nose pliers
to press the pin legs together and push back through the mounting holes.
3 Remove toe kick and cut off an additional section referring to the guidance on this page.
4 Refit the lower drawer. Refer to ‘Secure to cabinetry via drawer removal (method B)’ for
considerations and guidance.
5 Refit the toe kick panel referring to the guidance on this page.
On a protected surface, carefully score
down both corners to the desired cut-
off point and snap to remove the excess.
Once the sides are removed, score down
the middle of the toekick and snap
to remove.
Smooth the edges using a file or knife
as desired.
1
5
6
3
2
CUT
HEIGHT FROM FLOOR TO
BASE OF DOOR (MM)
3
100 – 114
2
115 – 129
1
130 – 144
0
145 – 160
*recommendations are based on the required min.
clearance of 12mm between the floor and toe kick.
0
1
2
3
 Loading...