Instruction Manual
D102005X012
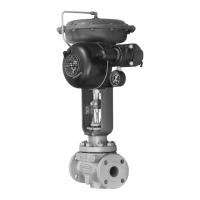
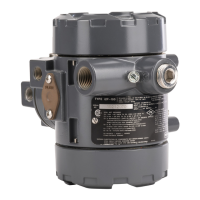
846 Transducer
June 2017
25
Troubleshooting
The modular design and unitized subassemblies of the 846 allows for quick and easy troubleshooting and repair. This
section presents information on the diagnostic features and procedures for troubleshooting both models in service or
in the shop.
Diagnostic Features
If a control loop does not perform properly and the cause of malfunction has not been determined, two features of the
transducer can be used to determine if the transducer is at fault: the stroke port and Remote Pressure Reading.
Stroke Port
The stroke port provides a way to quickly increase the transducer output, giving a rough measure of the unit's
functionality. A hole in the module cover vents the constant bleed from the pilot stage. When the hole is covered,
pressure at the pilot stage receiver nozzle increases, which in turn increases the output. Output pressure will increase
to within 2 psi of supply pressure for either direct or reverse action. If output pressure does not increase to this level, it
may indicate that supply air is not reaching the pilot stage or that a pilot stage nozzle is plugged.
Note
If the stroke port diagnostic feature is not desired, the transducer is available with an optional cover that contains multiple stroke
ports, as shown in figure 4. This prevents increasing the output by covering the stroke port.
Remote Pressure Reading (RPR)
Remote Pressure Reading (RPR) is an optional diagnostic feature that enables the user to determine the output
pressure from any location along the signal wire path. For loop troubleshooting, this allows the user to confirm the
functionality of the transducer from a remote location.
A frequency signal directly proportional to the output pressure is superimposed on the input signal loop. The
frequency range of the RPR function is 0 to 10,000 Hz.
A jumper on the circuit board activates the Remote Pressure Reading function. The Maintenance section provides
instruction on positioning the jumper. The jumper, shown in figure 18, has two positions: N for ON, or D for OFF. The
RPR jumper is in the N (ON) position when the unit ships from the factory, unless otherwise specified.
Using a Frequency Counter to Read the RPR Signal
A frequency counter can be used for Remote Pressure Reading. The frequency counter displays the RPR output
frequency that can be converted to output pressure using a simple mathematical line formula as shown below. Figure
13 shows the wiring connections.
Notes
The Remote Pressure Reading (RPR) frequency signal has an amplitude of 0.4 to 1.0 V peak‐to‐peak. If other noise (frequency) with
a comparable or greater amplitude is present on the line, it may make the RPR frequency signal unreadable.
The following procedure is applicable for 846 transducers manufactured starting March 2015. Contact your Emerson sales office
or
Local Business Partner for information on reading the RPR signal for products purchased prior to this date.