Instruction Manual
D102005X012
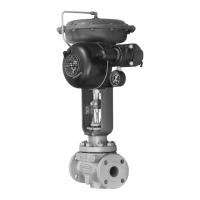
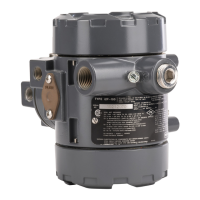
846 Transducer
June 2017
37
that can be received by a frequency counter. Operation of the RPR feature is jumper‐selectable, in units so equipped.
The RPR feature operates when the jumper is located in the N position on the circuit board. With the jumper in the D
position, the RPR feature does not operate. When the RPR feature is included, the transducer is shipped with the RPR
jumper in the N position, unless otherwise specified. For more information about the RPR feature, refer to Remote
Pressure Reading (RPR) in the Troubleshooting section.
Note
When operating 846 transducers in series, only one unit may be configured for Remote Pressure Reading. Activating the RPR
feature in two units will result in an unusable RPR signal.
Range Jumper
The range jumper is positioned according to the calibration specified. All full span calibrations and some split range
calibrations can be accomplished with the range jumper in the High Range position. Some split range calibrations
require the jumper to be in the Low Range position. For more information about the range jumper, refer to Standard
Performance: Split Range Input, Direct Action in the Principle of Operation section.
Action
For direct action units, output changes directly with a corresponding change in input. For example, as the input
increases from 4 to 20 mA, the output increases from 0.2 to 1.0 bar (3 to 15 psi). Direct action circuit boards are green
in color.
For reverse action units, the output changes inversely with a change in input. For example, as the input increases from
4 to 20 mA the output decreases from 1.0 to 0.2 bar (15 to 3 psi). Reverse action circuit boards are blue in color.
Upon loss of input current, or if input current decreases below 3.3 $0.3 mA, the output of the direct action unit
decreases to less than 0.1 bar (1 psi). In the same situation, the output of the reverse action unit increases to near
supply pressure.
Removing the Electronic Circuit Board
The electronic circuit board is connected to the module final assembly by five mounting screws. The circuit board
must be removed to inspect the pressure sensor located beneath it. To remove the circuit board, remove the five
mounting screws and pull upward on the plastic board standoff (black=multirange; white=standard).
CAUTION
Standard electronic assembly handling procedures apply. Do not attempt to remove the circuit board by pulling on the
components. Doing so could weaken the connections and disable the electronics.
Be careful when handling the pressure sensor located beneath the circuit board. The pressure sensor lead frame is bent
to allow the pressure sensor to fit properly in the sensor cavity of the module final assembly, and to maintain flush
contact with the pressure sensor manifold.
Two O-rings are included with the pressure sensor. One O-ring is located on the pressure sensor. A second, smaller
O-ring is positioned in the beveled O-ring gland of the module-assembly. Table 4 shows the O‐ring sizes.