Instruction Manual
D102005X012
846 Transducer
June 2017
41
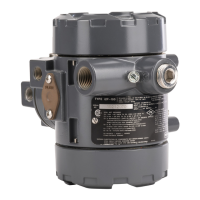
Figure 21. Terminal Compartment Exploded View
A6656
ELECTRICAL
FEEDTHROUGHS
TERMINAL BLOCK
TERMINAL BLOCK
CONNECTION BOARD
TEST PINS
ZERO AND SPAN
SCREWS
GROUNDING LUG
Separate test points are provided that have a 10‐ohm resistor in series with the signal negative (-) terminal. The test
points allow the input current to be determined with a voltmeter without disconnecting a signal lead. A 4 to 20 mA
span produces a 40 to 200 mV DC voltage drop across the 10‐ohm resistor. The test points can accommodate
different connections, including alligator clips and E-Z hooks.
The terminal block and terminal block connection board can be removed by disengaging the two terminal block
mounting screws. Lubricate the terminal compartment cover threads with anti‐seizing paste or a low temperature
lubricant. See table 4 for the size of the terminal compartment cover O‐ring.
Exhaust and Stroke Port Screens
WARNING
Refer to the Maintenance WARNING at the beginning of this section.
Two identical screens, the exhaust port screen and the stroke port screen, allow air to vent to the outside
environment. The exhaust port screen is located behind the nameplate. Removing the two nameplate screws and
rotating the nameplate to the side allows access to the exhaust port screen. Figure 24 shows an exploded parts view.
The stroke port screen is located at the center of the module cover. Removing the module final assembly from the
housing and then from the module cover allows access to the stroke port screen. Removing the Module Final
Assembly earlier in this section describes this procedure. Figure 24 shows an exploded parts view.