Instruction Manual
D102005X012
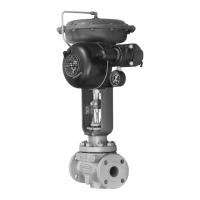
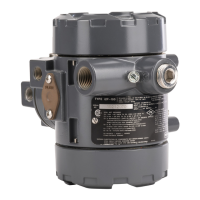
846 Transducer
June 2017
29
4. Inspect the porting on the module final assembly to determine if large amounts of contaminants have entered the
transducer.
Before making the following checks, disconnect both signal wires from the transducer, and ensure the module final
assembly is removed from the housing.
1. Using an ohmmeter, check the electrical connections in the housing terminal compartment. The circuit should
show an open between the positive (+) and negative (-) terminals. If not, replace the housing or terminal block and
connection board.
2. Use a wire jumper to connect the two electrical feedthroughs located in the module compartment. The resistance
between the positive (+) and negative (-) terminals in the terminal compartment should be 10 ohms. If not, check
the electrical feedthroughs for short or open circuits. If a short or open circuit is found, replace the housing.
3. With the electrical feedthroughs jumpered as stated above, connect the ohmmeter to either the positive (+) or
negative (-) terminal and the grounding lug. The circuit should show an open. If not, check for a short to the
housing.
4. Remove the module from the module cover and inspect the pilot/actuator assembly for damage or clogging.
Some of the previous troubleshooting steps may be inconvenient to perform in the field. It may be best to make use of
the modular design of the 846 and keep a spare, calibrated module final assembly available for exchange. If the
module final assembly is to be transported to the shop for repair, first remove it from the module cover. Attach the
spare module final assembly to the module cover. Refer to Module Final Assembly in the Maintenance section for
complete instructions. The nonfunctioning module can then be returned to the shop for troubleshooting.
Troubleshooting in the Shop
If the entire transducer is brought to the shop for troubleshooting, then the preceding sequence applies. If only the
module final assembly has been brought to the shop, then use another 846 housing as a test fixture. Insert the module
into the test fixture. Perform the previous steps (as they apply) of the In‐service Troubleshooting procedure.
To further aid troubleshooting, the module final assembly can be broken down into three subassemblies. The
troubleshooting sequence consists of exchanging the subassemblies with known working ones to determine which is
at fault. The three subassemblies are the pilot/actuator assembly, the electronic circuit board, and the module
subassembly. The module subassembly consists of the module final assembly with both the pilot/actuator assembly
and electronic circuit board removed.
1. Remove the pilot/actuator assembly. Refer to Pilot/Actuator Assembly in the Maintenance section for complete
removal information.
CAUTION
Do not apply force to the deflector bar while cleaning the nozzles. Doing so could alter the alignment or disable the
deflector bar mechanism.
CAUTION
Do not use chlorinated solvents for cleaning the pilot/actuator assembly. The chlorinated solvents will deteriorate the
rubber diaphragm.
a. Inspect the nozzles and deflector. If they show a buildup of contaminants, clean the nozzles by gently inserting a
wire with a maximum diameter of 0.38 mm (0.015 inches). Clean the deflector, if necessary, by spraying with
contact cleaner.