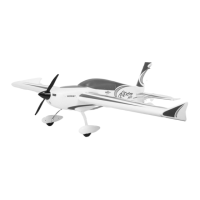
13
The QQ Extra 300 was designed from the ground up to be a
superior 3D aircraft. Pilot workload has been greatly reduced
thanks to its nely tuned aerodynamic design to the incredible
performance and pre-set conguration of the Aura 8 advanced
ight control system, intermediate pilots will nd that they are
now able to do what they previously only dreamed of.
Sharpening Your Skills
Obviously before attempting any of these maneuvers, you should
be procient at ying an airplane. Practice orientation maneuvers-
be able to y the airplane anywhere you want upright, inverted,
knife edge, ying towards yourself, ying away from yourself. Part
of learning 3D is being able to bail out of a maneuver gone wrong
consistently and safely.
A good 3D pilot will be smooth, but assertive in manipulations of
all ight controls. Throttle and rudder are just as important to
ying 3D as aileron and elevator. Competency with these controls
is a must before progressing into 3D maneuver training.
After becoming procient in basic aerobatics and being able to
comfortable control the airplane in any ight attitude, you may
progress on to some 3D maneuvers. At right, there is a list of some
of the more common 3D maneuvers in practice today. These
maneuvers are in order of increasing diculty, so be sure to work
into them in a logical progression. Once you master some of the
more basic maneuvers, try your hand at more complex maneuvers
and then practice variations of maneuvers and putting them into
a sequence. There is no limit to the QQ Extra 300’s performance
envelope.
LEARNING TO FLY 3D WITH THE QQ EXTRA 300
Harrier- The harrier is one of the most basic 3D maneuveres and is
a good maneuver to start your training. A harrier is own at a
nose-high attitude (around 45°) while maintaining constant
altitude and can be own upright or inverted. Transition into a
hover or into forward ight for recovery.
Hover- In a hover, the airplane is in a vertical attitude and is held
in place by manipulating the throttle and ight controls to
prevent the airplane from climbing or descending, and remain
stationary. Transition into a harrier or exit into a vertical upline to
recover.
Torque Roll- A torque roll is a slight modication to the hover.
Instead of keeping the airplane in a stationary hover, the the
aileron is neutralized to allow the torque of the motor to rotate
the airplane.
Waterfall- Waterfalls are accomplished by pivoting 360° in pitch
with little or no altitude change or forward movement. Transition
into a harrier or exit into a vertical upline to recover.
Blender- The blender is not a particularly dicult maneuver, but it
is very dynamic and very impressive. From high altitude, the
airplane enters a vertical downline at low throttle and rolls to the
left. At a predetermined altitude (not too low!) an outside snap is
intiated while simultaneously advancing the throttle to enter a at
spin. Ensure adequate altitude for recovery.
Harrier Roll- Harrier rolls are by far the most dicult 3D maneuver
to perfect, but without a doubt are the most impressive to the idle
bystander and R/C pilot alike. A harrier roll is as it sounds- a
continous aileron roll while performing a harrier. Many hours of
practice are required to master this maneuver, and there are many
variations to it as well.
Selecting a Flying Site
Selecting a ying site is critical to a successful ight. Airplanes
require a lot more room than other R/C products, therefore, a
neighborhood or parking lot is less than ideal. A large open eld
with short grass and generous overy area are the best candidates
if no AMA eld is available in your area. Know your overy area-
ensure that there are no houses, playgrounds, or other buildings
that may be damaged if the airplane were to crash.
Takeo
Taxi or place the aircraft on the runway centerline, with the nose
into the wind. Select Mode 2, then smoothly advance the throttle
to full while maintaining directional control with the rudder and
slight back pressure on the elevator. The airplane should lift o
smoothly before the throttle is fully open. Fly in Mode 2 until the
aircraft is fully trimmed (see special trimming instructions), and
you are comfortable with it's handling, then explore the other
modes as desired.
Flying
Altitude is your friend on the rst ight. Briskly climb to a safe
altitude and trim the airplane out. The airplane should y straight
and level a 1/2 to 3/4 power with no hands on the transmitter. Try
some basic maneuvers, and slowly progress into the airplane’s
ight envelope as you become more comfortable with the
airplane’s ight qualities and perfect your setup. Note: If at any
time, such as after gain adjustments, you experience
unexpected control system inputs or oscillations, switch to
Mode 1, and land and troubleshoot the issue. (Mode 1 turns
the sensor inputs o with default programming)
FLYING YOUR QQ EXTRA 300
USE CAUTION WHEN FLYING YOUR QQ EXTRA IN MODE 3
AT HIGH AIRSPEEDS. DOING SO CAN INDUCE CONTROL
SURFACE OSCILLATIONS AND MAY CAUSE A CRASH.
Trimming
The rst several ights on your QQ Extra should be dedicated
to trimming and setup. Fly the airplane at full power in Mode
2 and trim for level ight. Land, adjust linkages and return
the trim and/or subtrim to zero and y again. Repeat
until the airplane ies hands o, straight and level.
Landing
Be mindful of your ight time and allow adequate battery reserve
for a couple of go-arounds, if necessary, on the rst few ights.
Select Mode 2 and slow the airplane and align with the runway,
into the wind. The airplane should descend smoothly in this
conguration with proper airspeed. Once you are close to the
ground, gradually close the throttle fully and begin to smoothly
apply up elevator as required to arrest descent and the airplane
should gently touch down with a short roll out.