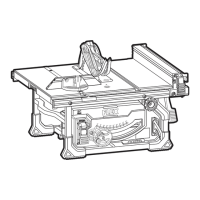
38
TS 92 18-EC
Secure the rip fence lock levers. Tighten the
right index bolt (L-3).
Adjusting the left side positon
Use the Allen key (20) to loosen the left
index bolt (L-1) on the front and back rails
so that the bolts can slide freely.
Place the fence over the left index bolt (L-1)
but do not secure the rip fence lock levers
(16).
Move rails so that the fence touches at least
one tooth on the blade and lock the rails.
Slide the fence along with index bolt (L-1)
towards the blade until the fence touches
the blade teeth.
Secure the rip fence lock levers. Tighten the
front and back left index bolt.
Setting the rip fence pointer
Place the fence over the index bolt (L-2) and
lock the rip fence lock levers (16) on the
front and back.
Move the fence until it is alongside the saw
blade. Lock the rails in place.
Loosen the pointer adjustment screws (L-5).
Adjust the pointer to “0” mark on scale (L-4),
then re-tighten the screws (L-5).
Rip fence LED strip light (see
figure M1-M2)
To turn on the strip light (M-1), press the ON
(I) half of the light switch (M-2).
To turn off the strip light (M-1), press the
OFF (O) half of the light switch (M-2).
The strip light (M-1) is powered by a battery
integrated into the rip fence (17) and will
need to be recharged periodically via the
USB-C port.
Remove the rip fence (17) from the saw.
Connect a USB-C cable to a USB power
adapter (both are not included). Connect
the USB power adapter to a standard power
outlet.
During charging, the indicator light (M-4)
will shine red and will turn green when the
charging is complete.
Disconnect the USB-C cable from the USB-C
port (M-3) and disconnect the USB power
adapter from the power outlet once the
battery is fully charged.
Checking riving knife alignment
(see figure N1-N2)
WARNING!
Check riving knife alignment to the blade
periodically and make adjustments as
necessary. Improperly aligned riving knife
may result in work piece instability, loss of
control, and kickback.
Raise the blade to the full height (up)
position and set the bevel angle to 0°.
Remove the table insert.
Place the rip fence (17) on the left side of
the table, then move it to the blade until the
rip fence (17) touch the tips of the blade
teeth. Lock the rip fence (17).
Three paper thicknesses paper (N-1) should
fit between the blade body and the rip
fence (17).
If not, remove the table insert, loosen the
clamp screws (N-2), reposition the riving
knife and firmly tighten the clamp screws
(N-2).
Check the alignment and spacing again
and repeat.
Saw operations
WARNING!
Always wear eye and hearing protection
during cutting gloves when handling saw
blades.
Power switch (see figure O1)
To turn saw on, press the green button (O-1).
To turn the saw off, press the red paddle
(O-2).
When power is cut to the saw, the tool
will switch to the off mode. Once power is
restored, the tool will need to be turned on
again.
To prevent unauthorized use, the power
switch can accommodate a padlock (not
provided).
Auto stop (see figure O1-O2)
This table saw is equipped with an auto-stop
feature, which automatically shuts off the saw
when the cut is complete.
Install the battery.
Press the auto-stop button (6), the auto-stop
indicator (5) will light up.
Turn on the saw and start the cut.