7
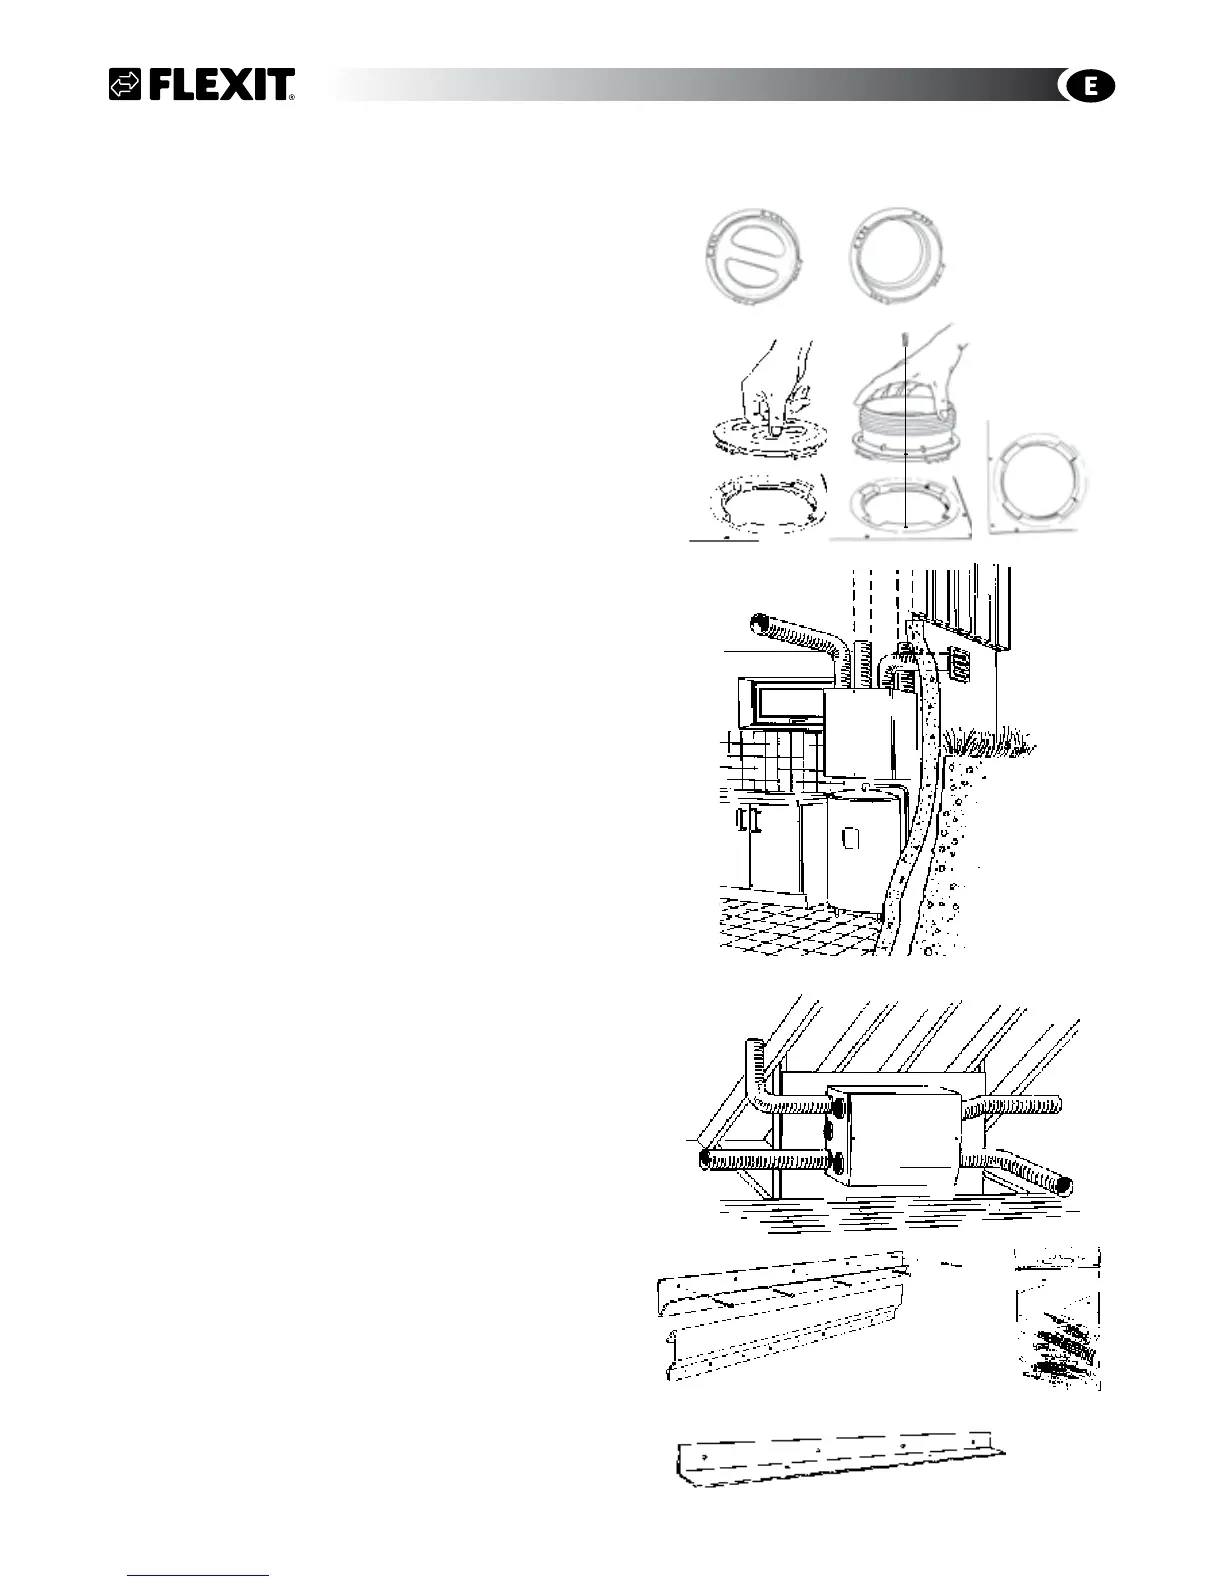
4 Installing SL4 R
The duct connections on the top and bottom of the unit
can be moved by turning the nipples/covers a quarter
turn and lifting them up (Fig. 8).
Fix the movable ducts at the top and bottom of the unit
(extract air and exhaust air) with self-tapping screws
from the installation kit. The location of the screws is
indicated on the ducts.
4.1 Wall Mounting
The enclosed wall bracket is used for wall mounting
(Fig. 8B/8C), which is fixed to the unit. Wall must be
sound insulated (Fig. 2/Chapt. 2).
The wall must be sound insulated to prevent noise
transfer. The unit should be placed against a wall which
does not have a sound sencitive adjoining room.
Duct connection top (Fig. 9)
• The wall bracket (Fig. 10B) is screwed to the wall with
the enclosed screws (Fig. 10D).
• The unit is suspended from the rail. As standard, the
unit has the mounting bracket mounted on the top
for 90
o
installation.
• Fix the unit at the bottom with the enclosed
mounting bracket (Fig. 10E).
Duct connection to the side (Fig. 10)
• For 180
o
/sideways installation, the mounting bracket
(Fig. 10C) must be unscrewed and installed on the
long side which faces up.
• The suspension rail (Fig. 10B) is screwed to the wall
with the enclosed screws (Fig. 10D).
• The unit is suspended from the rail.
• Fix the unit at the bottom with the enclosed
mounting bracket (Fig. 10E).
Fig. 9
Fig. 10A
Fig. 10B
Fig. 10D
Fig. 10C
Fig. 8
Fig. 10E
SL4 R
gpd.sunwayinfo.com.cngpd.sunwayinfo.com.cn