427-0073-12-12 Version 120 May 2015 1-13
1
Camera Installation
Step 2 Remove the rear cable gland and replace it with the cable gland plug. Use the gasket and
nut that were removed with the cable gland.
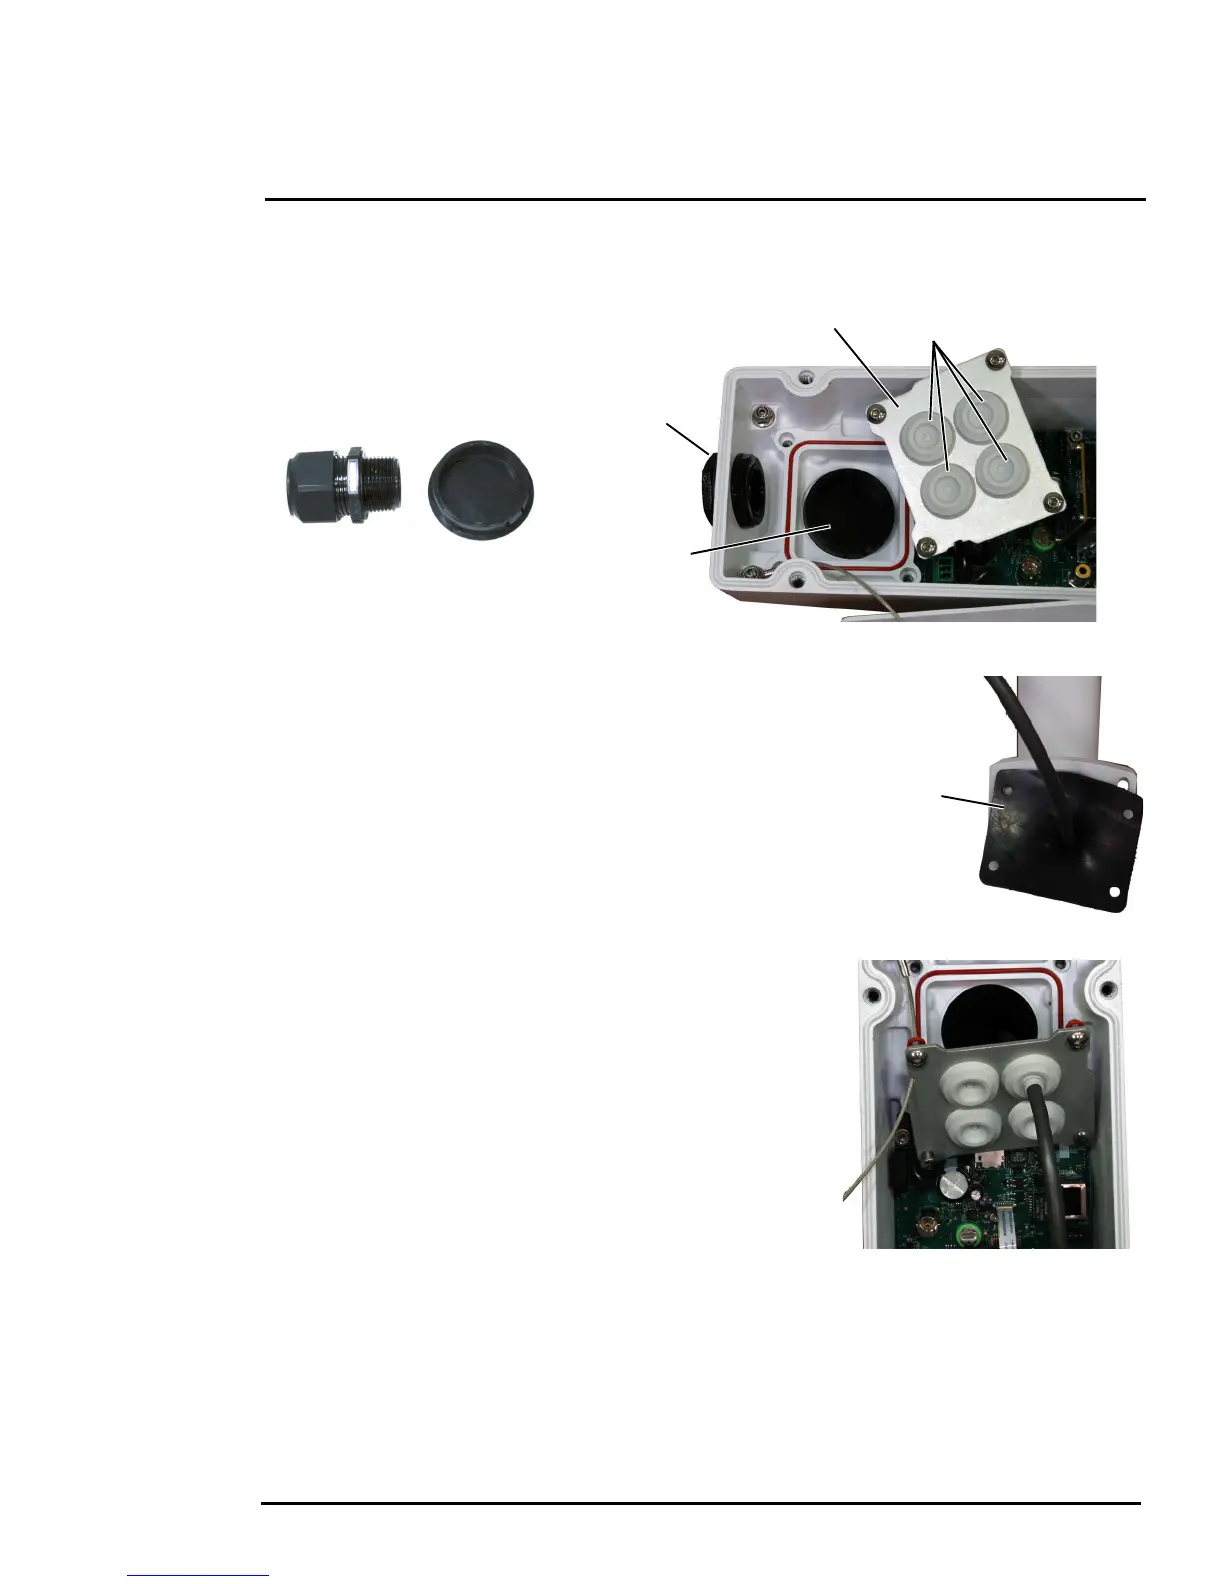
Step 3 Use a 3 mm hex key to
loosen the four captive
screws and remove the
seal plate, o-ring, and
plug.
Step 4 Install the wall mount (PN
4129742) to the wall and pull the cable(s)
through the mount. Cut a small cross-slit in the
black mount gasket and push the cable(s)
through the gasket. Pull the cable(s) through
the opening in the bottom of the camera. A
single Ethernet cable is shown in the images.
Step 5 Secure the camera to the mount using four M5
x 0.8 threaded fasteners to the bottom of the
camera. Use Loctite 222 low strength thread
locker for the mount fasteners.
Step 6 As needed, clean the o-ring and the o-ring
groove in the bottom of the camera using isotropy
alcohol and press the o-ring into its groove.
Step 7 For each cable, punch hole in the center of a gland
seal from the top using the 3 mm hex key. Insert the
cable from the bottom though the hole.
Step 8 Place the gland plate back into position and tighten
the four 3 mm captive screws using a torque value
of 1.8 n-m (16.0 in-lbs).
Step 9 Check the length of each cable to ensure an
appropriate bend radius and terminate the cable.
Figure 1-17: Seal Plate Removed
Panel mount gland seals (x4)
Seal plate
Gland plug
Plug
installed
Figure 1-18: Removed Parts
Figure 1-19: Camera Mount
Mount Gasket
Figure 1-20: Cable through Seal Plate
 Loading...