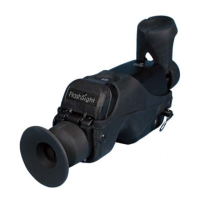
FlashSight™ User’s Guide
Copyright © 2006, FLIR Systems, Inc. 431-0002-09-10 Version 100 10
Downloading images from the FlashSight into a PC is accomplished via the
USB cable. See Section 5 for detailed directions regarding the use of this
accessory.
4.4 Menu Control
FlashSight provides a user control to select and adjust various items using an
on-screen menu. This control, which is located on the front of the FlashSight
assembly just below the camera lens, is a push-turn device (i.e., it can be
rotated like a knob and also pushed like a button). Pressing the button will
cause an on-screen menu as shown in Figure 12 to be displayed. Each row of
the menu allows you to affect one of the following settings:
1. Toggle video polarity – hot objects displayed brighter or darker than
cold objects.
2. Toggle video-optimization – automatic (“AUTO”) or manual adjustment.
3. Adjust brightness / contrast (not available in “AUTO” mode).
Figure 12: FlashSight Menu
Note
The gauge showing the image-capture capacity is also shown when the menu is
displayed. This allows you to verify the remaining capacity without having to capture
an image.