Description6
The account can also be created at a later stage through the Control Panel. Follow this
procedure:
1. In the top bar, tap the Control Panel icon.
2. Tap Create your FLIR Cloud account.
3. Type the information needed for the account, and then tap CREATE.
4. Follow the displayed instructions, and then tap SIGN IN.
5. Tap FINISH.
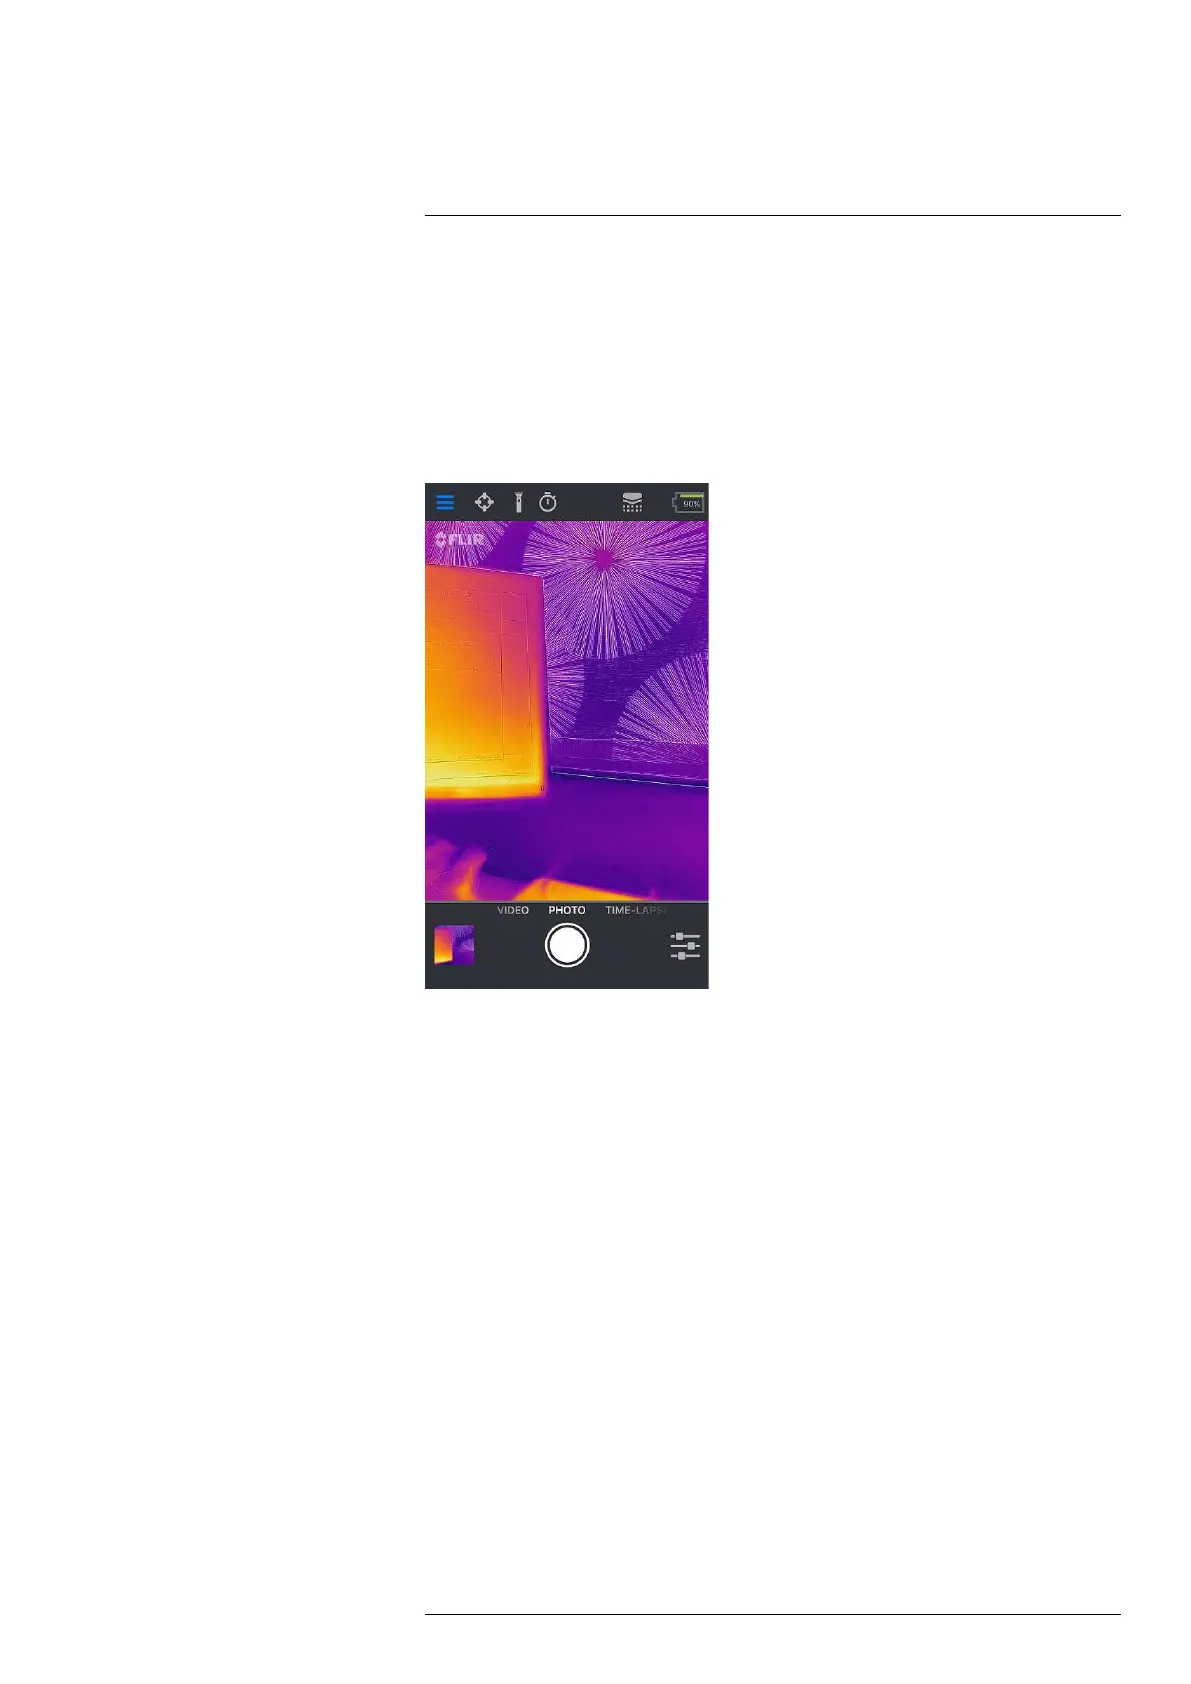
6.3.3 Bars and views
• Top bar
At the top of the screen there is a black bar with icons for the Control Panel (slide-out
menu), Spot Meter, Torch, Self-timer, and Calibration, and a battery indicator for the
FLIR ONE camera.
• Live image view
In the center of the screen the Live image view is shown. Depending on the Imaging
Control settings, the presented image is either from the visual camera or the infrared
camera, or is a combination of them both, a so-called MSX image.
• Bottom bar
At the bottom of the screen there is a black bar with icons for the FLIR ONE Gallery,
Image Mode (Photo, Video, or Time-Lapse), and Imaging Control.
6.3.4 Imaging Control
The following settings are available in the Imaging Control:
• Visible / MSX / Thermal (the current mode of the Live image view)
• Palettes
• MSX Distance
• Temperature Range
• IR Scale
• Lock Span
• Selfie Mode
Click a setting in the list to see more information.
#T810375; r. AA/51295/51295; en-US
9