Searching for new pair
Ready to ride
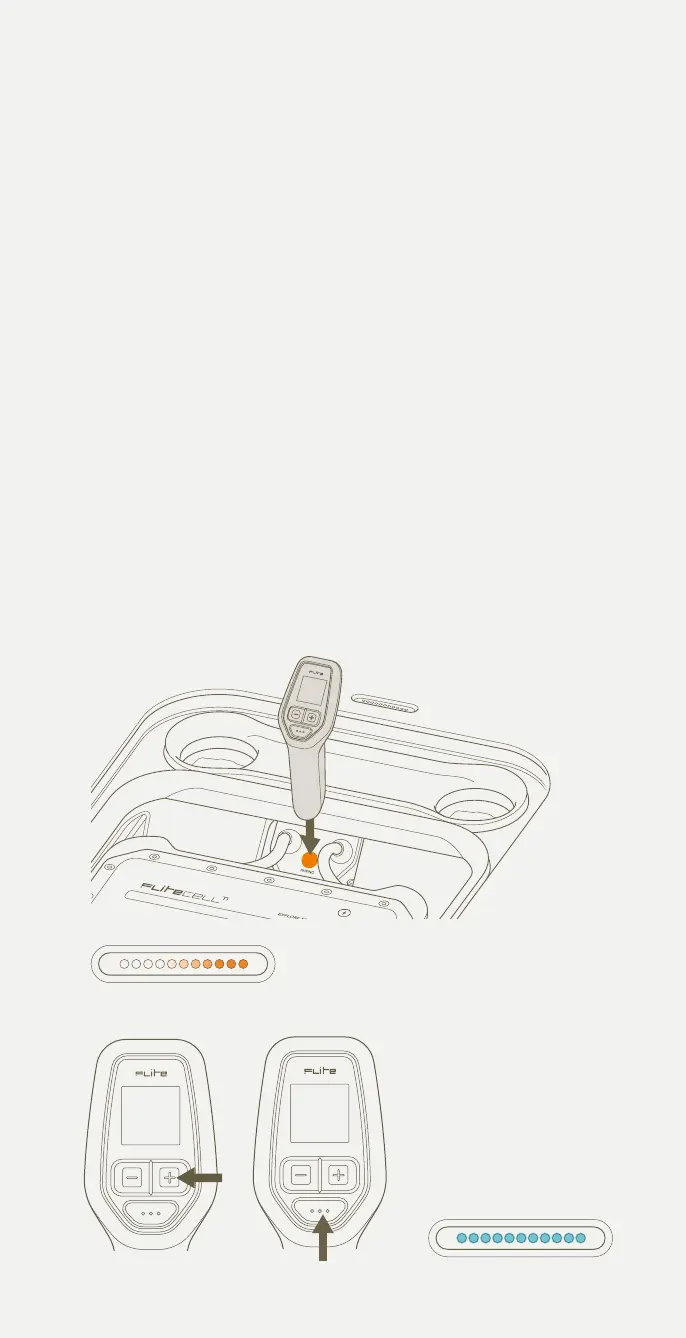
+ Button Mode Button
Flite Controller pairing procedure
1 Ensure Flitebox power cables are connected to Flitecell. Close the lid
and wait for the audible beep indicating the board is switched on.
2 Open the Flitescooter lid and place the base of the Flite Controller
on the pairing target of the Flitebox (between the Flitecell cables).
Note: With the lid open, the system will shut down after 10 seconds.
3 Once the LED lights change to scrolling orange, remove the Flite
Controller from the pairing target and close the lid.
4 Set the controller into pairing mode by holding the + button for 7
seconds until the words 'PRESS MODE TO COMMENCE PAIRING'
appear. Then press mode button to confirm. The words 'LOOKING
FOR NEW PAIR' will appear.
5 Once paired successfully, the LEDs will change to a light blue colour.
6 Fasten the latches once paired successfully.
Troubleshooting: If the lights are not solid blue, or the battery icon on your
Flite Controller is crossed out, this indicates that the Flitecell has not paired,
and the process needs to be repeated from Step 1.
The Magnetic Clip can be used to keep Flitecell activated longer than 10
seconds. Remove once paired.
DO NOT HOLD THE FLITE CONTROLLER IN THE PAIRING POSITION FOR
MORE THAN 30 SECONDS. HOLDING THE FLITE CONTROLLER IN THIS
POSITION WILL PUT THE BOARD INTO SOFTWARE UPDATE.
1
3
4
5
32