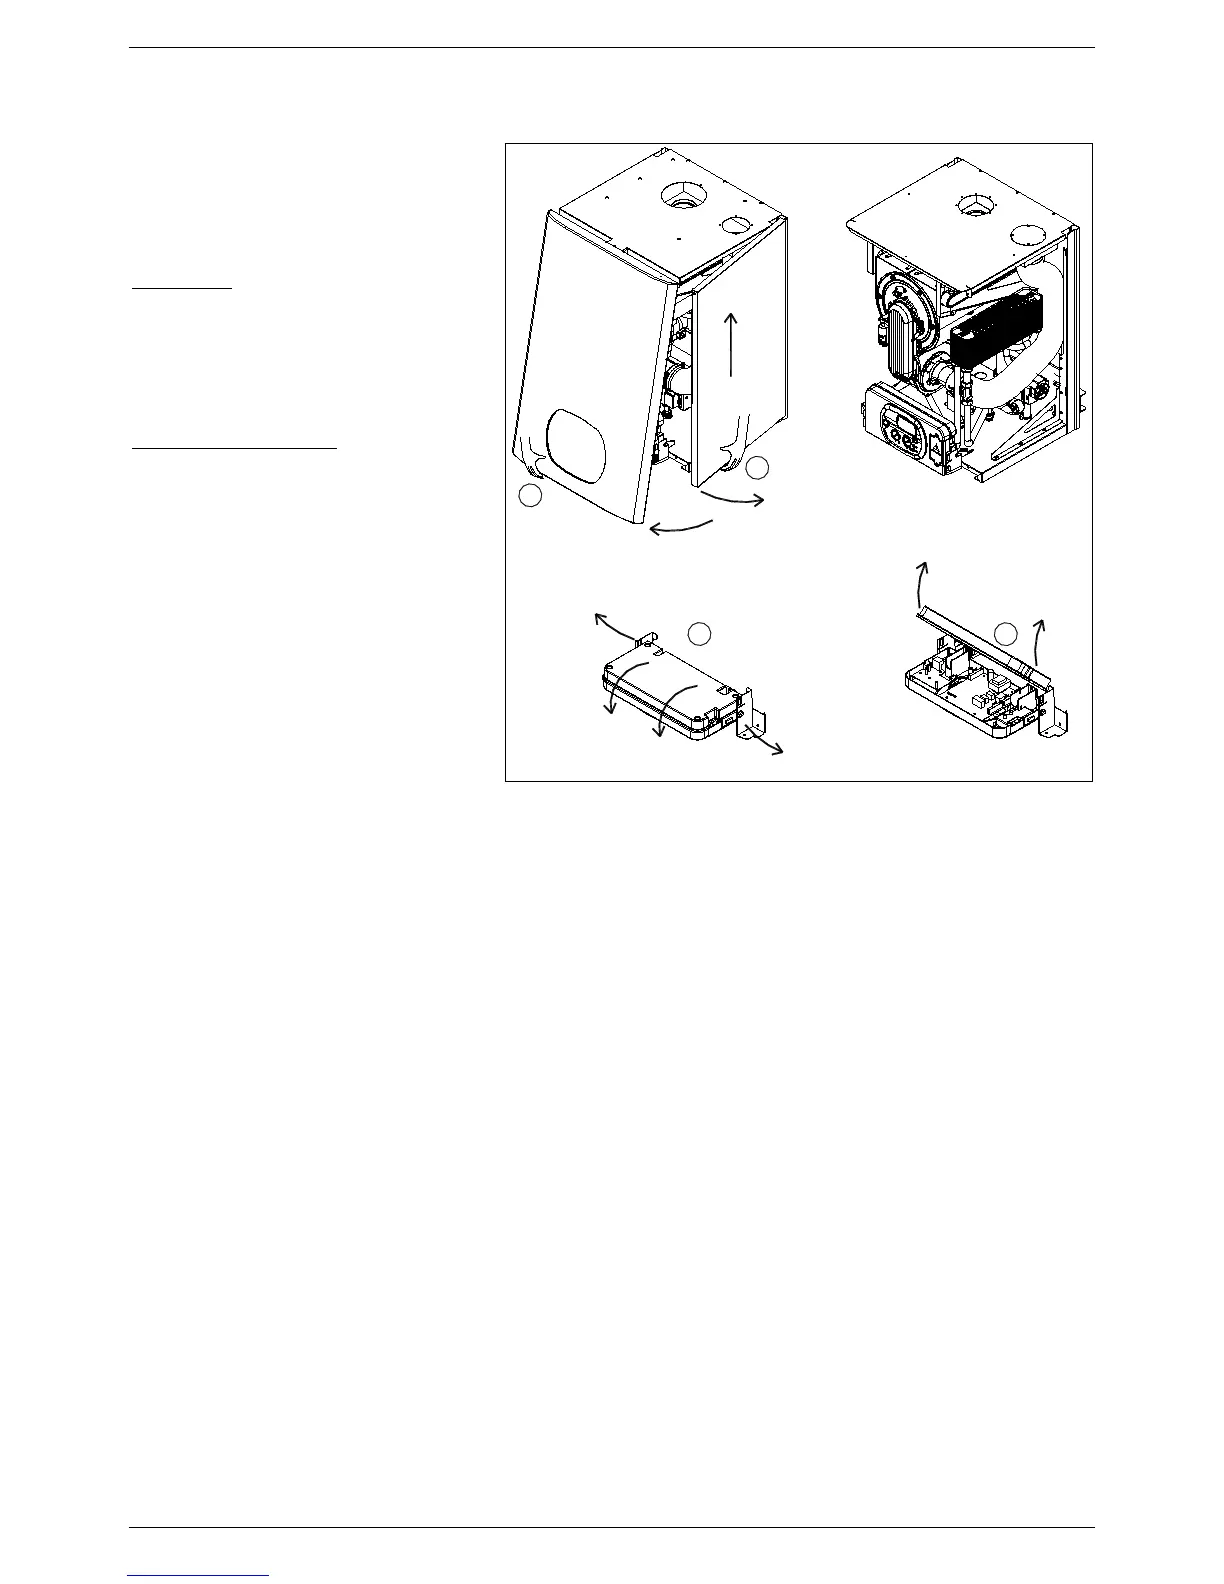
6.4 Accessing the water heater
All maintenance operations require one or
more of the water heater casing panels to
be removed.
The side panels can only be removed
after the front panel has been removed.
Front panel:
Remove the fixing screws at the lower
edge of the front panel.
Grasp the lower part of the panel and
pull it outwards
(fig. 1) and then
up.
Left and right side panel:
Remove the fixing screws at the front
and lower edge of the side panel to
remove.
Grasp the bottom of the panel, move
it sideways and then upwards to
remove it
.
To access the electrical connections
of the control panel, proceed as
follows:
• Remove the front panel (see fig. 1).
• Grasp the left and right control panel
support brackets
and pull them
outwards, at the same time rotating the
panel downwards.
• Unscrew the four fixing screws
and
remove the cover.
6.5 Flushing out the primary side
• Fill the water heater as per the filling instructions.
• Using a drain off cock on the lowest point of the system allow the water to drain from the system and water
heater.
• In order to flush the system correctly, turn off all radiators or fan coils. Open the filling loop and drain cock
simultaneously and allow the water to flow through the water heater.
• Open each individual radiator or fan coil, allowing water to flow through. Then turn that radiator or fan coil off
and repeat for all radiators or fan coil on the system.
• Turn off the filling loop and close the drain cock open all radiators and open the filling to fill the system.
• Continue to fill the system until the pressure gauge reaches 14.5 psi (1.0 bar).