Worcester 13 / 14 Series User Instruction – WCENIM0002-01
Page 10 of 13
d) Fit the new gland packings into the body recess and the gland and the new
Belleville washers (with their outer edges touching) on the stem.
e) While preventing the stem from turning, tighten the gland nut to the correct
torque (see section 10.1). Operate the stem several times and re-adjust the gland
nut to the specified figure. Over-tightening of the gland nut will reduce the life of
the stem assembly.
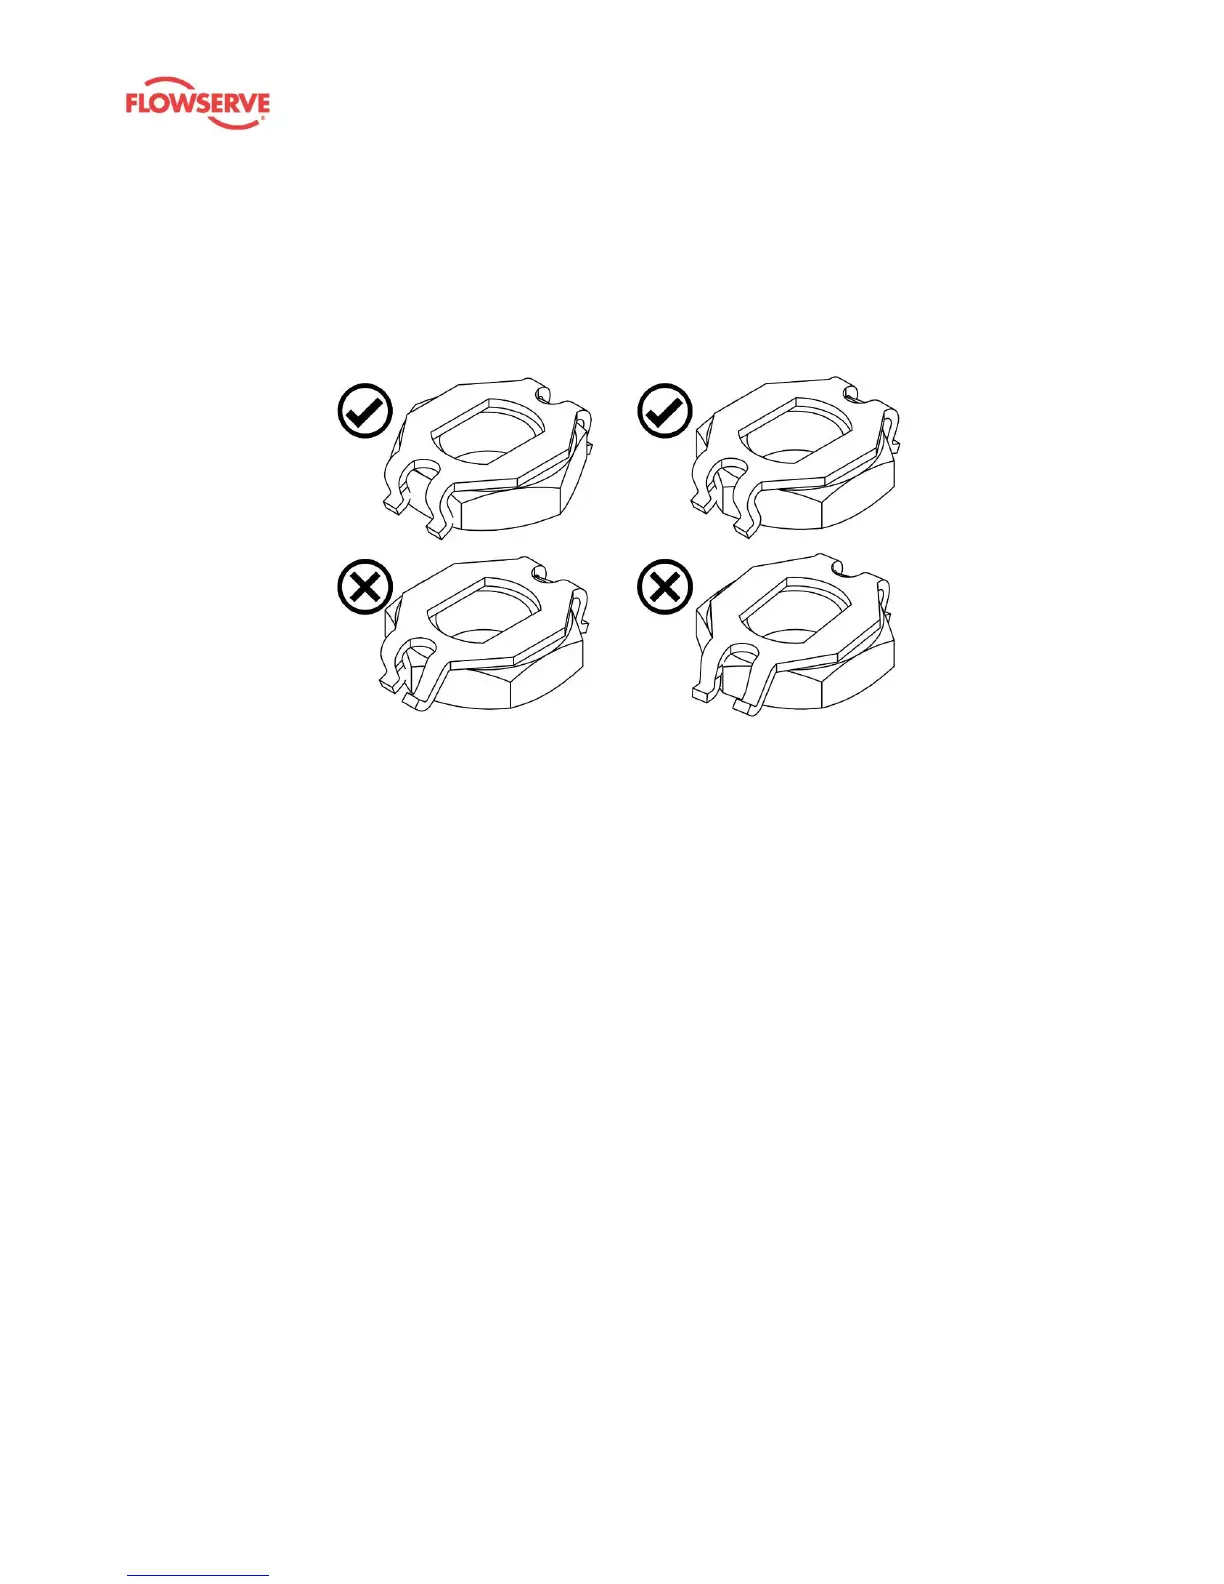
f) Fit the locking clip correctly as shown in Figure 3.
Figure 3 Fitting the locking clip
g) Fit the wrench assembly (if required).
h) Turn the stem to the valve closed position and slide the ball into the body,
locating on the stem bottom drive. Turn the stem to the valve open position to
prevent the ball from falling out.
i) Fit the new seats and body seals.
j) Clean the sealing faces of the body connectors before refitting. On AF variants,
refit the location rings. The body connectors must be pulled apart to place the
body back into position without damaging the seats, seals, and sealing faces.
k) Centralise the body, replace the body bolts and tighten diagonally and evenly
to the correct torque (see section 10.3).
l) Replace the four lower body / connector bolts and tighten as above.
m) If practical, leak tightness and operating torque should be checked prior to
refitting the valve in line.

 Loading...