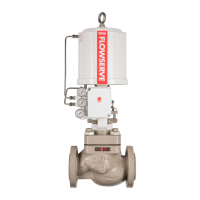
1-9
Flowserve Corporation, Valtek Control Products, Tel. USA 801 489 8611
or the bushings. Make sure the spring is retained in
the groove provided in the top of the yoke. For air-
to-open configurations, insert the actuator stem
through the yoke and place the spring and spring
button above the piston.
5. Install the cylinder, making sure the yoke is pushed
deep enough into the cylinder to allow the retaining
ring to be installed.
6. Reinsert the retaining ring by feeding it into the
groove a little at a time until it snaps in place.
Replace the stem bellows and stem clamp.
7. Using a new adjusting screw gasket, reinstall the
gasket and adjusting screw. Tighten the adjusting
screw only enough to provide an air seal with the
gasket. Do not over tighten.
NOTE: On air-to-open configurations, make sure
the hole in the spring button is directly centered
under the adjusting screw hole.
8. Apply air over the piston and place the actuator
subassembly onto the valve, making sure the gland
flange and bonnet flange are in place. For valves
with a 2-inch spud, be sure the half rings are in place
between the yoke and bonnet. Engage the plug
stem and actuator stem threads. Carefully turn the
actuator clockwise until the plug stem is engaged
(three to four turns).
CAUTION: To avoid possible stem and / or seat
galling, do not allow the plug to turn on the seat.
9. Apply sufficient air under the piston (for air-to-open
valves) or over the piston (for air-to-close valves) to
prevent the plug head from touching either the seat
or the bonnet. Continue turning the plug stem into
the actuator stem until two to three plug stem
threads remain exposed.
CAUTION: Do not allow the gland flange to
contact or gall the polished plug stem.
CAUTION: To avoid possible stem and / or seat
galling, do not allow the plug to turn on the seat.
10. Apply air over the piston. This will drive the plug into
the seat and lift the yoke off the bonnet approxi-
mately
1
/16 inch / 1.60 mm. If the space is not
1
/16 inch
/ 1.60 mm, apply air under the piston to retract the
actuator stem and screw the plug in or out as
needed. Repeat this step until the
1
/16 inch / 1.60
mm space is created.
11. Apply air under the piston and attach the yoke
clamps and packing box bolting. Tighten the yoke
clamp bolting firmly. The packing box nuts should
be just over finger-tight.
CAUTION: Do not overtighten packing. This can
cause excessive packing wear and high stem
friction that may impede plug movement.
12. Apply air over the piston to seat the plug. For all
throttling valves, adjust the stem clamp so that with
full instrument signal to the positioner the full signal
scribe line on the positioner cam points to the center
of the cam roller bearing.
NOTE: For on / off valves, the bottom of the stem
clamp should simply be lined up with the bottom of
the actuator stem (
±
1
/
16
inch / 1.60 mm).
Tighten the stem clamp bolting. Proper tightness is
important since this adjustment secures the actua-
tor stem to the plug stem. Adjust the stroke plate so
the stem clamp points to the “closed” position.
13. Reconnect the actuator / positioner tubing, supply
and signal lines.
REVERSING THE AIR-ACTION
Changing to Air-to-Open
To change the air-action from air-to-close to air-to-
open, refer to Figures 3 and 5 then proceed as follows:
1. Follow the instructions for disassembling the actua-
tor (see “Disassembling the Actuator” section).
2. Reassemble the actuator with the spring, actuator
stem spacer and spring button over the piston. For
proper alignment, the center hole in the spring
button should engage the end of the adjusting
screw.
3. The positioner must also be changed. To do this,
refer to the appropriate positioner Installation,
Operation, Maintenance Instructions.
Changing to Air-to-Close
To change the air action from air-to-open to air-to-close,
refer to Figures 3 and 5 then proceed as follows:
1. Follow the instructions for disassembling the actua-
tor (see “Disassembling the Actuator” section).
2. Reassemble the actuator with spring and actuator
stem spacer below the piston. The spring should sit
in the spring groove on top of the yoke. The spring
button is not used on air-to-extend configurations
and is stored above the piston (the actuator stem
retaining nut holds the spring button in place.)
3. The positioner must also be changed. To do this,
refer to the appropriate positioner Installation,
Operation, Maintenance Instructions.