Do you have a question about the Fluidmaster PerforMAX 400CAR3 and is the answer not in the manual?
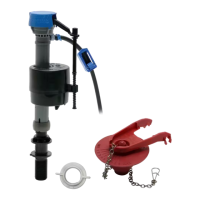
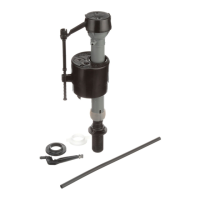
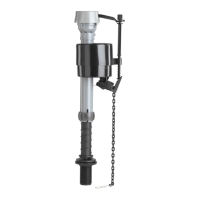
Lists and illustrates all components included in the fill valve and flapper kit for easy identification.
Specifies the necessary tools required to perform the installation of the toilet repair kit.
Instructions for shutting off the water supply to the toilet tank before beginning the installation.
Guide on how to flush the toilet to remove most of the water from the tank.
Details on using a sponge or towel to remove residual water from the toilet tank.
Procedure for disconnecting the water supply connector from the bottom of the old fill valve.
Instructions for unscrewing and removing the locknut securing the old fill valve below the tank.
Steps to fully remove the old fill valve assembly, including refill tube and shank washer.
Guide on detaching the flapper chain from the toilet tank lever.
Instructions for unhooking or lifting the old flapper from the flush valve seat.
Process for placing the new flapper onto the flush valve seat and securing it.
Instructions for connecting the new flapper chain to the tank lever with proper slack.
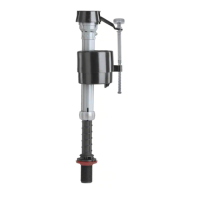
Guidance on adjusting the fill valve height to ensure the correct water level in the tank.
Steps for placing the shank washer onto the fill valve shank, wide side up.
Instructions for connecting the refill tube to the fill valve's refill port.
Guide on securing the refill clip to the other end of the refill tube.
Process for positioning the fill valve in the tank, ensuring the refill tube faces the flush valve.
Instructions for attaching the refill clip to the overflow pipe for proper water delivery.
Steps for screwing the locknut onto the fill valve shank to secure it below the tank.
Procedure for connecting the water supply line to the new fill valve.
Instructions for restoring water supply and checking for any leaks.
Guidance on verifying the water level in the tank after filling and checking for leaks.
Procedure to check if the tank water level is correctly set at roughly 1/2 inch below the overflow pipe.
Instructions on how to adjust the float to raise or lower the water level for optimal flushing.
Guidance on performing a test flush with toilet paper to assess flush performance.
Steps to adjust the flapper dial to achieve the most efficient and effective flush.
Instructions for setting the flapper dial to the final optimal position after testing.
Process of adding a gallon of water to the bowl to establish a baseline water level.
Instructions for marking the water level in the bowl with a pencil for reference.
Procedure to check if the water level in the bowl matches the marked line when the fill valve stops.
Guidance on adjusting the roller clamp to raise or lower the bowl water level.
Instructions to repeat water level adjustments and checks until the correct level is achieved.
Final instruction to flush the toilet after all adjustments are complete and confirm satisfaction.
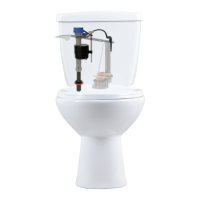
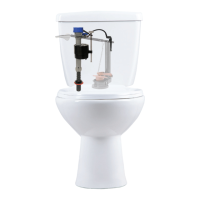
This document provides a comprehensive guide for installing and fine-tuning the Fluidmaster 400CAR3 PerforMAX® Fill Valve and 3" Flapper, designed to optimize toilet flushing performance and water efficiency. The installation process is broken down into clear, sequential steps, ensuring that even individuals with limited plumbing experience can successfully upgrade their toilet system.
The Fluidmaster 400CAR3 system is an advanced toilet repair kit that replaces both the fill valve and the flapper, two critical components for proper toilet operation. The PerforMAX® Fill Valve is engineered to provide a powerful flush while conserving water, offering adjustability for both tank and bowl water levels. This allows users to customize their toilet's performance to achieve an efficient flush without excessive water usage. The 3" flapper is designed to seal the flush valve opening, preventing leaks and ensuring that the tank refills correctly after each flush. Together, these components work in harmony to deliver a quiet, efficient, and reliable flushing experience. The system is particularly beneficial for toilets that experience weak flushes, continuous running, or slow refilling, as it addresses common issues associated with worn-out or inefficient original equipment. By providing precise control over water levels, the PerforMAX® system helps reduce water waste, contributing to lower utility bills and environmental sustainability.
The Fluidmaster 400CAR3 system is designed with user-friendly features that simplify both installation and ongoing adjustments.
While the Fluidmaster 400CAR3 system is designed for durability and long-term performance, the manual implicitly highlights several aspects that contribute to its maintainability and longevity.
In summary, the Fluidmaster 400CAR3 PerforMAX® Fill Valve and 3" Flapper system offers a robust solution for toilet repair and upgrade, focusing on efficiency, adjustability, and ease of use. Its design and accompanying instructions empower users to achieve optimal toilet performance with confidence.
| Product Type | Toilet Fill Valve |
|---|---|
| Model Number | 400CAR3 |
| Material | Plastic |
| Adjustable Height | Yes |
| Anti-Siphon | Yes |
| Color | White |