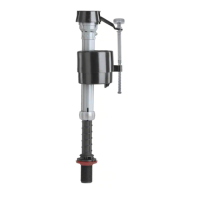
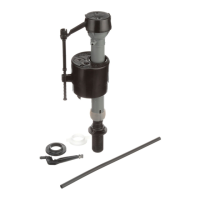
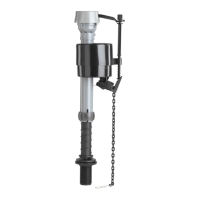
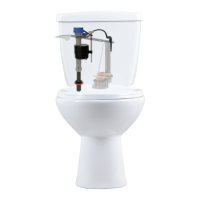
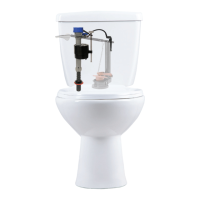
The Fluidmaster 400A Fill Valve is a crucial component for maintaining the proper function of a toilet, designed to efficiently refill the toilet tank after each flush. This quick install guide provides comprehensive instructions for both installation and troubleshooting, ensuring that users can confidently replace or install a new fill valve with ease. The device is engineered for broad compatibility with most toilet tanks, making it a versatile solution for common toilet repair needs.
Function Description
The primary function of the Fluidmaster 400A Fill Valve is to control the water flow into the toilet tank, stopping it once the water reaches a predetermined level. This process is initiated after the toilet is flushed, which lowers the water level in the tank and causes the fill valve's float to drop. As the float drops, it opens a valve mechanism, allowing fresh water from the supply line to enter the tank and bowl. The fill valve also includes a refill tube that directs a small amount of water into the overflow pipe, which in turn refills the toilet bowl. This ensures that the bowl always has enough water to create a proper water seal, preventing sewer gases from entering the bathroom. Once the water level in the tank rises and lifts the float to the set height, the valve mechanism closes, shutting off the water supply. This precise control over water intake is essential for water conservation and efficient toilet operation. The fill valve's design aims to provide a quiet and fast refill, minimizing disruption and wait times between flushes.
Usage Features
The Fluidmaster 400A Fill Valve is designed with several user-friendly features that simplify both installation and ongoing maintenance.
- Adjustable Height: One of the key features is its adjustable height, allowing it to fit a wide range of toilet tank sizes. Users can easily twist the fill valve to adjust its height, ensuring that the top of the fill valve cap is approximately 3 inches above the top of the overflow pipe. This adjustability is crucial for optimal performance and proper water level setting.
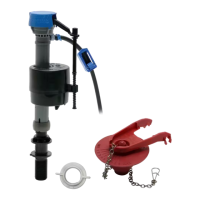
- Easy Installation Process: The installation guide breaks down the process into clear, sequential steps. It begins with preparing the tank by turning off the water supply and draining the tank, followed by removing the old fill valve. The guide then walks through installing the new fill valve, including attaching the shank washer, pushing the refill tube onto the refill port, attaching the refill clip to the overflow pipe, and inserting the fill valve into the tank. Finally, the locknut is screwed on from below the tank to secure the valve. This step-by-step approach, complemented by clear illustrations, makes the installation accessible even for those with limited plumbing experience.
- Refill Tube and Clip: The inclusion of a refill tube and clip ensures that water is directed into the overflow pipe to refill the toilet bowl. The refill tube can be cut to length if it's too long, providing flexibility for different tank configurations. The refill clip securely attaches the tube to the overflow pipe, maintaining its position for consistent bowl refill.
- Water Level Adjustment: The fill valve features a tank water level adjustment screw, which allows users to fine-tune the water level in the tank. After installation, the water level should be roughly 1/2 inch below the top of the overflow pipe for a proper flush. If the water level is too low, turning the adjustment screw clockwise raises the float and increases the water level. Conversely, turning it counterclockwise lowers the float and decreases the water level. This precise control helps optimize water usage and flush performance.
- Visual Cues for Installation: The guide uses visual cues, such as "TURN CLOCKWISE" and "TURN COUNTER-CLOCKWISE," along with arrows, to indicate the correct direction for twisting components. This reduces ambiguity and helps users perform actions correctly.
- Tools Needed: The installation process requires only basic tools: pliers, a towel, a bucket, and a sponge. These are common household items, making the installation process convenient without the need for specialized equipment.
Maintenance Features
The Fluidmaster 400A Fill Valve is designed for durability, but like all plumbing components, it may require occasional maintenance or troubleshooting. The manual provides detailed guidance for common issues.
- Troubleshooting for Fill Valve Issues: The guide addresses common problems such as the fill valve not turning on, not turning off, or not refilling the tank. It instructs users to check for debris by turning off the water supply, flushing the toilet, and then removing the fill valve cap. By holding the float up and twisting the cap counterclockwise, users can access the internal components. Flushing water through the uncapped valve a few times can help clear any obstructions. After clearing, the cap is reassembled by aligning the cap arm and adjustment rod with the refill tube and pressing down while rotating clockwise to lock it.
- Replacing the Fill Valve Seal: If the float does not drop when flushed, indicating a potential issue with the seal, the guide advises replacing the fill valve seal with a genuine Fluidmaster 242 Seal. This involves removing the cap as described above and replacing the internal seal.
- Cleaning Flapper and Drain Seat: If the fill valve turns on and off by itself, it suggests that the tank is losing water, often due to a leaky flapper or drain seat. The solution involves cleaning the flapper and drain seat for a better seal. If the leak persists, replacing the flapper or even the entire flush valve (with models like 507AK or 540AKR) or repairing the flush valve seat (with 555C) may be necessary.
- Addressing Water Supply Connector Leaks: For leaks at the water supply connector, the guide simply recommends replacing the water supply line, indicating that the issue is likely with the connector itself rather than the fill valve.
- Troubleshooting Low Bowl Water Level: If the water level in the bowl is too low, the guide provides two potential causes and solutions. First, it ensures that water from the refill tube is flowing through the overflow pipe. Second, it reminds users to check if the water level in the tank is too low (referencing the adjustment instructions on page 12).
- Flapper Closing Too Soon: If the flapper is closing too soon, leading to an incomplete flush, the guide suggests giving the flapper chain approximately 1/2 inch of slack. This allows the flapper to remain open long enough for a full flush cycle.
- Online Troubleshooting Resources: For more complex issues or additional assistance, Fluidmaster provides a troubleshooting HOW-TO VIDEO accessible via a QR code or URL, as well as contact information for their technical services department, including a toll-free number and website support. This comprehensive support system ensures that users can find solutions to various problems.
In summary, the Fluidmaster 400A Fill Valve is a well-designed, user-friendly toilet repair component that emphasizes ease of installation, precise water level control, and clear troubleshooting guidance. Its adjustable features and comprehensive support resources make it an accessible and reliable choice for maintaining an efficient and leak-free toilet system.