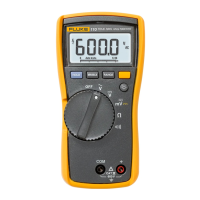
When measuring voltage, resistance, diodes, capacitors, resistance or frequency (everything but
current!), connect the red cord to the ”V Ω” (etc.) terminal at right. When the red cord is in this position
the meter should always be connected IN PARALLEL (i.e. across, not in line with) what you are trying to
measure, and the dial should never be on one of the “A” positions.
When measuring current (and current only!) connect the red cord to the “A” terminal at left. When the
meter is connected in this fashion, it should be connected IN SERIES (i.e. in line with) what you are trying
to measure, and the dial should be on one of the “A” positions.
There are four types of lead tips you can use, depending on preference:
“banana plugs” – tubular metal end, good for plugging into other devices
“probes” – pointy metal ends, good for poking around into circuits
“alligator clips” – grab on to what you want to measure (probably have very few of these)
“hook leads” – a springloaded hook that latches on to what you want. Better than alligator clips
in tight spaces.
The LCD display contains information about:
-what is being measured (volts, amps, ohms, farads, hertz; DC, AC),
-range settings being used (auto, or manual and the present range setting),
-display settings (Hold, Min, Max, Avg),
-instrument settings (e.g. low battery warning), and
-a bar graph along the bottom which gives a quicker (but less accurate) readout of measured values.
If you want to see every symbol displayed at once, press the “HOLD” button as you switch the meter on.
For further information, there are a number of manuals on the cart next to the meters.
 Loading...