Do you have a question about the Fluke 180LR and is the answer not in the manual?
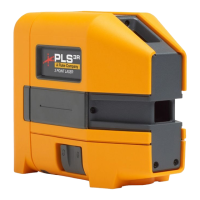
The Fluke 180LR and 180LG Line Laser Levels are battery-powered, self-leveling, professional-grade instruments designed for precise alignment tasks. These devices are primarily used to lay out reference points for aligning targets either horizontally, vertically, or diagonally. The 180LR model emits a red laser beam, while the 180LG model emits a green laser beam. Both models offer the flexibility of emitting either a solid or pulsed laser beam, catering to different working environments.
For indoor applications, the solid laser beams are ideal, providing a clear and continuous line. When working outdoors or in conditions where the solid laser beam might be difficult to see, the pulsed laser beams can be utilized. It's important to note that pulsed laser beams are not as bright as solid laser beams. In such scenarios, the Fluke LDR (for red laser) or LDG (for green laser) Laser Detector can be used in conjunction with the Product to accurately pinpoint the laser's location. Users should refer to the LDR, LDG Users Manual for detailed instructions on using the detectors.
Operating the Product involves a simple power button that allows users to scroll through various laser options. A single press turns on the horizontal laser, a second press activates the vertical laser, a third press enables both lasers in self-leveling mode, and a fourth press activates both lasers in manual level mode. A fifth press turns the Product off. An indicator LED provides visual feedback on the Product's status: a solid green light indicates that the Product is on and level with a solid laser, while a blinking green light signifies that it's on and level with a pulsed laser. A red light indicates a tilt, meaning the Product is not level or is in manual level mode. A yellow light signals a low battery. Additionally, a dedicated pulse button allows users to switch the laser to pulsed mode when needed.
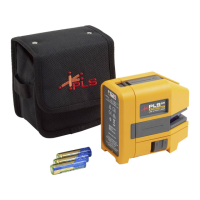
The Product is designed for ease of use and includes an accessory mount, optical windows for the laser emission, a battery door, and comes with a holster and a soft case for protection and portability.
When performing alignment tasks, the Product offers several methods. For new horizontal or diagonal alignment, the Product should be placed on a stable surface. In manual level mode, the Product can be rotated on its center to project the horizontal laser to the target area, allowing users to mark the level or grade point. If the Product is mounted on a tripod, it's crucial to ensure the tripod head is perfectly level to avoid errors in marks.
For new vertical alignment, the Product should be positioned facing the target with the vertical laser activated. Marks can then be made where the vertical laser intersects the target area. To check the alignment of an existing item, the horizontal or vertical laser is pointed at the target area, and the distance from the item to the laser is measured. This measurement should be repeated at various distances from the Product; if the measurements are consistent, the item is aligned.
Periodical accuracy checks are recommended to ensure the Product maintains its precision. To check the accuracy of the horizontal laser, a horizontal site at least 7.62 m (25 ft) wide with two opposing walls (or scrap wood) as targets is needed. The Product is placed about 15 cm (6 in) from target A, and a mark is made where the horizontal laser intersects. The Product is then turned 180° on its center to intersect target B, and another mark is made. The process is repeated with the Product 15 cm from target B, making two more marks. If the distances between corresponding marks on targets A and B are the same, the laser is within calibration. If not, the difference of error can be calculated. The laser is considered within calibration accuracy if the distance is ≤3 mm @ 9 m.
To check the accuracy of the vertical laser, a door jamb with 2.44 m (8 ft) clearance on both sides is required. A cross mark (mark 1) is made on the floor centered on the door header. A second cross mark (mark 2) is made 2.44 m (8 ft) from mark 1, ensuring it's centered on the door header using the vertical laser. The Product is then placed on mark 2 with the vertical laser on, and a third cross mark (mark 3) is made on the floor 4.88 m (16 ft) from the Product, again ensuring it's centered on the door header. A cross mark (mark 1) is made on the door header above the floor mark 1. The Product is moved to floor mark 3, aligning the laser to intersect the centers of floor marks 1 and 2. Another cross mark (mark 2) is made on the door header above floor mark 1. If the first and second cross marks on the door header are the same, the laser calibration is accurate. If they differ, the distance between their center points is measured. The laser is within calibration accuracy if this distance is ≤1.58 mm.
Maintenance of the Product is straightforward. While it doesn't require extensive maintenance, it should be treated as a calibrated instrument and protected from drops. For cleaning, the case can be wiped with a damp cloth and a weak soap solution. Abrasives, isopropyl alcohol, or solvents should not be used on the case or optic windows.
Battery replacement is indicated by a yellow light on the indicator LED. To replace the batteries, the battery compartment lid is removed, three AA batteries are installed with correct polarity, and the lid is then replaced.
Safety is paramount when using the Product. Users must read all safety information and instructions carefully before use. The Product should only be used as specified to prevent hazardous laser radiation exposure and ensure the protection supplied by the Product is not compromised. Direct eye exposure to the laser, especially with optical tools like binoculars or telescopes, must be avoided as it can cause eye damage. The laser should not be pointed directly at persons or animals, or indirectly off reflective surfaces. If the Product operates incorrectly, it should not be used. For extended storage or temperatures above 50 °C, batteries should be removed to prevent leakage and potential damage to the Product. Any repairs should only be performed by an approved technical site, as opening the Product can expose users to dangerous laser beams.
| Laser Wavelength | 635 nm |
|---|---|
| IP Rating | IP54 |
| Outdoor Use | Yes, with detector |
| Laser Class | Class II |
| Laser Power | <1 mW |
| Operating Temperature | 14°F to 122°F (-10°C to 50°C) |
| Accuracy | ≤ 3 mm @ 10 meters (1/8 inch @ 32.8 feet) |
| Storage Temperature | -20 °C to +70 °C (-4 °F to 158 °F) |