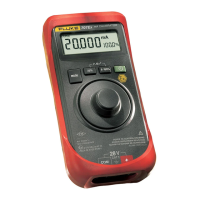
Step 1: Basic set-up. Setting
the Fluke 707 loop calibra-
tor current output
Place the calibrator in the 4-20
mA output current mode.
Connect the 707 to the input
terminals of the valve posi-
tioner (see Figure 3).
Step 2: Zero adjustment
Set the 707 to an output of 4
mA and allow some time for
valve stem movement to stabi-
lize. Quickly decrease the
current from 4 mA to 3.9 mA
by depressing and turning the
vernier knob in a counter-
clockwise direction. You can
operate the 707 with one hand
while feeling the valve stem
with your free hand to check
for any sign of movement.
Adjust for zero movement
between these two current set-
tings by using the zero
adjustment on the positioner.
Increase and decrease cur-
rent from 4 mA to 4.1 mA using
the vernier knob in the
depressed position. Insure that
the valve stem just begins
movement above the 4.1 mA
setting and fully closed at 4 mA.
Step 3: Span (full open)
position check
Using the 25% button, step the
calibrator output value to
20 mA and allow the valve to
stabilize. Step the input to
20.1 mA using the vernier knob
in the depressed position turn-
ing clockwise while watching
or feeling for movement of the
valve stem. Minimize this move-
ment using the span adjust-
ment on the valve positioner.
Using the vernier knob in
the depressed position, adjust
current up and down between
20.10 mA and 19.9 mA. There
should be no movement of the
valve stem above 20 mA and a
slight movement below 20 mA.
Step 4: Check zero and
span again
Many positioners have interac-
tive zero and span controls.
This step will help insure proper
valve position adjustment.
Repeat Step 2 and Step 3.
Step 5: Linearity check
For valves with linear action,
linearity can be checked by
setting the 707 to 4 mA and
stepping current to 12 mA
(50%) while observing valve
travel. If your valve is of a non-
linear type, refer to the valve
manual for proper operational
checks.
Step 6: Stroking the valve
Checking for smooth valve
operation is easy to accomplish
using the slow ramp function of
the 707.
•
Set the calibrator to mA
source mode and select the
slow ramp function ( ) by
depressing the 25% and 0-
100% buttons simultaneously.
•
Allow the calibrator to ramp
through several cycles while
watching or feeling for any
abnormal operation of the
valve, such as sticking in
one position momentarily or
erratic movement.

 Loading...