EasyManuals Logo

Fluke ScopeMeter 199C User Manual

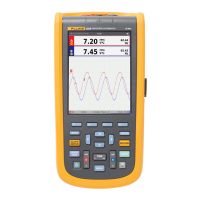
Fluke ScopeMeter 199C
86 pages
To Next Page IconTo Next Page
To Previous Page IconTo Previous Page
Page #60 background imageLoading...
Page #60 background image
Fluke 19xB-19xC-2x5C
Service Manual
5-4
Fluke 5500A Multi Product Calibrator, including SC300 or SC600 Oscilloscope
Calibration Option.
Stackable Test Leads (4x), supplied with the 5500A.
50Ω Coax Cable (2x), for example Fluke PM9091 (1.5m) or PM9092 (0.5m).
50Ω feed through termination, Fluke PM9585.
Male BNC to Dual Female BNC Adapter (1x), Fluke PM9093/001.
Dual Banana Plug to Female BNC Adapter (1x), Fluke PM9081/001.
5.2 Calibration Procedure Steps
To do a complete calibration adjustment you must do all following steps:
1. Select the Calibration Mode, section 5.3
2. Do the Contrast Calibration Adjustment, section 5.4
3. Do the WarmingUp & PreCalibration, section 5.5
4. Do the Final Calibration, section 5.6
5. Save the Calibration Data and Exit the calibration mode, section 5.7
6. Do the probe Calibration, section 5.8
Steps 4 and 5 must always be done together and completely in the order given in this
manual. Skipping adjustment steps will make the calibration invalid!
The following partial calibrations are allowed:
Contrast calibration, do the above-mentioned steps 1, 2, and 5.
If during normal operation the display cannot be made dark or light enough, or if the
display after a test tool reset is too light or too dark, you can do this calibration.
Probe calibration, do the above-mentioned step 6.
The probe calibration matches the probe to the used input channel.
5.3 Starting the Calibration
Follow the steps below to start the calibration:
1. Power the test tool via the power adapter input using the BC190 power adapter.
2. Check the actual test tool date, and adjust the date if necessary (the calibration date
will become the test tool date when saving the calibration data):
Press
(toggles the menu bar on-off)
press
to open the OPTIONS menu
using
select DATE ADJUST...
press
to open the DATE ADJUST menu
adjust the date if necessary.
3. Select the calibration mode.
The Calibration Adjustment Procedure uses built-in calibration setups, that can be
accessed in the calibration mode.

Table of Contents

Questions and Answers:

Question and Answer IconNeed help?

Do you have a question about the Fluke ScopeMeter 199C and is the answer not in the manual?

Fluke ScopeMeter 199C Specifications

General IconGeneral
Bandwidth200 MHz
Sample Rate2.5 GS/s
Channels2
Battery LifeUp to 4 hours
Vertical Resolution8 bits
Timebase Range5 ns/div to 100 s/div
Input CouplingAC, DC, GND
Harmonics AnalyzerYes
Power Quality MeasurementsYes
Vertical Sensitivity2 mV/div to 100 V/div
DisplayColor LCD
Input Impedance1 MΩ
Operating Temperature0 °C to +50 °C
Maximum Input Voltage400 V (DC + AC peak)

Related product manuals