Do you have a question about the Focusrite Vocaster One and is the answer not in the manual?
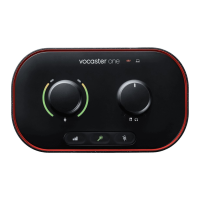
Introduction to Vocaster One, its design for podcasters, vloggers, and its studio-quality audio capabilities.
Details on connecting Vocaster One to computers, cameras, and Apple iPads via USB-C for audio recording and streaming.
Details on the microphone input, including compatibility with dynamic and condenser mics, and 48V phantom power support.
Explains the 3.5mm jack sockets for connecting phones and video cameras, enabling two-way audio communication.
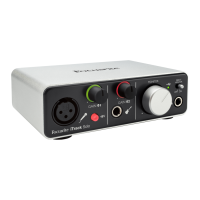
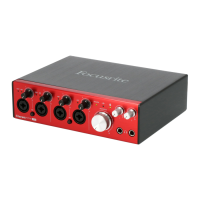
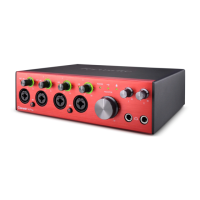
Overview of the top panel controls, including gain knobs, halo meters, and buttons for Auto Gain, Enhance, and Mute.
Lists items included in the box and outlines the system requirements for using Vocaster One with computers.
Guidance on using the Easy Start Tool for initial setup and connection of Vocaster One to your computer.
Step-by-step instructions for setting up Vocaster One on a Mac, including auto-detection and navigating the Easy Start URL.
Instructions for setting up Vocaster One on Windows, including handling notifications and accessing the setup file.
Steps and requirements for connecting Vocaster One to an iPad with a USB-C port for audio recording.
Recommendation to download and install Vocaster Hub software for full interface functionality and access to features.
Guidance on configuring Vocaster One with Digital Audio Workstations (DAWs) on Mac and Windows for recording.
Instructions on how to manually register your Vocaster One product by entering the Unique Product Number (UPN).
Illustrates the correct audio preferences setup in Hindenburg for both automatic and manual configurations on Mac and Windows.
A typical setup for recording with a microphone, connecting to a computer or iPad and listening via headphones.
Details on providing phantom power for condenser mics and setting microphone gain levels using Auto Gain or manual adjustment.
Step-by-step guide on using the Auto Gain feature to automatically set optimal microphone input levels for recording.
Information on what to do if the Auto Gain feature fails to set the correct input level, including common causes and solutions.
Instructions on how to manually adjust microphone gain using the Vocaster One's knob and halo indicators or the Vocaster Hub software.
How to use the microphone mute button on Vocaster One or Vocaster Hub to temporarily silence the microphone.
Explanation of the Enhance feature for optimizing audio quality, including its presets for tailoring voice sound.
How to connect headphones to the front panel socket for monitoring your mix, with volume control on the unit.
Instructions for connecting speakers via the rear panel outputs and controlling speaker volume.
Guide to connecting a phone to Vocaster One for recording conversations or music, including mix-minus functionality.
Steps for connecting Vocaster One's output to a video camera's audio input for synchronized audio and video recording.
Introduction to Vocaster Hub software, its benefits, how to install it, and access its control page.
Explanation of the interface communication icon in Vocaster Hub, indicating connection status between the unit and the computer.
Details on the Host Input panel in Vocaster Hub for adjusting microphone gain, using Auto Gain, Enhance, and Mute functions.
Explanation of the mixer section in Vocaster Hub, detailing channels like Host, Aux, Loopback, and Show Mix for balancing audio.
How to use Vocaster's Loopback feature to record audio directly from your computer, including internet and application sounds.
An example scenario demonstrating how to use both Loopback inputs for independent recording of software audio alongside other sources.
Table detailing DAW input numbers, Vocaster inputs, and their uses for recording multiple audio tracks into recording software.
Detailed explanation of the top panel rotary controls, halo LED indicators, and buttons for gain, mute, and enhance.
Description of all rear panel ports, including Power, USB, 48V, Host (XLR), Camera Output, Phone Input, and Speaker Outputs.
Detailed technical specifications for sample rate, USB, microphone input, phone input/output, headphone output, and camera output.
Overview of other audio I/O connections, microphone input details, weight, and dimensions of the Vocaster One unit.
Information on where to find troubleshooting assistance and support resources via the Focusrite Help Centre.
Legal notices regarding Focusrite trademarks, registered trademarks, and copyright ownership.
Acknowledgements and thanks to the members of the Vocaster team who contributed to the product's development.
| Type | Audio Interface |
|---|---|
| Channels | 1 |
| A/D Resolution | 24-bit |
| Sample Rate | 48 kHz |
| Output Type | TRS |
| Outputs | 2 |
| Headphone Output | 1 |
| USB Type | USB-C |
| USB Connectivity | Yes |
| Phantom Power | Yes |
| Auto Gain | Yes |
| Frequency Response | 20Hz - 20kHz |
| OS Requirements - Mac | macOS 10.15 or later |
| OS Requirements - PC | Windows 10 or later |
| Weight | 0.8 kg |
| Bluetooth Connectivity | No |
| Input Type | XLR |
| Inputs | 1 |
| Gain Range | 60 dB |
| Power | USB Bus Powered |
| Compatibility | macOS, Windows, iOS |
| Software | Vocaster Hub |