Back to Top 24
Control Solution
Q26. How do I do the control solution test?
1. Insert the test strip into the test slot of the device. Wait for the device to display
the blood drop.
2. Auto QC mode in FORA 6 series and GD40g/h: The meter automatically
detects the difference between the control solution and blood samples, marking
the result as a control solution test with “QC” displayed.
3. Manual QC mode for other FORA’s meter: Press the MAIN button to mark this
test as a control solution test. With “QC” displaying, the device stores your test
results in the memory under “QC”. If you press the MAIN button again, the “QC”
disappears, and this test is no longer a control solution test.
4. Apply the control solution. Shake the control solution vial thoroughly before use.
Squeeze out a drop and wipe it off, then squeeze another drop and place it on
the tip of the vial cap. Hold the device to move the absorbent hole of the test
strip to touch the drop. Once the confirmation window is filled, the device begins
to count down.
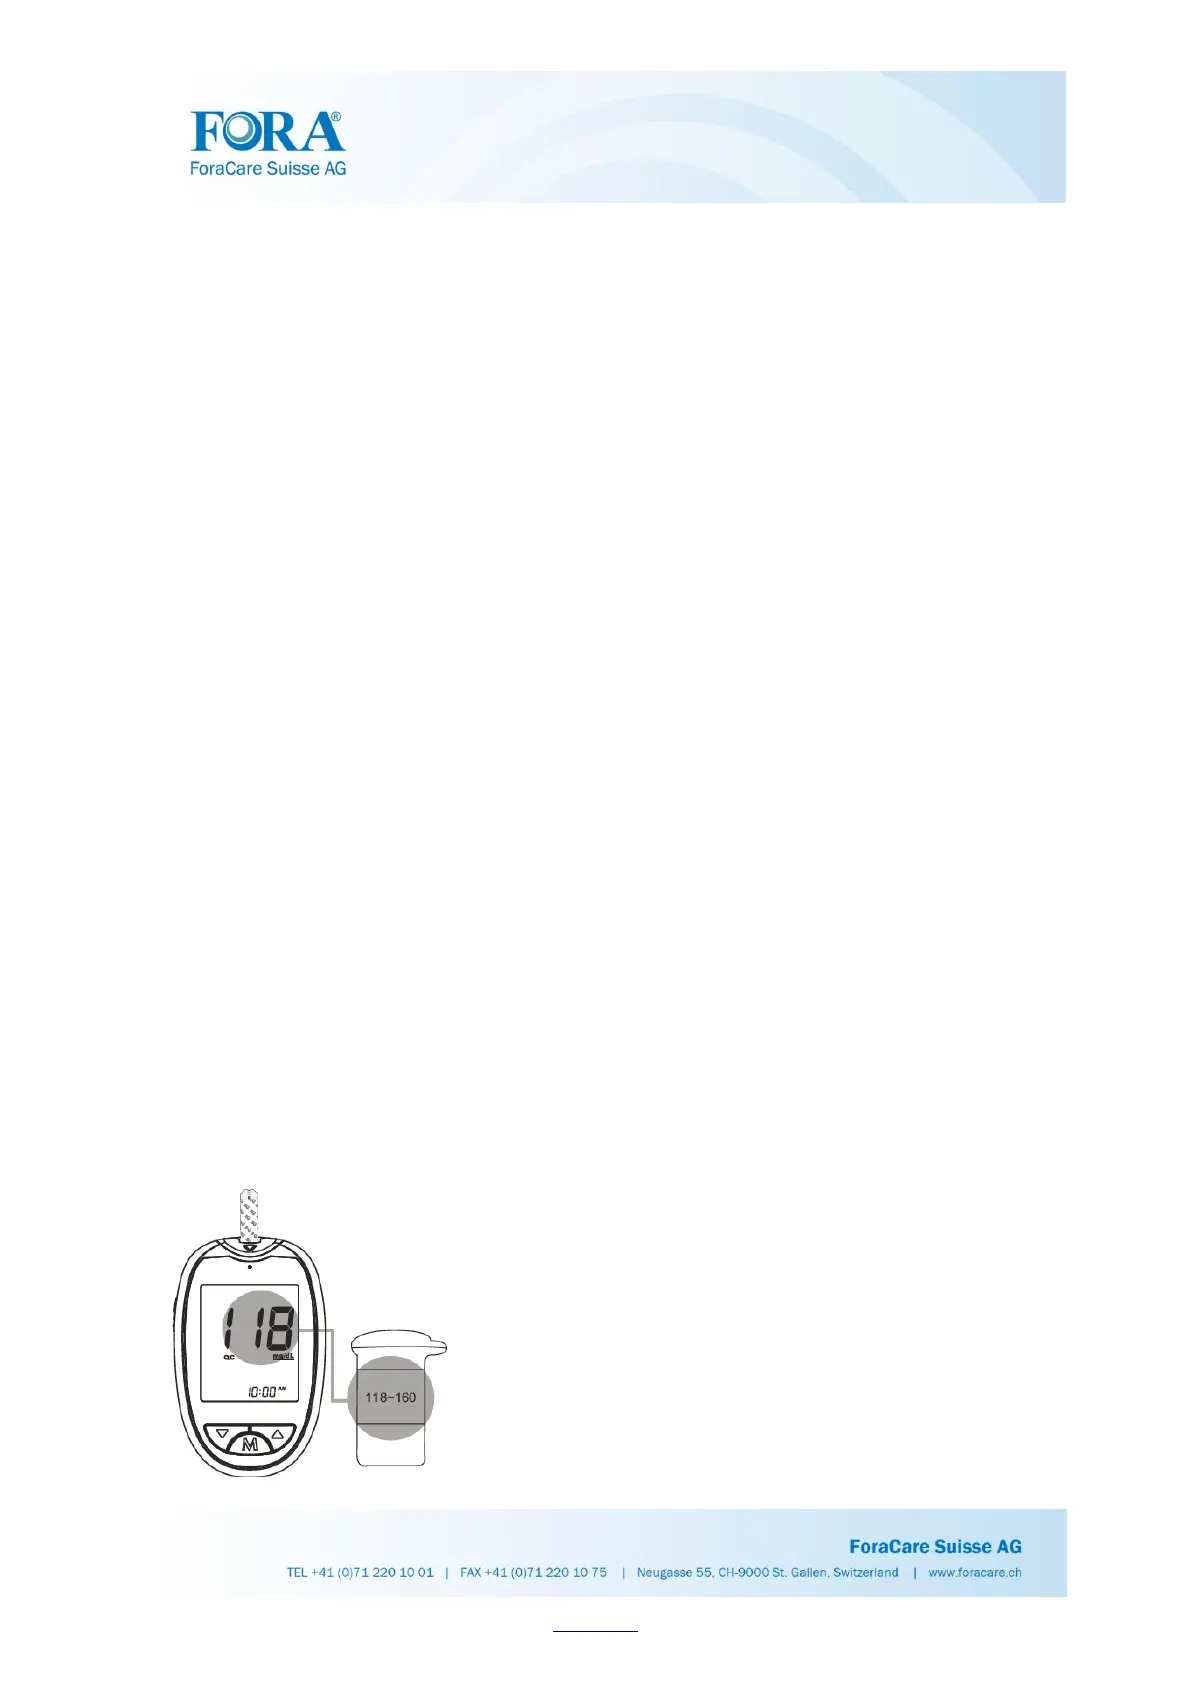
5. Read and compare the result. The test result of the control solution appears on
display after the countdown finishes. Compare this result with the range printed
on the test strip vial or individual foil pack, which should fall within this range. If
the test result is out of range, read the instructions again and repeat the control
solution test.
 Loading...