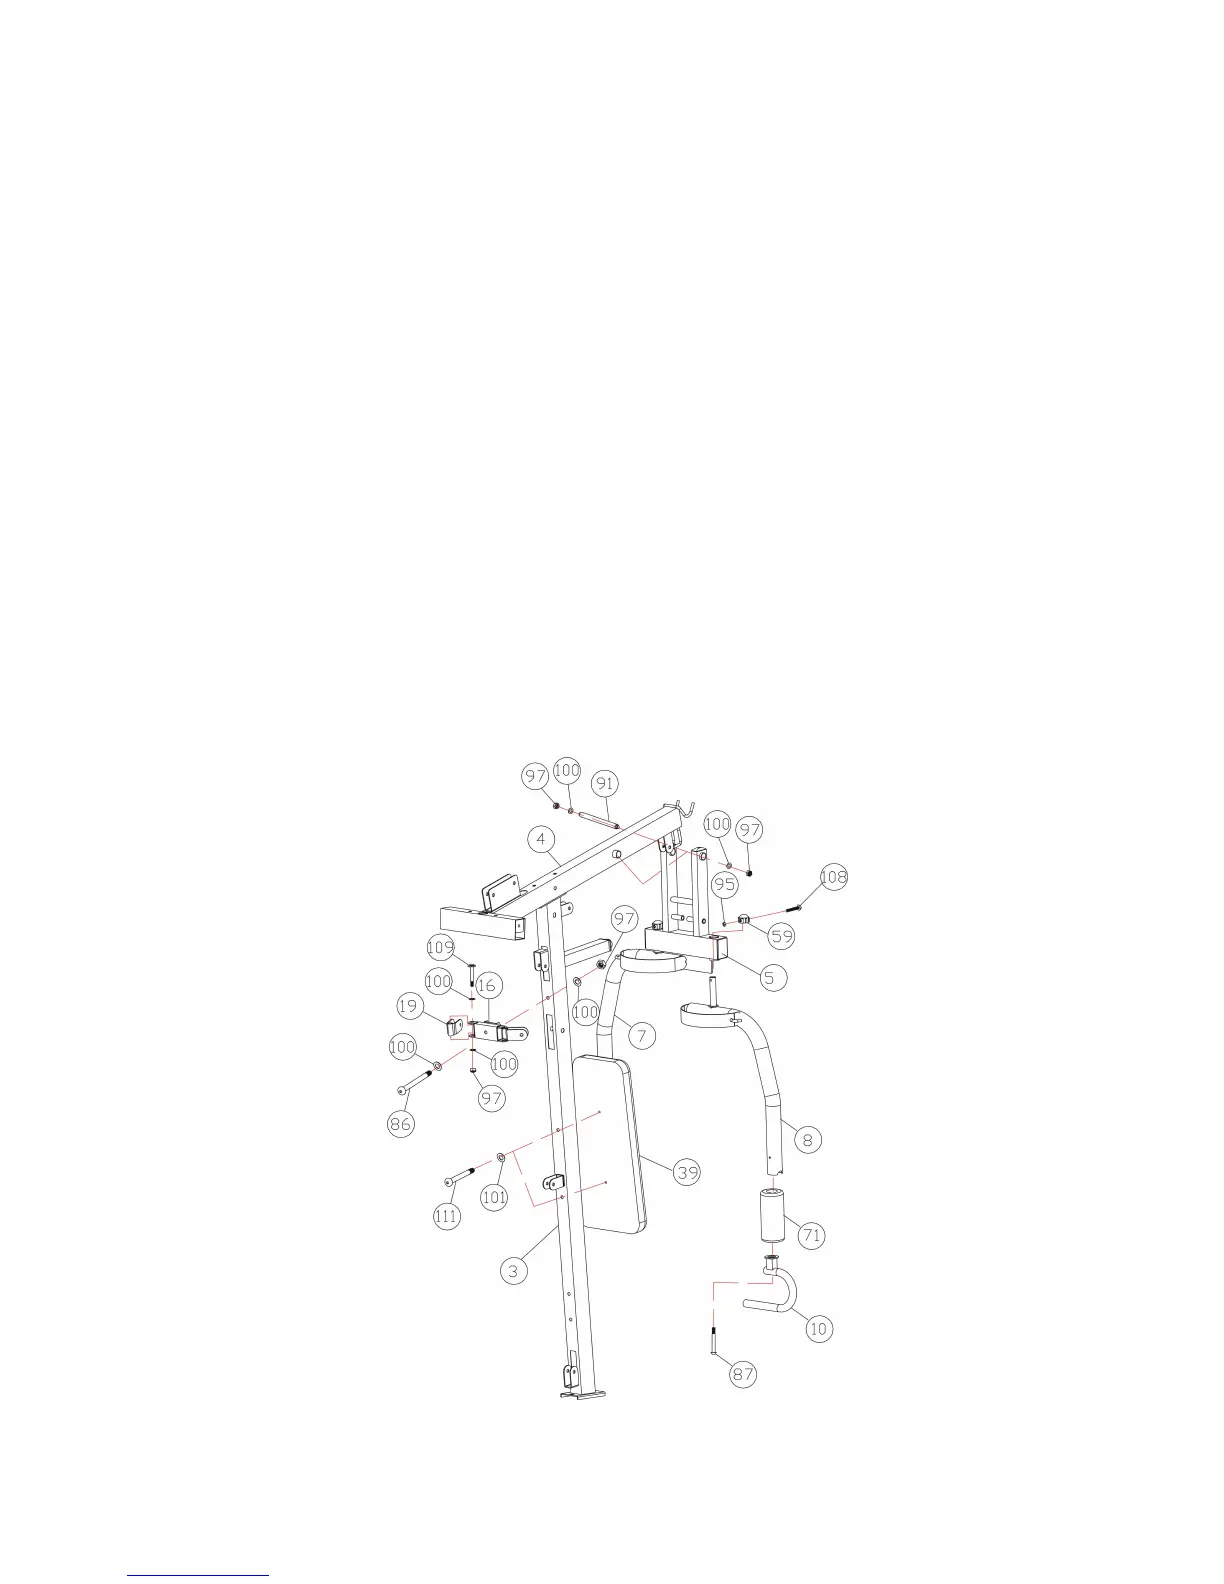
A) Attach the Front Press Frame(5#) to the Upper Frame(4#),Secure them with Front press
Axle(91#), Two Pcs φ10 Washers(100#)and 2PCS M10 Aircraft Nut(97#). Do not
fully tighten the bolts and nuts.
Make sure the Front Press Frame (5#) can swivel freely.
B) Attach the Right Butterfly Frame (8#) to the Front press Frame(5#),and secure them with
1 pc Allen Bolt(108#),1 PC Lock Ring(59#) and 1PC M6 Aircraft Nut(95#). Insert the Foam
Roll (71#)into the Right butterfly(8#) from the bottom to the mid of the right butterfly,
attach the front press handle (10#) to the right Butterfly(8#) and then Secure them with
1PC M10*85 Allen bolt(87#).
C) Repeat the procedure B to install the left butterfly(7#).
D) Attach the Backrest pad (39#) to the Front Vertical frame(3#) and Secure them with
2PCS M8*85 Allen Bolts (111#)and 2PCS φ8 Washers(101#).
E) Attach the Pulley Bracket(16#) to the Front Vertical Frame(3#) and Secure them with one
pc M10*110 Allen Bolt(86#),2pcsφ10 Washers (100#) and one M10 Aircraft
Nut(97#).Attach the Swivel Pulley Bracket (19#) to the pulley bracket(16#) and Secure
them with M10*65 Allen Bolt(109#), two PCSφ10 Washers(100#) and M10 Aircraft
Nut(97#).Install the another Swivel bracket(19) with the same method.