Forcepoint Next Generation Firewall Hardware Guide | Models 330, 331, 335, 335W
The settings for inline interfaces must be identical for all four interfaces. The pair on the appliance and the
interfaces on the two devices connecting to the appliance must have the same speed and duplex settings
configured.
Ethernet port mapping
For appliances that have removable interface modules, Ethernet port names are based on the slot and port
numbers.
The first number in the name represents the slot on the appliance, and the second number represents the port on
the slot. For example, eth2_0 is located on port 0 of slot 2.
• Slot 0 contains the fixed Ethernet ports.
• Slots 1 and higher contain the ports on the interface modules.
The port numbers start at 0 and increase from left to right.
During the initial configuration of the appliance, you map the Ethernet ports to the interface IDs that you defined
in the Management Client.
The NGFW Configuration Wizard shows the mapping between the interface IDs and port names. In the command
line version of the NGFW Configuration Wizard, Interface IDs appear in the ID column and port names appear in
the Name column.
This mapping can change if you replace an interface module. If the new module has more Ethernet ports, the
interface IDs for the new ports start from the next free interface ID number.
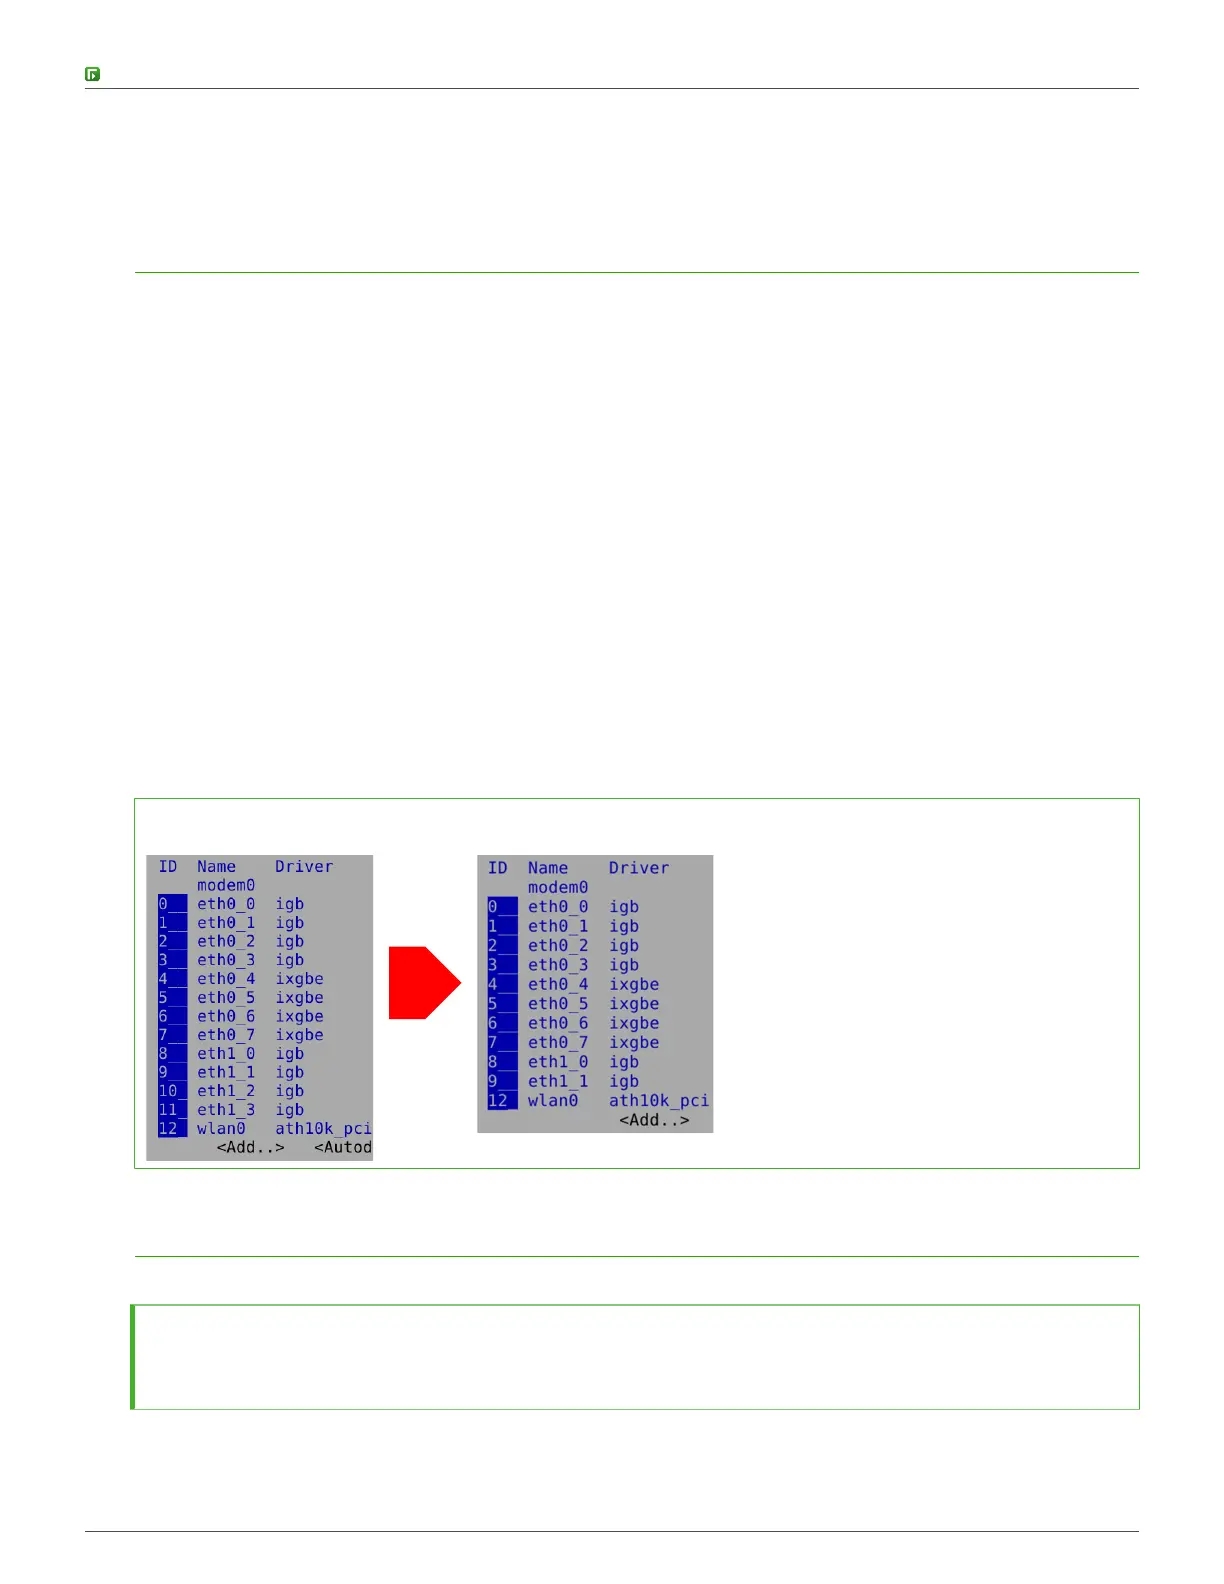
Example: You have thirteen interfaces numbered 0–12, which includes a four-port module installed in slot 1. If
you replace the four-port module installed in slot 1 with a two-port module, eth1_2 with ID 10 and eth1_3 with ID
11 are removed.
Example before and after ID mapping
Attach the antennas
If antennas were provided with the appliance, attach the antennas to the appliance.
Before you begin
Before you attach or replace the antennas, you must turn off the appliance.
14