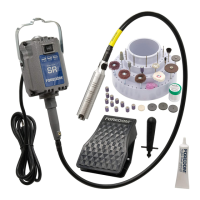
6
Connecting Foot Speed Control
The electrical specifications for your power tool are
listed on the back of the motor. It will show the
proper voltage and currents to use with your power
tool.
Be sure to follow the grounding instructions on
page 3 of this manual while attaching the speed
control to a power outlet.
TX, TXB, LX, and LXB Motors can only be
plugged into TXR or SXR Foot Controls or an
EMX Dial Control on AC Current Only.
Serious
motor damage will result
if other speed con-
trols are used, if more than one control at a
time is used or if motor is directly plugged into
an AC electrical outlet.
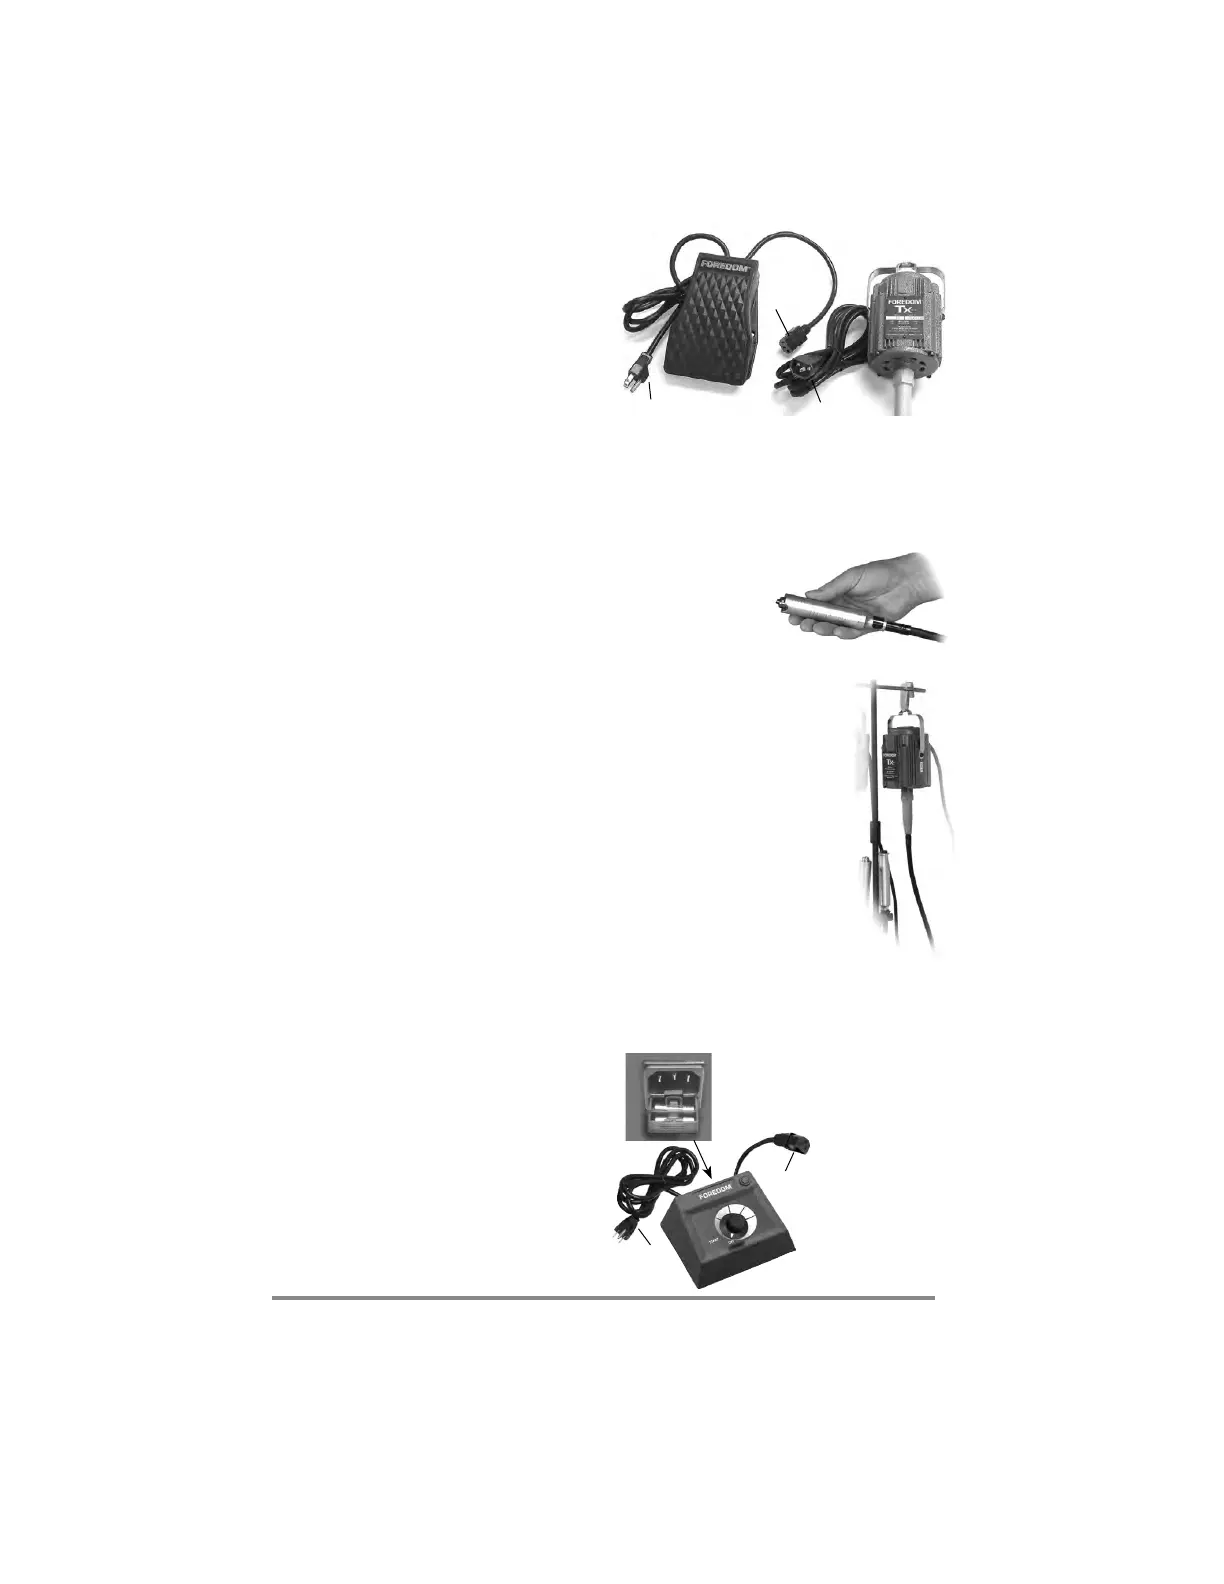
To connect the TXR or SXR foot control to the
motor, insert the shielded 3-prong plug on the
motor power cord into the socket connector on the
shorter power cord on the foot control. With the foot
control in the “off” position (not depressed), plug
the 3-prong plug on the longer power cord from the
foot control into a proper 3-wire power outlet.
When your foot is not pressing the foot control, the
motor should not be running.
It is also important to hold the handpiece securely
before engaging the foot pedal to the “on” posi-
tion. Your foot must maintain steady contact with
the pedal during operation. Holding the handpiece in
your hand, press your foot down with a light touch,
start out slowly and gradually increase the speed.
Finding the right speed for any specific
task is a matter of experimentation
and experience.
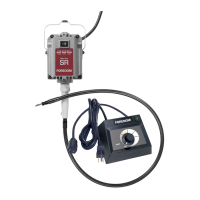
Connecting Table-Top Dial Speed Control
TX, TXB, LX, and LXB motors can also use the EMX
dial speed control on AC current.
1. Plug the shielded 3-prong power cord from the
motor into the the short cord on the dial control.
2. With motor fwd/off/rev switch in the “off” posi-
tion and the dial control indicator also in the “off”
position, connect the detachable power cord to the
dial control outlet on the back and into a proper
3-wire outlet (see page 3).
3. Holding the handpiece in your hand, put the
motor fwd/off/rev switch in the desired “on”
position, begin with a light touch, start out slowly
and gradually increase the speed.
4. Overloading the motor may blow the fuse.
The fuse can be found below the detachable
power cord receptacle.
3-prong plug
connects to
power outlet
socket
connector
for motor plug
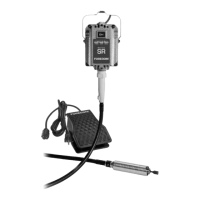
Hanging Motor
Installation
TX and LX Motors should be
hung up about 25″– 40″ above
the work surface and to the
right of the work if you are right
handed or to the left of the work
if you are left handed.
Use a safety clip or hook like
the one shown to prevent the
motor from jumping or twisting
off an open hook at start up or
during use. Properly securing
the motor will help to prevent
injury to the user.
All Foredom motor hangers have a safety clip
(see page 15). If an “open hook” is used be sure
to secure the motor to it with wire or tape.
3-prong plug con-
nects to power outlet
shielded plug connects
to speed control only
Use only TXR, SXR, or EMX speed controls.
Never modify the shielded plug on the
motor cord in order to use it with a different
control or to plug it directly into an AC
electrical power outlet.
Hold the handpiece
securely before
turning the motor
on with either the
foot or dial control.
To minimize repetition, we sometimes drop prefixes associated with Foredom part numbers.
Officially, Motors begin with M. (M.TX), Handpieces with H. (H.30
®
), and Speed Controls with C. (C.TXR).
socket
connector
for motor
plug
Fuse compartment and
spare fuse are located
below detachable power
cord receptacle