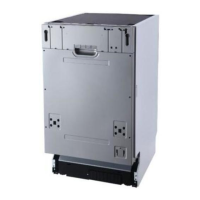
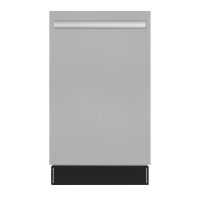
This document serves as an installation manual for a FORTÉ Built-In Dishwasher, model F24DWS650PR. It provides comprehensive instructions for preparing the installation site, connecting the dishwasher to power and water supplies, and ensuring proper drainage. The manual emphasizes safety precautions and outlines the necessary tools and materials for both new installations and replacements.
Function Description
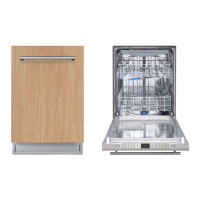
The FORTÉ F24DWS650PR is a built-in dishwasher designed to be integrated into a standard residential kitchen cabinet unit. Its primary function is to clean dishes, and it includes a heating element to heat the water for effective washing. The installation process involves securing the dishwasher within an enclosure, connecting it to a dedicated electrical circuit, and establishing hot water and drain line connections. The design allows for the attachment of a custom decoration door, enabling the appliance to blend seamlessly with existing kitchen cabinetry.
Usage Features
The manual focuses on the installation aspects, which directly impact the dishwasher's usability and performance. Key usage features facilitated by proper installation include:
- Door Balance: The installation instructions detail how to adjust the door springs to ensure the dishwasher door opens and closes smoothly and remains balanced. This is crucial for safe operation and prevents the door from tipping forward unexpectedly, especially before the unit is fully secured. The manual provides guidance for different decoration door weights (e.g., mood decoration door vs. metal decoration door) to achieve optimal balance.
- Leveling: The dishwasher must be perfectly level for proper dish rack operation and wash performance. The manual provides steps for adjusting the four leveling legs individually, ensuring the unit is stable and the racks do not roll forward or backward unintentionally. This attention to leveling prevents operational issues and potential damage to the appliance or dishes.
- Drainage System: The manual outlines two methods for drain installation: an air gap with a waste tee or garbage disposal connection, and a high drain loop to a waste tee or garbage disposal. Proper drain connection, including ensuring the drain hose is not kinked and the total length does not exceed 10 feet (3.01 m), is critical for preventing backflow and ensuring efficient water removal after each wash cycle. The manual also highlights the importance of removing the drain plug if connecting to a garbage disposal to avoid drainage problems.
- Water Supply: The dishwasher requires a hot water supply with a specific pressure range (20-120 psi) and temperature (120°F to 150°F or 49°C to 65°C) for optimal wash performance. The installation instructions guide the user through connecting the 90° water supply elbow to the water valve, ensuring a secure, leak-free connection using Teflon thread seal tape. Flushing the water line before connection is recommended to clear debris, which helps maintain the longevity and efficiency of the dishwasher's water inlet system.
- Electrical Connection: The dishwasher must be connected to a properly grounded 120V, 60 Hz, 15 or 20 ampere branch circuit. The manual provides detailed instructions for both direct wire and power cord methods, emphasizing the importance of proper grounding to reduce the risk of electrical shock. It specifies the use of UL Listed/CSA Approved strain relief and appropriate wire nuts, ensuring a safe and compliant electrical installation.
Maintenance Features
While the manual primarily covers installation, several instructions contribute to the long-term maintenance and troubleshooting of the dishwasher:
- Accessibility for Service: The manual explicitly states that the dishwasher MUST be installed to allow for future removal from the enclosure if service is required. This foresight in installation design simplifies future maintenance and repairs, potentially reducing service costs and inconvenience.
- Leak Prevention: Throughout the installation process, the manual stresses checking for leaks at various connection points, including water supply, drain lines, and around the door. Early detection and correction of leaks prevent water damage to the kitchen and the dishwasher itself, contributing to its durability.
- Clearance and Positioning: Instructions for maintaining adequate clearance around the dishwasher and ensuring it is not pinched or in contact with door springs or other components help prevent wear and tear. Proper positioning also ensures that the tub insulation blanket, if equipped, is not bunched up or interfering with door springs, which could affect the dishwasher's efficiency and lifespan.
- Pre-Test Check: A comprehensive pre-test checklist is provided to identify and correct potential issues before the dishwasher is put into regular use. This includes verifying door balance, leveling, secure wiring, proper drain and water line connections, and water temperature. This proactive approach helps prevent common operational problems and ensures the dishwasher functions correctly from the start, minimizing the need for early maintenance or service calls.
- Toekick Installation: The final step of replacing the toekick is not just aesthetic; it also helps protect the internal components of the dishwasher from dust and debris, contributing to its overall cleanliness and operational integrity. The instruction to align the toekick correctly with the junction box ensures proper fit and protection.
In summary, this installation manual for the FORTÉ F24DWS650PR dishwasher is meticulously designed to guide installers through a safe and effective setup process. By adhering to these instructions, users can ensure their dishwasher operates efficiently, reliably, and with minimal maintenance issues over its lifespan.