w
w
w
w
w
w
.
.
f
f
o
o
s
s
c
c
a
a
m
m
.
.
c
c
o
o
m
m
29
S
S
h
h
e
e
n
n
z
z
h
h
e
e
n
n
F
F
o
o
s
s
c
c
a
a
m
m
I
I
n
n
t
t
e
e
l
l
l
l
i
i
g
g
e
e
n
n
t
t
T
T
e
e
c
c
h
h
n
n
o
o
l
l
o
o
g
g
y
y
C
C
o
o
.
.
,
,
L
L
i
i
m
m
i
i
t
t
e
e
d
d
T
T
e
e
l
l
:
:
8
8
6
6
7
7
5
5
5
5
2
2
6
6
7
7
4
4
5
5
6
6
6
6
8
8
F
F
a
a
x
x
:
:
8
8
6
6
7
7
5
5
5
5
2
2
6
6
7
7
4
4
5
5
1
1
6
6
8
8
29
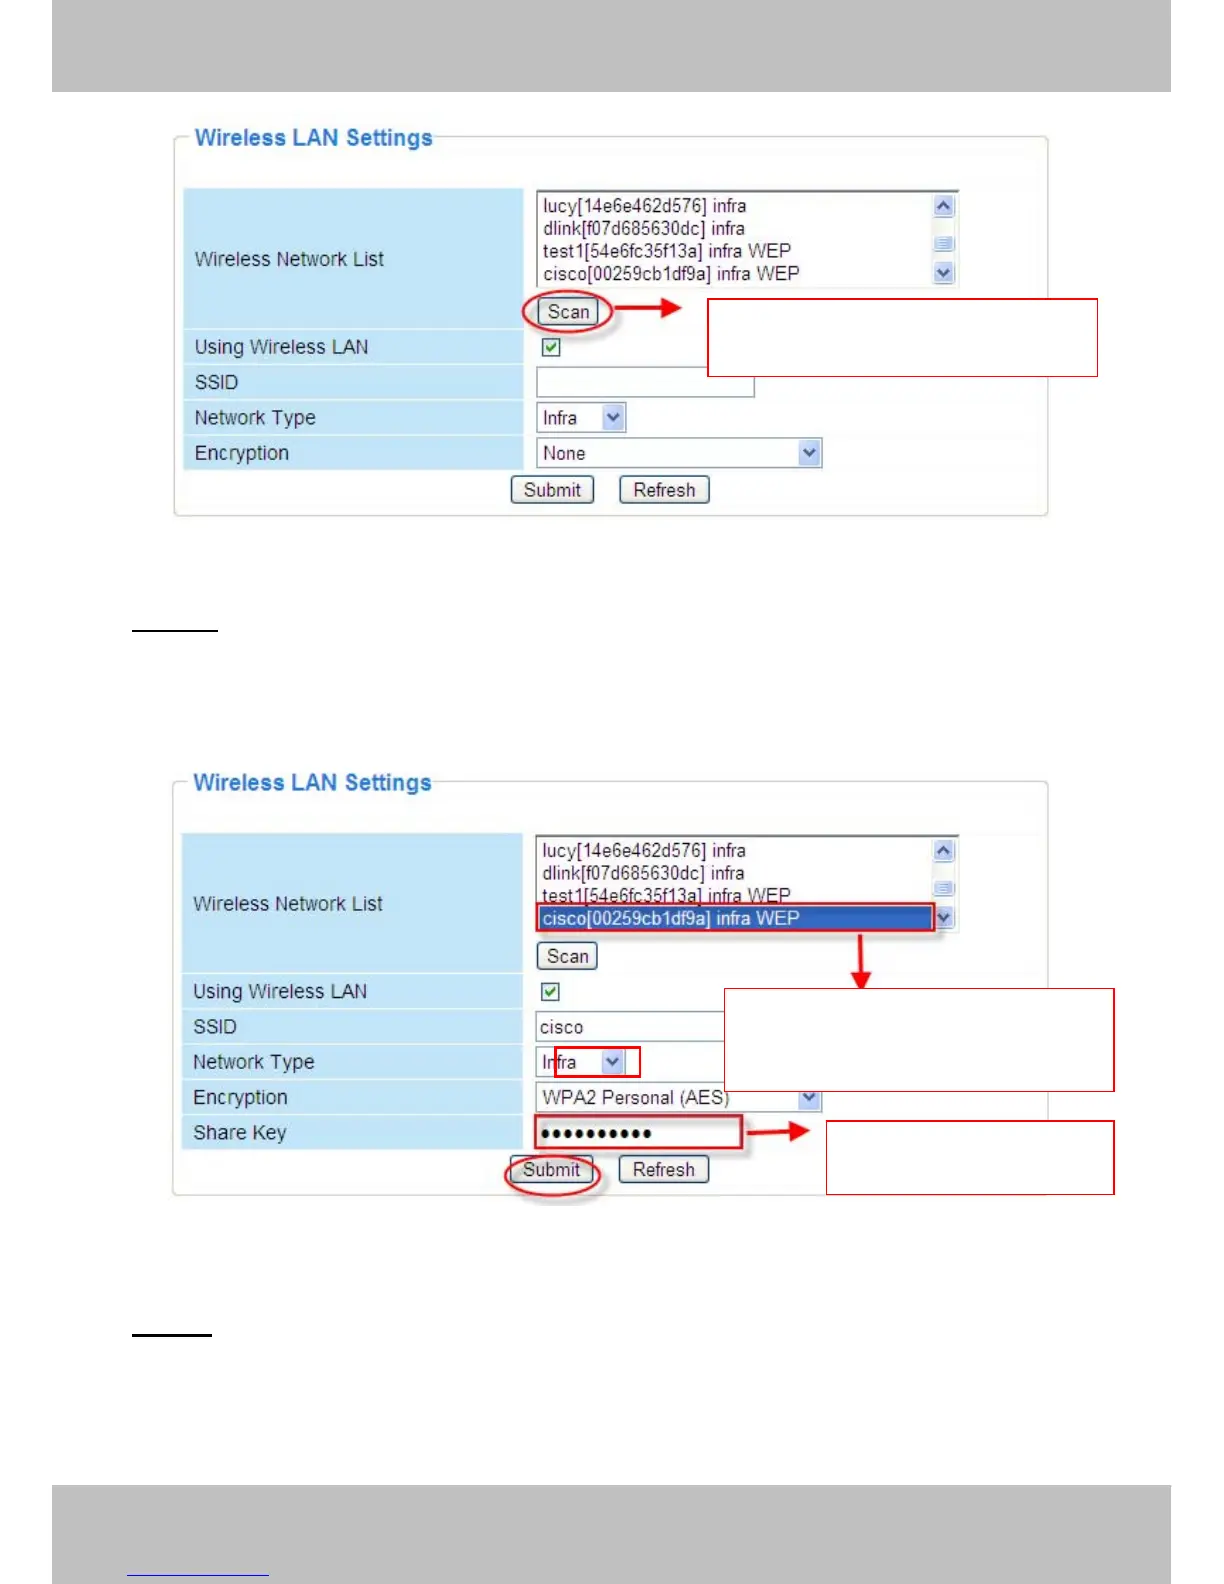
Figure 3.19
Step 02) Click the SSID of your router in the list, the corresponding information (SSID &
Encryption) will be filled in the following boxes automatically.
You will only need to fill in the share key. Make sure that SSID, Encryption and share key you
filled in for the camera are exactly the same for your router.
Figure 3.20
Step 03) Please click on the Submit button after all settings have been entered,the camera will
reboot. After the camera has completed the reboot process, wait 10 seconds and disconnect the
network cable.
The LAN IP address will disappear on the window of IP Camera Tool when the camera gets
restarted. Just wait for around 1 minute, the camera will get wireless connection, and the LAN IP
Click Scan Button to search WIFI
device
Click the SSID of router and SSID,
Encryption will be filled in the
following box automatically
Enter the same share key
with your router