9
3. The first step is selecting the sound you wish to use. Use “Sound Up” or “Sound Down” buttons
to navigate through your sound list and locate the desired sound. Once found, push the “Select”
button to set the sound.
4. Next, select the volume level that you wish to use for this favorite. This is done by using the
“Volume Up” or “Volume Down” arrow button. After you have found your desired volume level,
push the “Select” button to set the volume level. This will complete setting up your Favorite.
5. You will notice that the slot you assigned this favorite to now displays the sound name and the
volume level for reference.
Changing/Overwriting Existing Favorite
1. Select the “Favorites” menu item on the TX433.
2. Position the highlight bar on the favorite that you wish to change.
3. Push and hold the “Select” button for about 3-4 seconds. Repeat the steps for Creating a New
Favorite.
Using a Favorite
1. Select the “Favorites” menu item on the TX433.
2. Position the highlight bar on the preset that you wish to activate.
3. Push the “Select” button a single time to begin playback. The X1 will begin playing the selected
sound at the preset volume level.
Auxiliary Jack Function
The AUX jack is provided primarily for the remote control of FOXPRO decoys, and may be suitable for
controlling other similar devices. It is NOT intended for the direct control of motors, flashlights, or other
devices requiring the internal AUX jack circuitry to switch more than 50 milliamps. The jack tip polarity is
positive. Do not exceed 15 volts. You are urged to seek help from a knowledgeable professional before
connecting any unapproved device to the jack. Keep in mind that any damage to the FOXPRO caller as a
result of improper use of the AUX jack is not covered by the warranty, nor will FOXPRO be liable for damage
to any connected devices.
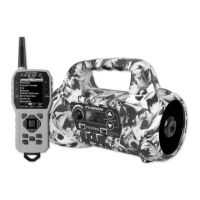
Using External Speakers
The X1 is equipped with an external speaker jack which allows you to connect an additional speaker. By
connecting a larger and more efficient external speaker to the X1, the volume level can be increased
significantly. You can find a complete selection of external speakers on the FOXPRO website. The external
speaker jack on your X1 accepts a standard 3.5mm plug. When selecting an external speaker, be sure to use
one with an impedance rating of 8-ohms. Be sure the X1 is turned OFF before connecting an external
speaker! To connect an external speaker, plug the connector of the external speaker into the external
speaker jack on the back of the X1.
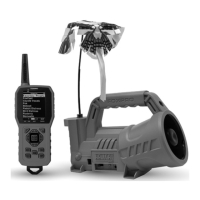
Picatinny Rail Mount/IR Port
The X1 includes a picatinny rail mount located on top of the caller (rail not included). In order to install the
rail, remove the 2 set screws that are included with the caller. Mount the rail so the holes line up and re-
install the screws. You can now attach accessories that utilize a picatinny rail.
Beside the mount, you will see a small lens. This is the IR port for use with the X-Decoy (sold separately). If
you have an X-Decoy attached to your caller (see decoy’s instructions for mounting), when you press the
remote button to control the auxiliary function, this port will send a signal to the X-Decoy to start and stop
the motion of the decoy, eliminating the need to connect the decoy to the caller with an external cable.
Note: Early versions of the X1 do not have an IR Port and require the use of an Auxiliary cable to connect
to the X-Decoy
Tripod Mount
The X1 features a universal tripod mount (tripod not included) located on the bottom of the longer leg. This
mount will work with most tripods using the universal-type tripod connector. Using a tripod can be helpful