aPbox Manual
19
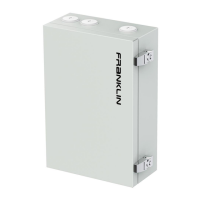
Step 3 Set the nut flush with the top of the sleeve anchor. Then, use a hammer to drive the
sleeve anchor into the hole in the base material until the washer and nut are tight
against the fixture. Use a 7/16” wrench to turn the nut in the counterclockwise
direction, and remove the nut, spring washer, and flat washer from the sleeve anchor.
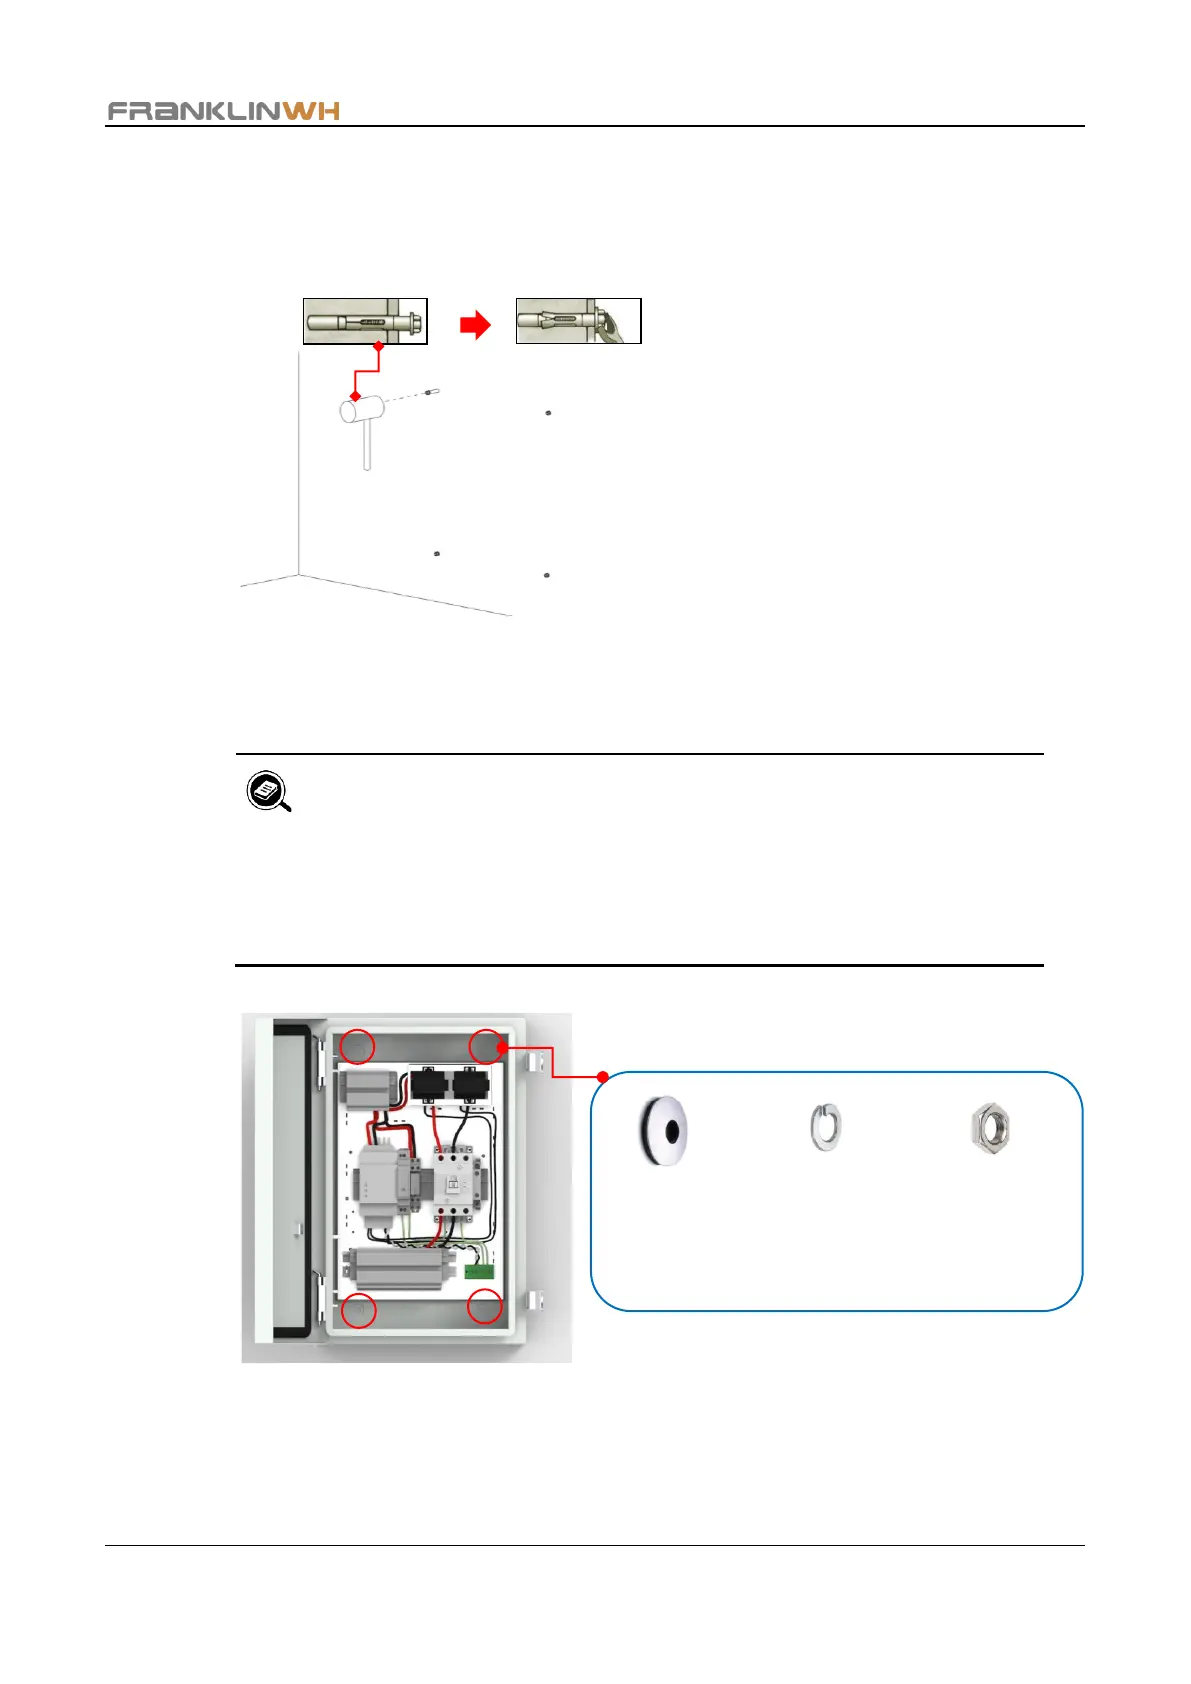
Step 4 Fasten the aPbox to the wall using the 1/4” water-tight washers (from the accessary
bag), spring washers, and nuts in sequence. Check that the tightening torque is 4.42
foot pounds.
• Make sure that there is at least 0.24 in. (6mm) clearance between
the aPbox unit and the wall in accordance with the NEC.
• The following figure shows mounting of the RC65 as an example.
The RM65 shares the same mounting positions and procedures.