WLA200 Rev140407
14
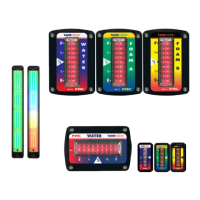
Install MaxVision LED Tank Display
The LED display is waterproof to allow for exibility in the mounting location.
Ensure that the light is mounted with the rear against a at surface.
Mount the display so that the raised MaxVision logo on the lens and the drain notch
on the rubber gasket are at the bottom and is mounted with the rear against a at surface.
The wires can be run through any one of the three holes in the rubber gasket.
Note: Before drilling holes place the light in position to check for t. Ensure
that the display clears all obstructions.
1. Measure and mark the mounting hole locations and through hole for the wiring.
2. Drill the two (2) mounting holes for #10 screws and a wire feed thru hole. Any
of the three locations (holes) in the rubber boot can be used for the wires.
Note: Ensure that the terminating resistor is installed on the datalink wires
when required.
3. Connect the wiring and secure the light with two (2) screws. (Refer to Wiring
Section.)
Terminating Resistor Notes
The datalink requires two terminating resistors, a TankVision display always has one.
One TankVision with one or two LED displays: Install resistor at farthest light.
Two TankVision displays: Do not install terminating resistor.
If the TankVision is used with a TurboFoam system: Do not install terminating resistor.
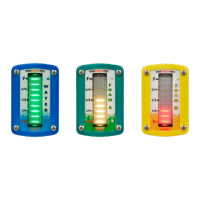
Program MaxVision LED Tank Display
The display can be programmed to have a solid color that changes at each 1/4
tank increment or to have four colors that show each 1/4 tank increment. It can also
be programmed for day brightness and night brightness
Hold a magnet over the sensor for ve seconds. Two middle rows of LEDs come on.
Swipe to select the program to be change, a row of LEDs come on with each swipe.
1 row on - change between solid color or multi color display.
2 rows on - set daytime brightness.
3 rows on - set nighttime brightness.
Wait 5 seconds to enter the program.
Swipe the magnet to change settings.
For #1 each swipe toggles between solid or multi color display.
For #2 and #3 each swipe changes the LEDs brightness;
Ten levels that are stepped through and then repeated.
Hold the magnet over the sensor for ve seconds to load the new setting. The
display blinks three times to conrm setting is loaded.
 Loading...