11
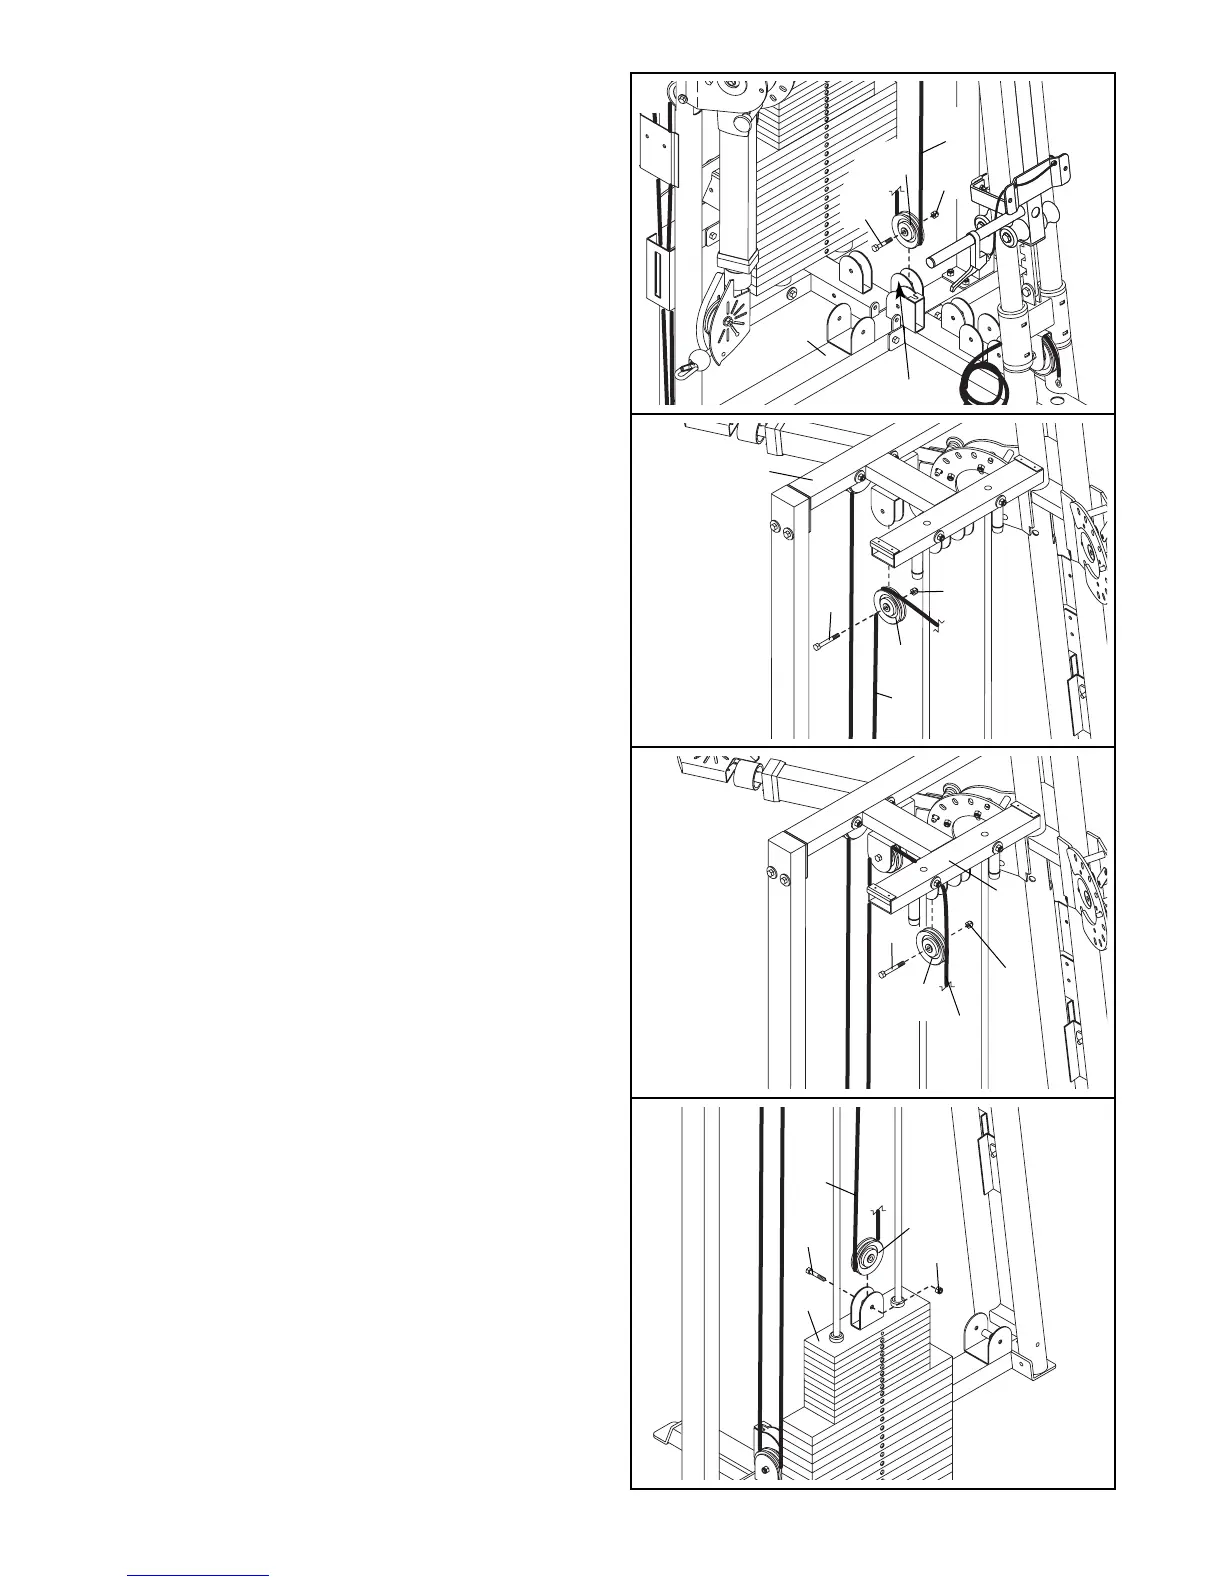
16. Note: For clarity, the following three steps
show the system from the reverse side.
Wrap the High Cable (63) over a 3 1/2” Pulley
(56). Attach the Pulley to the indicated bracket on
the Top Frame (5) with an M10 x 46mm Button
Bolt (76) and an M10 Nylon Locknut (101).
17. Wrap the High Cable (63) over a 3 1/2” Pulley
(56). Attach the Pulley to the indicated bracket on
the Top Frame (5) with an M10 x 46mm Button
Bolt (76) and an M10 Nylon Locknut (101).
15. Wrap the High Cable (63) under a 3 1/2” Pulley
(56). Attach the Pulley to the indicated bracket on
the Base (1) with an M10 x 46mm Button Bolt
(76) and an M10 Nylon Locknut (101).
15
16
17
5
76
101
56
56
101
63
63
76
5
101
Bracket
76
56
63
18. Wrap the High Cable (63) under a 3 1/2” Pulley
(56) in the direction shown. Attach the Pulley to
the bracket on the Top Weight (27) with an M10 x
46mm Button Bolt (76) and an M10 Nylon
Locknut (101).
18
63
56
101
76
27
1



 To Next Page