12
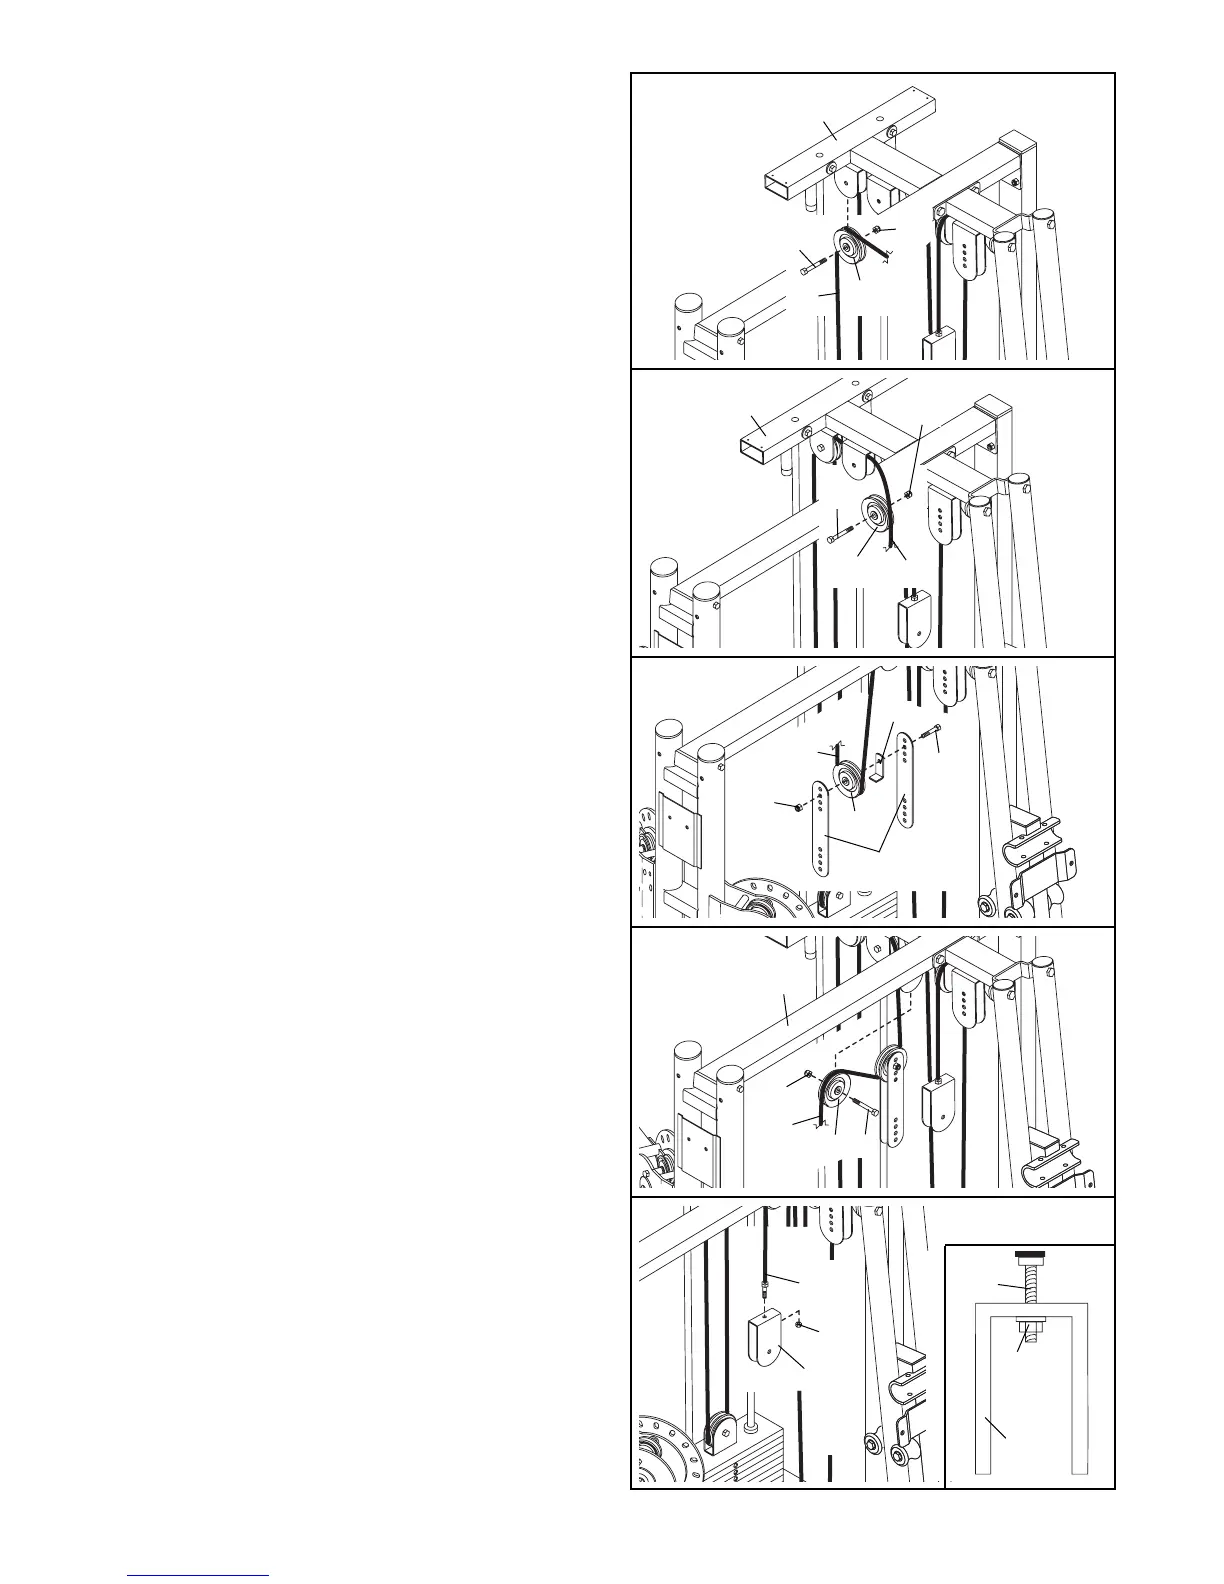
20. Wrap the High Cable (63) over a 3 1/2” Pulley
(56). Attach the Pulley to the indicated bracket on
the Top Frame (5) with an M10 x 46mm Button
Bolt (76) and an M10 Nylon Locknut (101).
21. Wrap the High Cable (63) under a 3 1/2” Pulley
(56). Attach the Pulley and a Cable Trap (105)
between the second set of holes from the top of
the two Long Pulley Plates (59) with an M10 x
46mm Button Bolt (76) and an M10 Nylon
Locknut (101). Make sure the Cable Trap is
turned to hold the Cable in the groove of the
Pulley.
22. Wrap the High Cable (63) over a 3 1/2” Pulley
(56). Attach the Pulley to the indicated bracket on
the Top Frame (5) with an M10 x 46mm Button
Bolt (76) and an M10 Nylon Locknut (101).
19. Wrap the High Cable (63) over a 3 1/2” Pulley
(56). Attach the Pulley to the indicated bracket on
the Top Frame (5) with an M10 x 46mm Button
Bolt (76) and an M10 Nylon Locknut (101).
19
5
76
63
56
20
5
21
22
101
59
56
63
105
76
5
63
76
56
101
76
101
63
56
23. Attach an end of the High Cable (63) to the other
“U”-bracket (62) with an M6 Nylon Locknut (103).
Thread the Locknut onto the end of the Cable
so that two threads show past the Locknut
(see the inset drawing).
23
62
103
63
63
62
103
101



 To Next Page