14
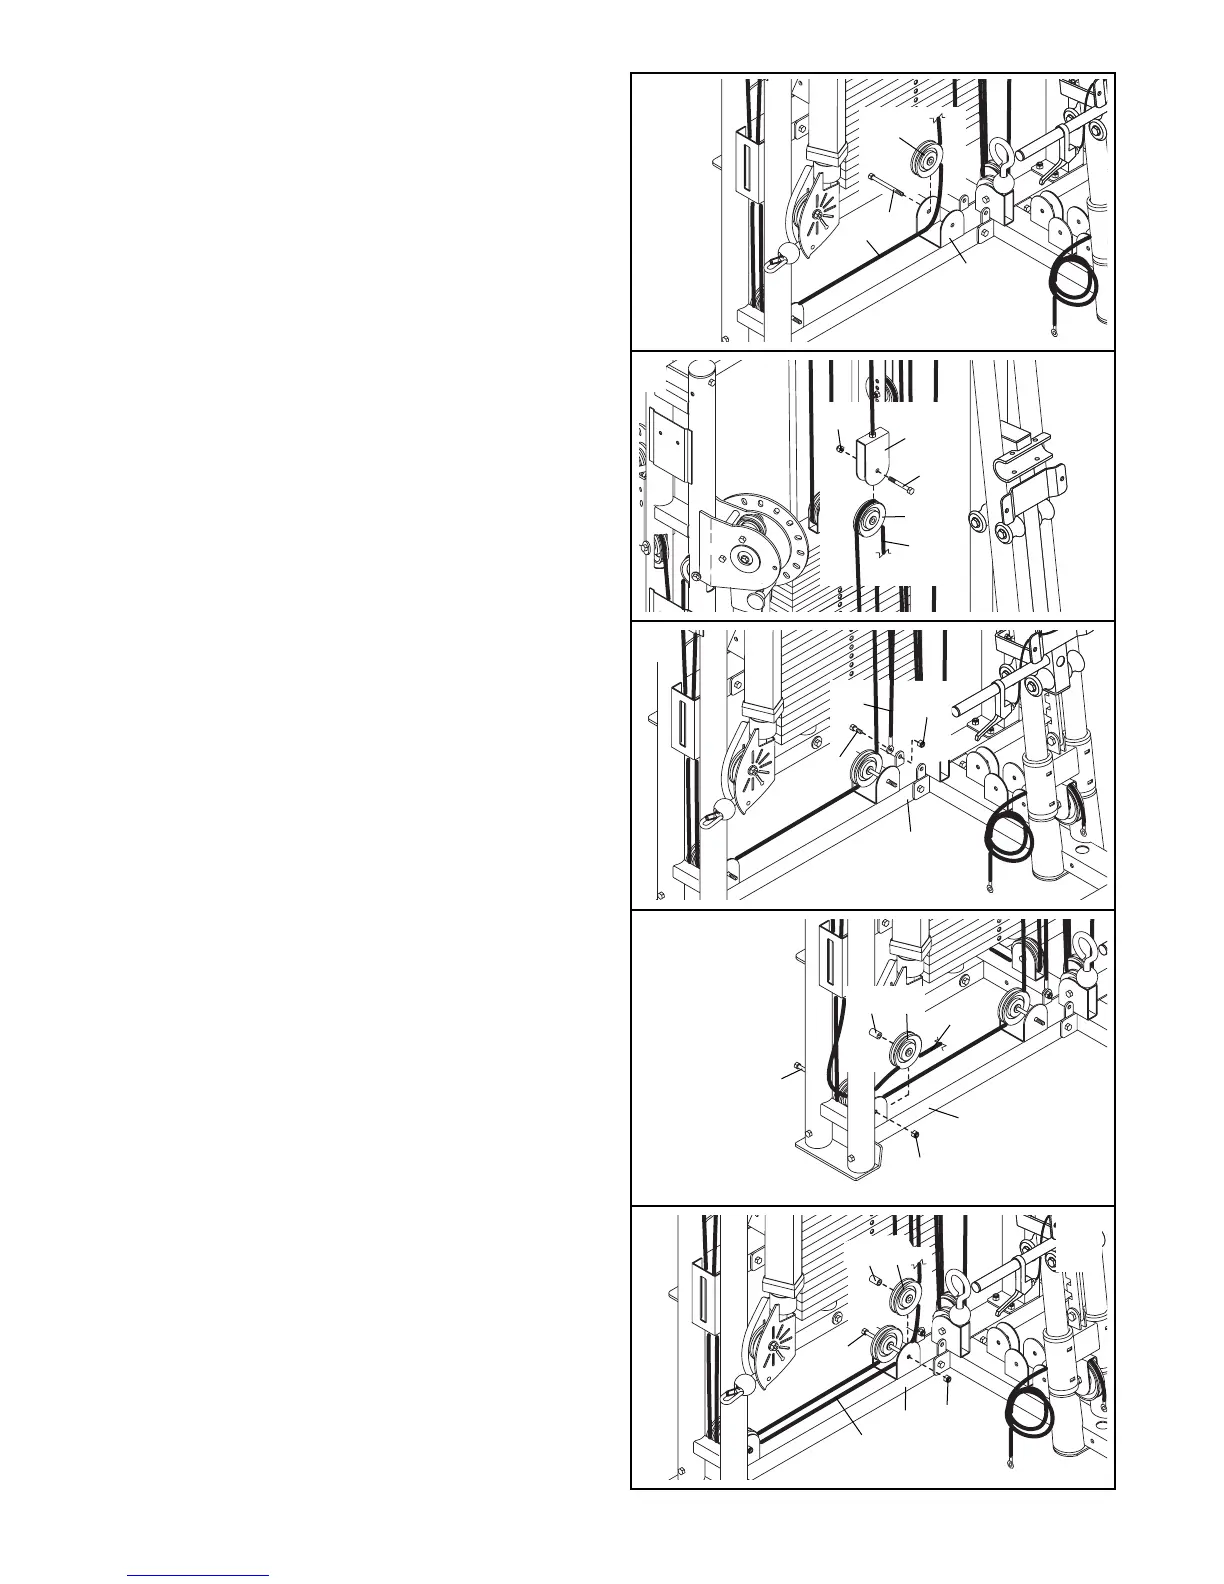
29. Route the right Press Cable (41) under a 3 1/2”
Pulley (56). Attach the Pulley to the Base (1) with
an M10 x 96mm Button Bolt (77). Do not thread
a locknut onto the Bolt yet.
31. Attach the end of the right Press Cable (41) to the
indicated bracket on the Base (1) with an M8 x
19mm Button Shoulder Bolt (85) and an M8
Nylon Locknut (102).
30. Wrap the Press Cable (41) over a 3 1/2” Pulley
(56). Attach the Pulley to the right “U”-bracket
(62) with an M10 x 46mm Button Bolt (76) and an
M10 Nylon Locknut (101).
29
30
31
77
41
56
56
1
41
76
62
101
102
1
41
32
41
56
68
77
1
101
32. Locate the left Press Cable (41). Route the
Cable under a 3 1/2” Pulley (56). Attach a 25mm
Spacer (68) and the Pulley to the Base (1) with
the M10 x 96mm Button Bolt (77) used in step 28,
and an M10 Nylon Locknut (101).
33. Route the Press Cable (41) under a 3 1/2” Pulley
(56). Attach a 25mm Spacer (68) and the Pulley
to the Base (1) with the M10 x 96mm Button Bolt
(77) used in step 29, and an M10 Nylon Locknut
(101).
33
41
77
1
101
85
68
56



 To Next Page