3
Step
1
2
D
E
F
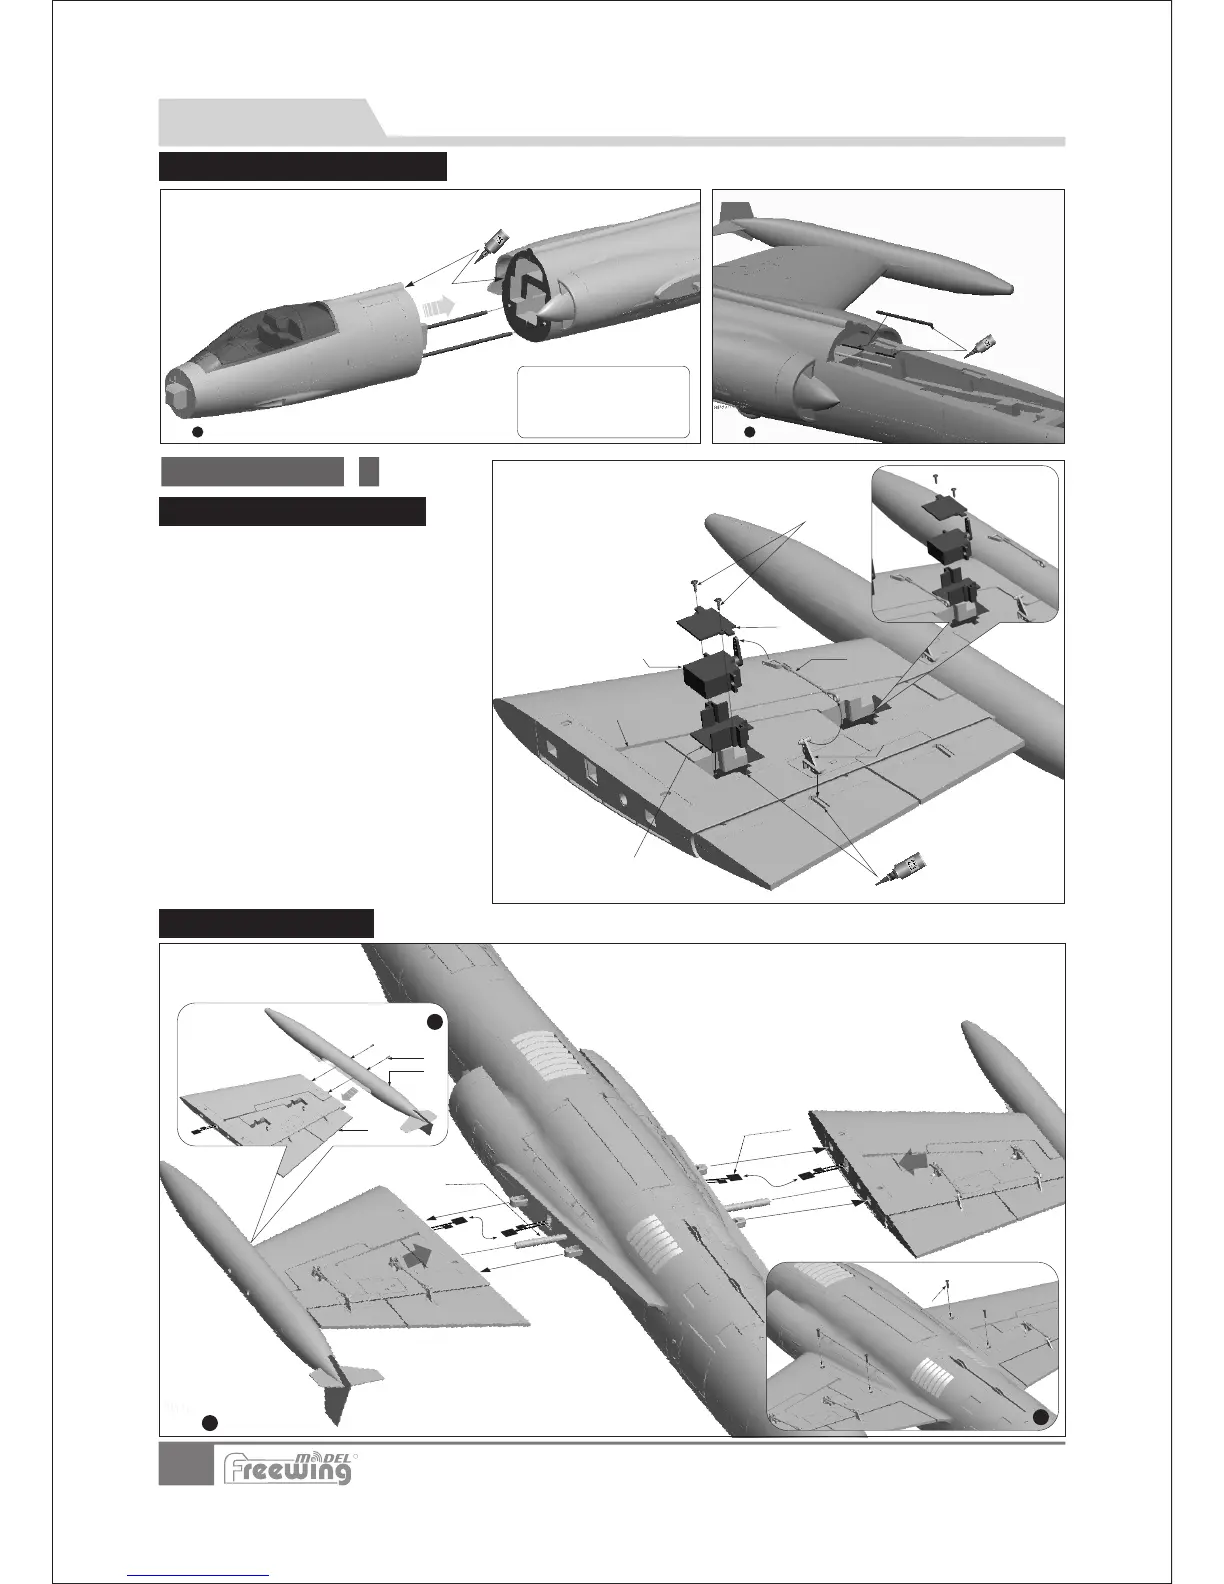
Assembly
Main Wing
Main Wing Servo Installation
1.
2.
3.
Use a servo tester or radio to center
the servo arm.
Use glue to anchor the 17g servo
box (C) and control horn(D)to the
main wing.
Place the 17g servo into the servo
box(C),and press the servo cable into
the servo cable trough (F), position the
17g servo cover(B) and use 2
screws(A), to secure the servo cover.
Connect pushrod (E) to the Servo Arm
and adjust its length so the control
surface is in the neutral position. Then
lock the clevis over the ball link on the
control horn (D)
A-Screw
B-Servo cover
C-Servo box
D-Horn
E-Pushrod
F-Servo cable trough
(PWA2x8mm 4pcs)
Servo
Step
Step
Main Wing Installation
EN
A
B
D
E
C
F
Note:There is EPO glue included
with the kit. . The glue should be
spread evenly then let it set for 90
seconds before joining the parts for
best glue strength.
Use glue and the Carbon rods to join the front and rear
fuselage sections. Carbon rods:Ø6x180mm 2pcs
1 2
Step Step
Carbon rods:Ø4x100mm 2pcs
Glue the carbon rods into the trough.
R
Front/Rear Fuselage Assembly
4.
1. Connect the servo cables to the fuselage extension cable.
2. Slide the main wings onto the fuselage.
3. Use 4 screws to secure the main wings.
A- Screws (PA3x8mm 4pcs)
B- Fuel tank
C- Main wing
D- Carbon rod (08x300 mm)
E- Servo/LED light extension cable
F- Screws (PM3x14mm 4 pcs)