Main
W
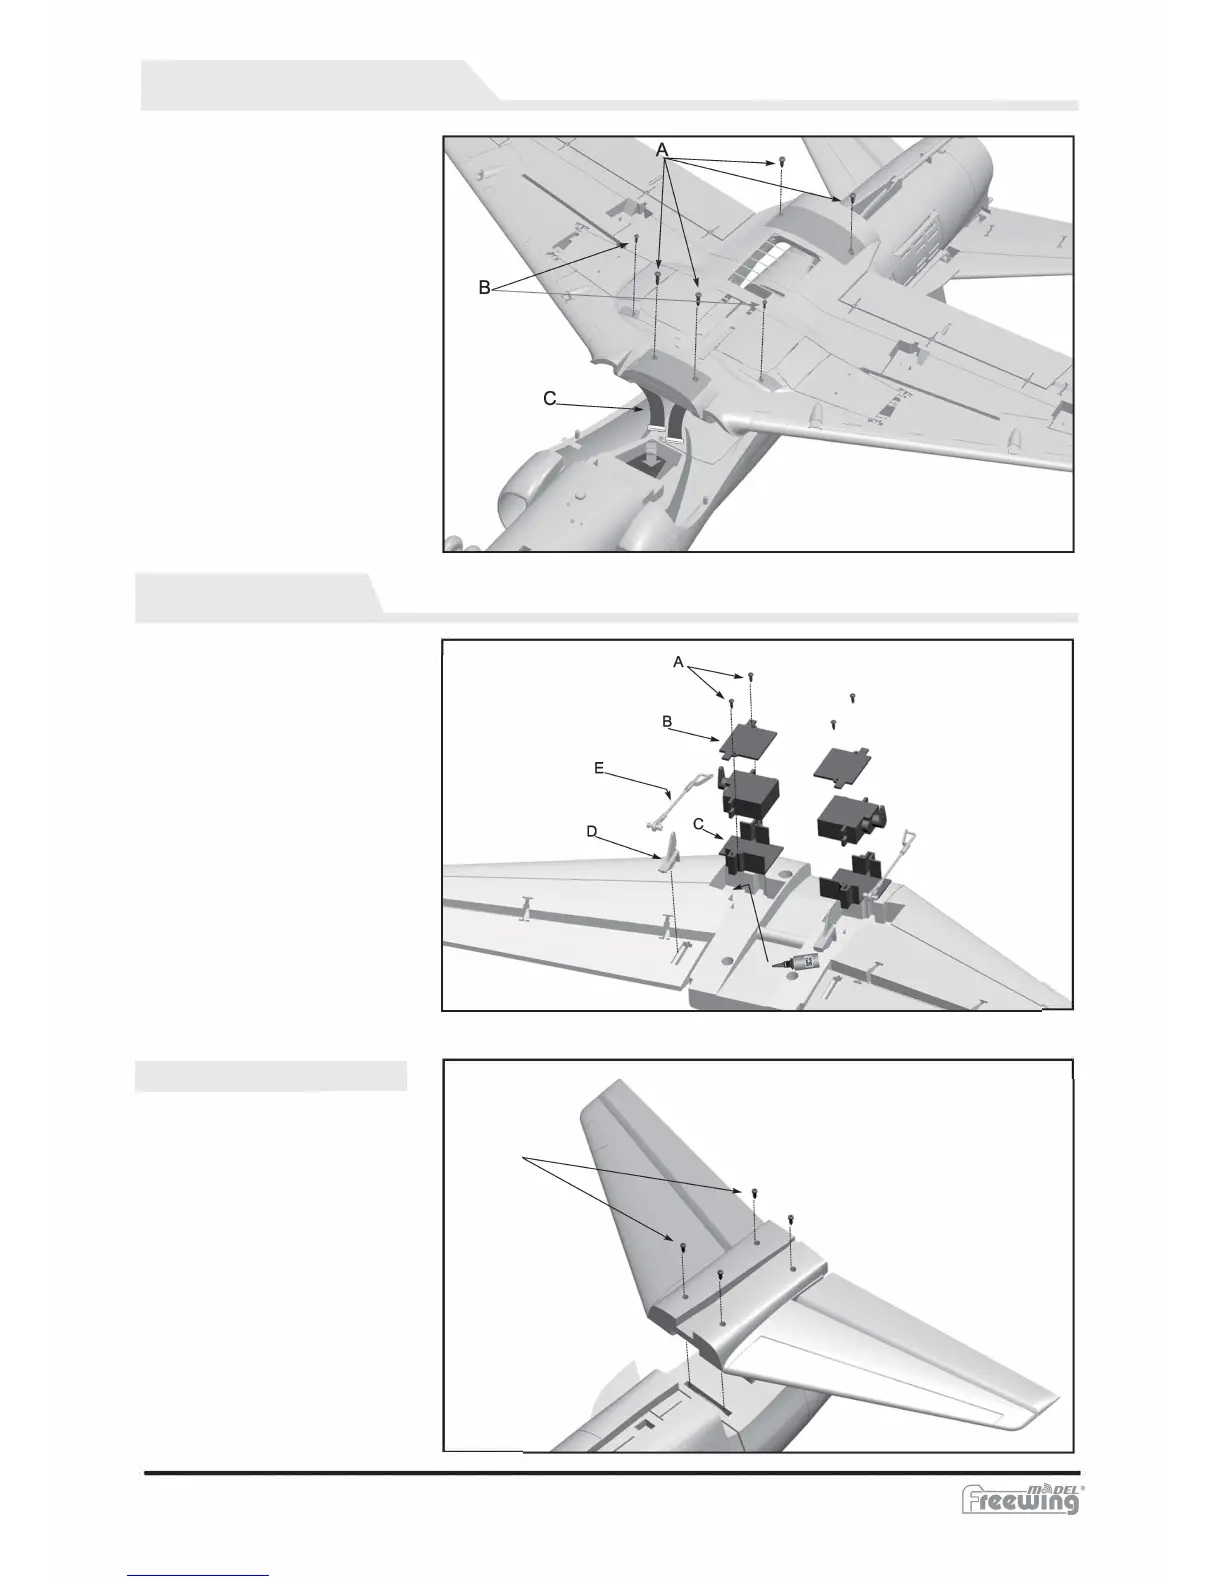
ing Installation
A- Screws (PA4x10mm 4pcs)
B - Screws (PA2.6x10mm 2pcs)
C - Main wing ribbon cables.
A-Screws (PWA1.7x5mm 2pcs)
B - 17g servo cover
C - 17g servo box
D - Elevator control horn
E - Elevator push rod
Elevator Installation
A-Screws (PA2.6x1Qmm 4pcs)
1.Use 4 "Screws (A)" to attach the
elevator to the fuselage.
T-45 Goshawk
EN
A
-4-
Refer to the photo on the right
1. Insert the "Main wing ribbon cables (C)"
into the fuselage battery compartment.
2. Use the "Screws(A)"and "Screws(B)" to
secure the main wing to the fuselage.
3. Plug the "Main wing ribbon
cables(C)"into the integrated circuit
module in the battery compartment.
Elevator Assembly
1. Use a servo tester or radio to center
the servo.
2. Use glue to attach the "17g servo
box(C)" to the horizontal stabilizer
and the "Elevator control horn(D)" to
the elevator.
3. Place the servo into the "17g servo
box(C)", then put the "17g servo
cover(B)" in place and secure it using
"Screws(A)".
4. Feed the open end of the pushrod
into the servo arm and lock it into
place with the provided lock.
5. Snap the clevis onto the ball link in
the "Elevator control horn(D)