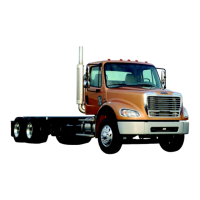
6. Check the brake pedal rollers for signs of wear
or cracks. Replace them if necessary.
7. If the rollers are replaced, replace the roller pin,
then install a new cotter pin and bend it 90 de-
grees, and apply torque seal (OPG F900 White)
to the cotter pin.
8. Remove the plunger from the valve. Using alco-
hol, clean the existing grease from the plunger.
Check the plunger for signs of wear or cracks.
Replace it if necessary.
9. Lubricate the plunger with synthetic grease of
NLGI Grade 1.5, such as 76 Triton synthetic EP
Grease (FTL Sped 48-25432-000).
10. Insert the plunger in the valve.
11. Install the brake pedal and the pivot pin.
12. Install a new roll pin, and apply Torque Seal
(OPG F900 White) to the roll pin.
13. Install the foot control valve assembly. See Sec-
tion 42.03, Subject 110 of the Century Class
Trucks Workshop Manual for instructions.
14. Test the brakes before returning the vehicle to
service.
42–10 Brake Inspection
IMPORTANT: This procedure should be per-
formed prior to lubrication of the brake compo-
nents.
Parking Brake Operational Check
CAUTION
Perform the following check in a clear safe area. If
the parking brakes fail to hold the vehicle, per-
sonal injury or property damage may result.
1. With the engine running, and air pressure at cut-
out pressure, set the parking brake.
2. Put the vehicle in the lowest gear and gently at-
tempt to move it forward. The vehicle should not
move. If the vehicle moves, the parking brakes
are not operating correctly and must be repaired
before the vehicle is returned to service. See
Group 42 of the Century Class Trucks Workshop
Manual for repair procedures.
f420012a
10/20/93
1
2
3
4
5
6
7
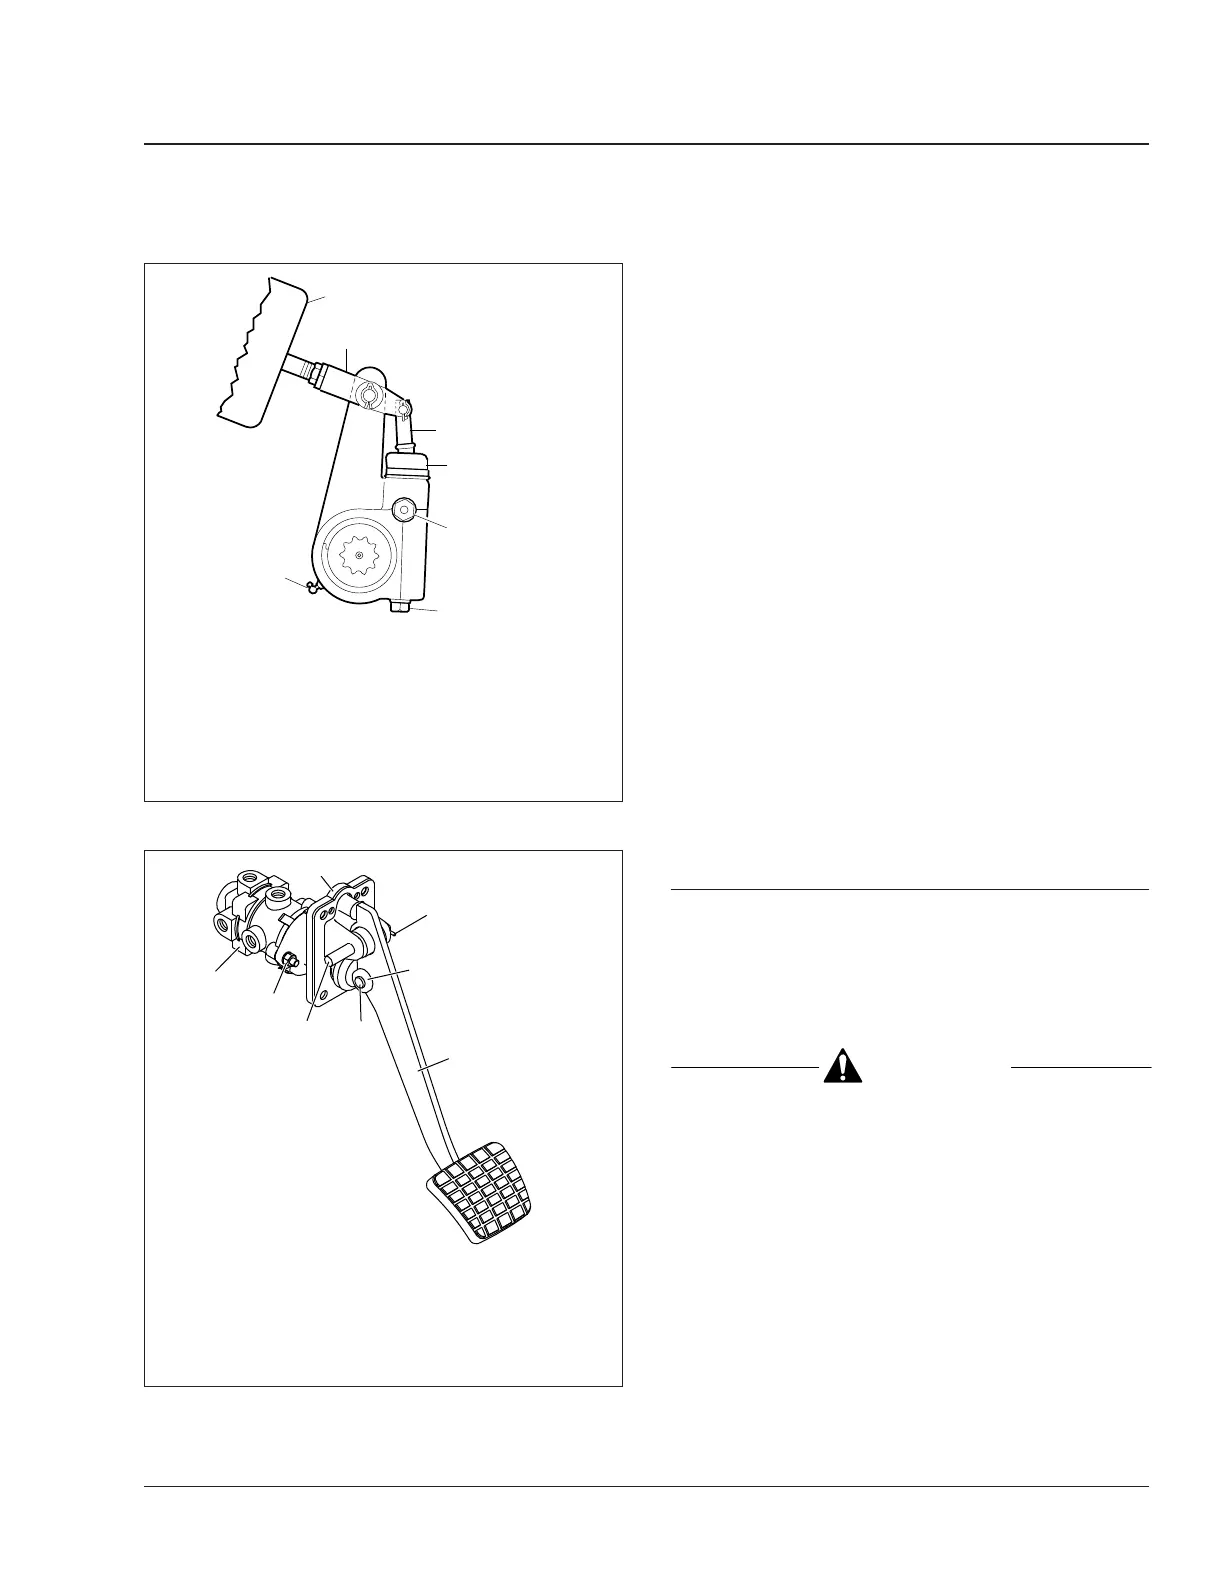
1. Brake Chamber
2. Clevis
3. Actuator Rod
4. Boot
5. Pressure-Relief Capscrew, Gasket, Pawl Spring,
and Pawl
6. Manual Adjusting Nut
7. Grease Fitting (or plug)
Fig. 9, Meritor Automatic Slack Adjuster
f43040511/01/2016
1
2
3
4
6
7
8
5
1. Foot Control Valve,
E-6
2. Mounting Plate
3. Nut and Washer
4. Pivot Pin
5. Roll Pin
6. Roller
7. Roller Pin
8. Pedal
Fig. 10, Brake Pedal and Valve Assembly
Brakes 42
Century Class Trucks Maintenance Manual, January 2016 42/9



 To Next Page