31–03 Frame Fastener Torque
Check
Frame brackets and components secured with Huck-
bolt® fasteners do not require a torque check, how-
ever, they should be inspected for damage. Frame
brackets and components secured with conventional
bolts and nuts are to be checked at initial mainte-
nance (IM). See
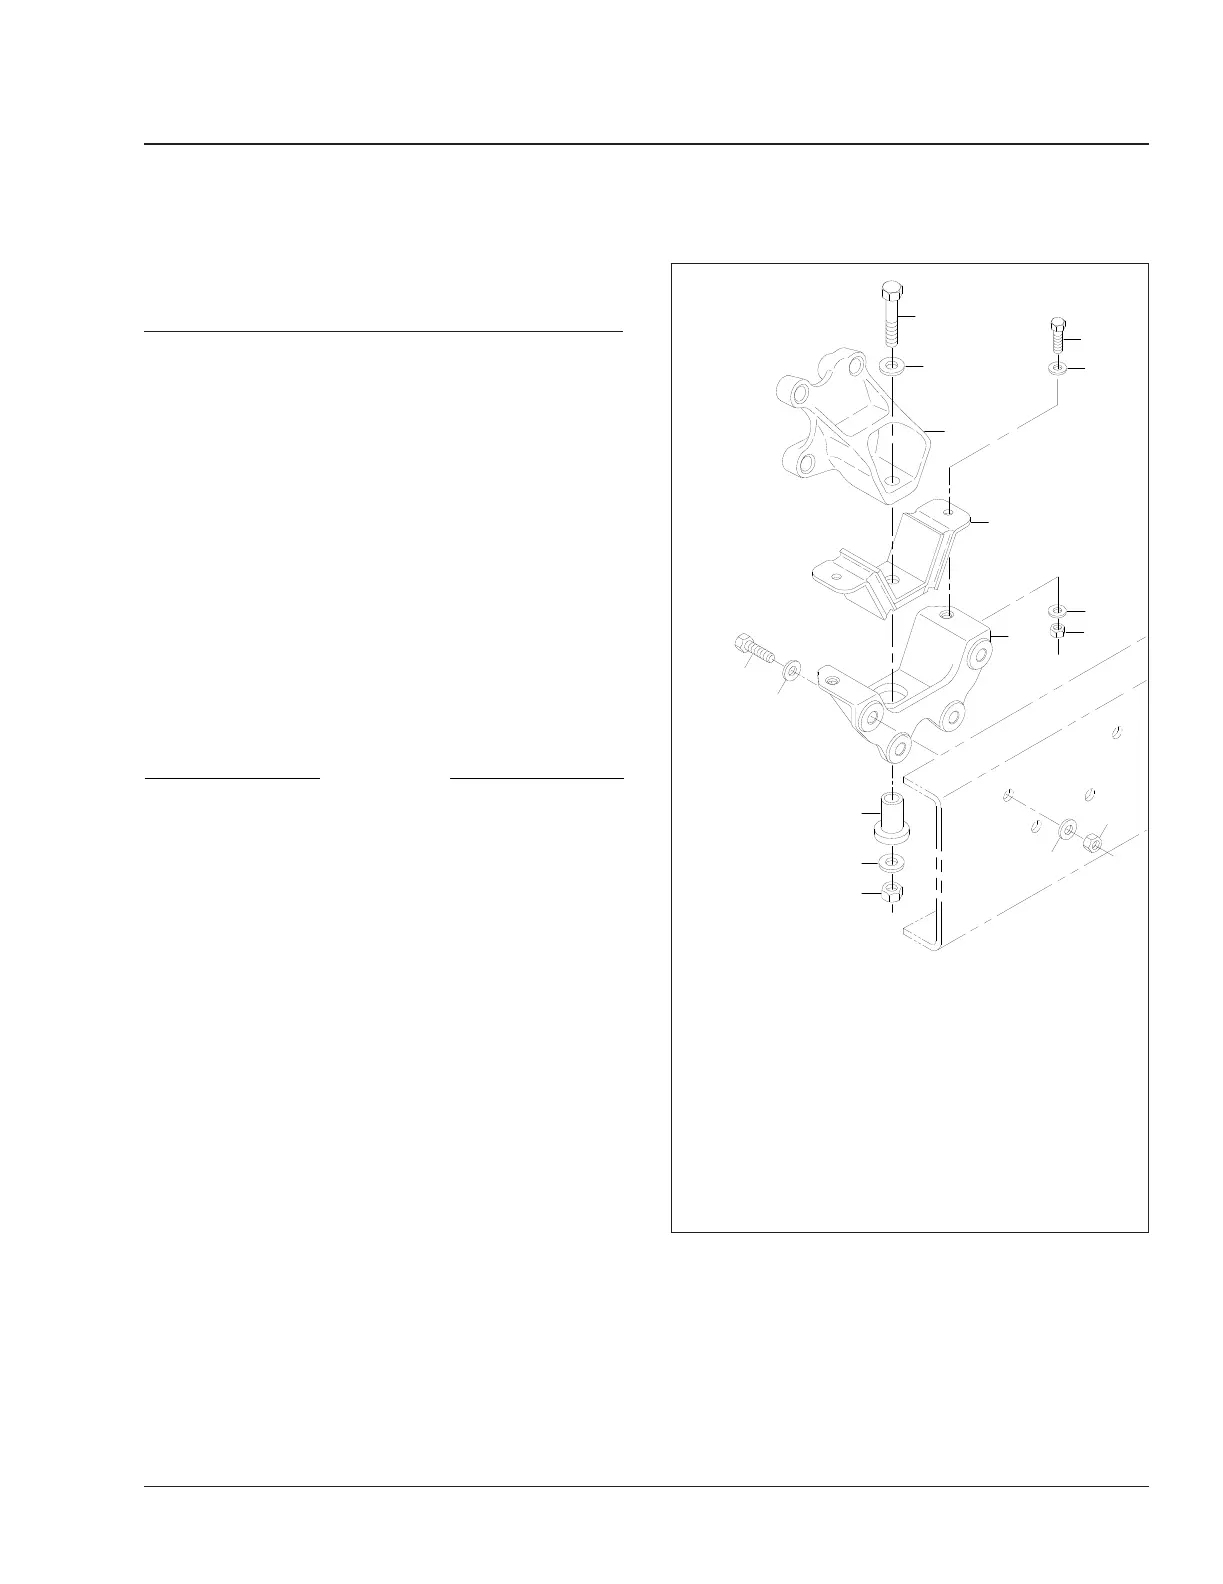
Fig. 13 for pre-EPA07 engine
mounts. Check the torque of frame fasteners to off-
set the effects of "bedding in" (or seating). When
possible, always check the torque of the nut, not the
bolt head. This will give a true torque reading by
eliminating bolt body friction. When checking the
torque of frame fasteners, inspect the frame for
cracks and other damage. Set a click-type torque
wrench to the maximum torque of the fastener you
are checking. Apply pressure until the torque wrench
clicks. Do not loosen the bolt to check the torque.
See the applicable torque table in
Group 00 for
torque specifications.
NOTICE
Make sure frame fasteners are properly tightened.
Continued vehicle operation with loose fasteners
could result in bracket or frame damage.
NOTE: Engine supports on vehicles built from
January 2007 do not require checking.
Inspect and check the fasteners at the following
locations:
• Axle Stops
• Engine Trunnion Supports
• Equalizer Brackets
• Exhaust Brackets
• Fifth Wheel Legs
• Fifth Wheel Mountings
• Frame Crossmembers and Gussets
• Front Frame Brackets
• Front Suspension Spring Brackets
• Fuel Tank Brackets
• Radius Rods
• Rear Engine Supports
• Rear Suspension Spring Brackets
• Shock Absorbers
• All Other Frame Fasteners
Any component that shows signs of cracking, or
other damage, must be repaired or replaced. See the
1
2
3
2
f220054
4
5
5
8
6
7
9
10
11
12
10
13
03/30/95
1. Capscrew, 3/4– x 4.5 Inch, Grade 8
2. Washer, 3/4 Inch
3. Engine Leg
4. Capscrew, 1/2–13 x 1.5 Inch, Grade 8
5. Washer, 1/2 Inch
6. Upper Isolator
7. Rear Engine Mount
8. Nut, 5/16–18
9. Capscrew, 5/8–11 x 2.5 Inch, Grade 8
10. Washer, 5/8 Inch
11. Lower Isolator
12. Nut, 3/4–10
13. Nut, 5/8–11
Fig. 13, Rear Engine Mount Assembly (pre-EPA07
engines)
Frame and Frame Components 31
Century Class Trucks Maintenance Manual, January 2016 31/9
 Loading...


