components, as this can introduce moisture and
contaminants into the threads of the fittings and
damage the sealants.
Gas detection sensors are located on the cab
overhead console and in the engine compartment
on the frontwall. The sensors are located in high
areas, where rising gas vapors will pass by or
accumulate. Do not use a high-pressure washer,
steam cleaner, or silicone-based chemicals on the
gas detection sensors, as this may permanently
disable the sensors. When cleaning the vehicle,
cover the sensors with a plastic covering. Keep
the sensors covered until the area has been
cleared of any cleaning fumes. Harsh chemicals
and extremely high temperatures may damage the
sensor.
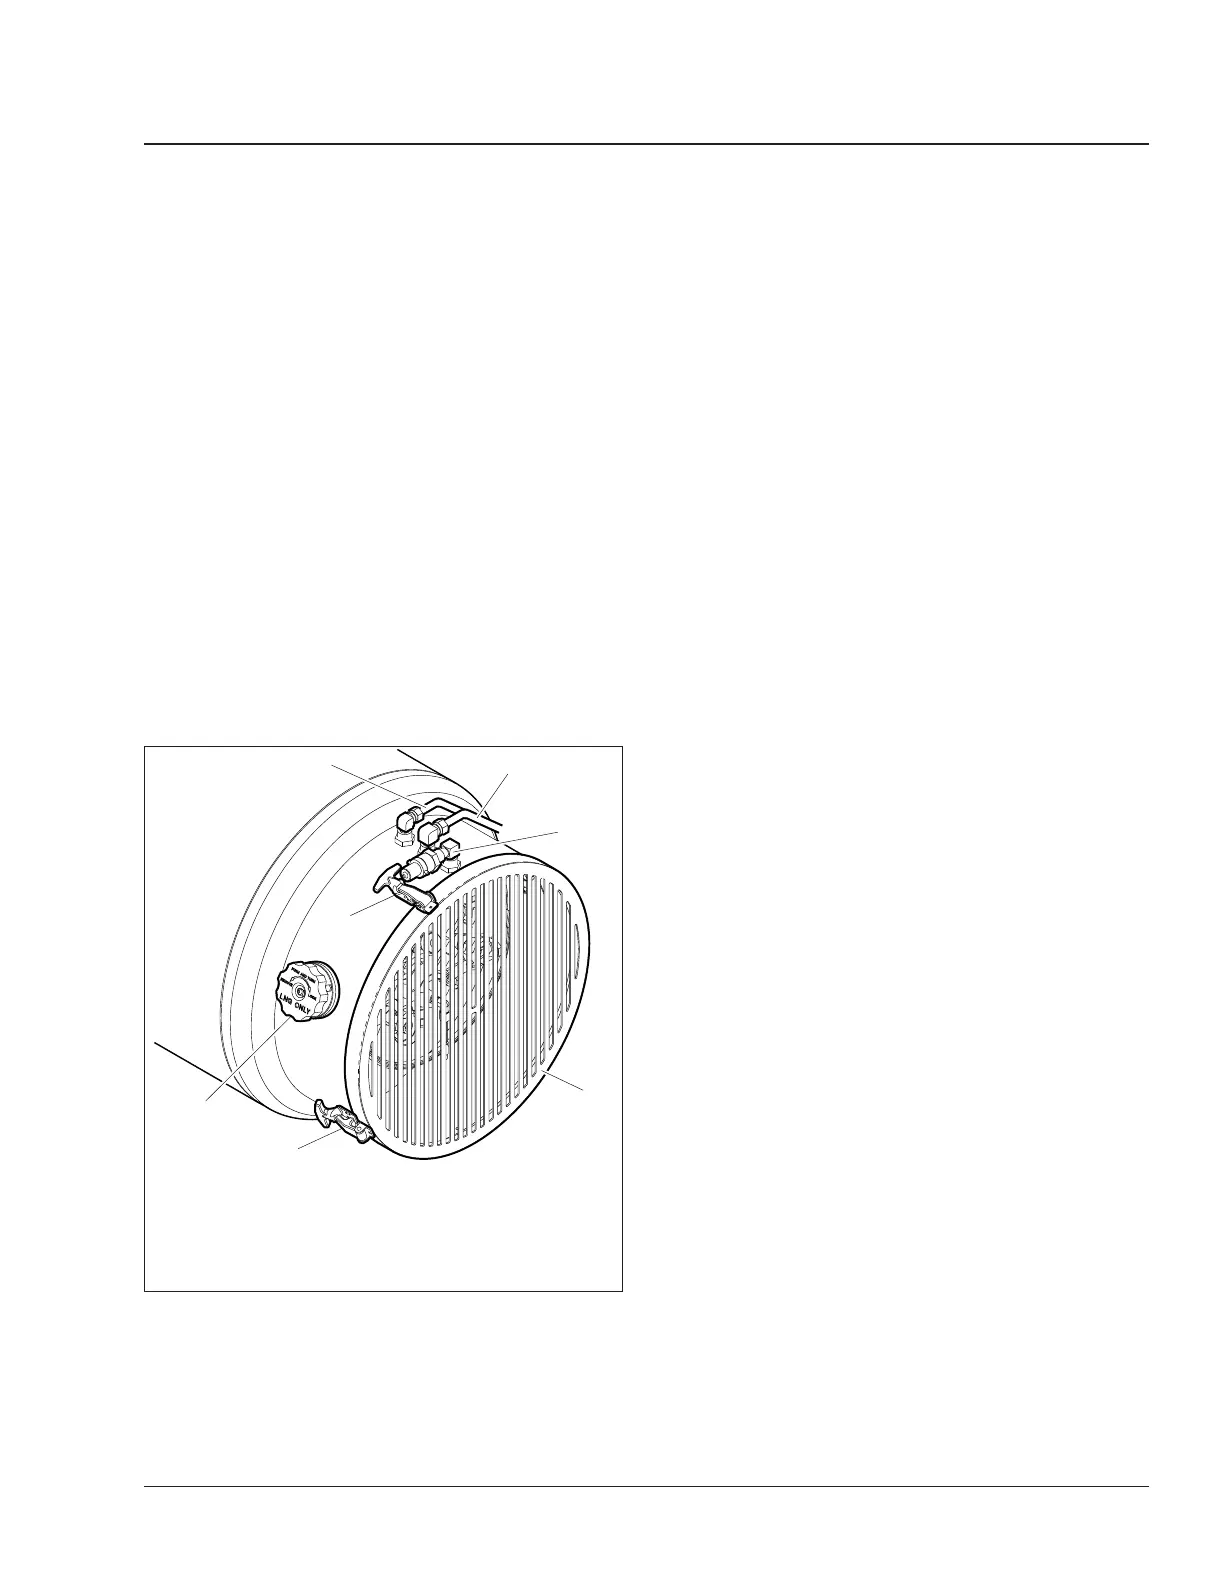
Fuel Tank and Shroud Inspecting
See Fig. 6 for fuel tank and shroud component
locations.
1. Inspect the fuel tank outer shell for dents or
other signs of damage. Inspect the bottom of the
tank for deep scratches, flat spots, or gouges.
Replace a leaking fuel tank.
2. Ensure that the fuel tank is secured to its
mounting brackets and that the mounting
brackets are secured to the frame. Inspect for
any signs of looseness.
3. Ensure that all rubber isolator straps are present
and secure.
4. Look for signs of abrasion between the fuel tank
and mounting brackets.
5. Inspect the fuel fill fitting for signs of damage or
leaks. Ensure the fuel fill cap is present and in
good condition, and the fitting is mounted
securely on the tank.
6. Inspect the fuel outlet line and fitting for signs of
leaks or damage.
7. Inspect the primary relief vent and pipe-away line
for damage, kinks, chafing, or loose connections.
8. Inspect the fill vent fitting for signs of damage.
9. Inspect the shroud cover for dents or other signs
of damage. Ensure that the shroud cover latches
are in working condition and fasten the shroud
cover securely to the tank.
10. Replace leaking or damaged fuel lines. Repair or
replace leaking or damaged fittings.
Plumbing Components
Inspecting
See Fig. 7 for plumbing component locations.
Use a bubble solution to check for leaks while
performing the following visual inspection.
1. Check the following components for signs of
damage or leaks.
• Pressure control regulator
• Vapor shutoff valve
• Secondary relief valve
• Primary relief valve and threaded
connections
• Excess flow valve
• Fuel shutoff valve
• Fill check valve
2. Inspect the fuel fill line for signs of damage,
kinked or crushed piping, or chafing.
05/29/2009 f470534
1
2
3
4
6
5
6
1. Fuel Fill Fitting
2. Fuel Outlet Line
(liquid)
3. Primary Relief Vent
Line (relief valve)
4. Fill Vent Fitting (vent)
5. Shroud Cover
6. Shroud Cover Latches
Fig. 6, Fuel Tank Outer Shell
Fuel 47
Business Class M2 Plus Maintenance Manual, 02/10/2023 47/5