Installation and Maintenance
6HUYLFH0DQXDO
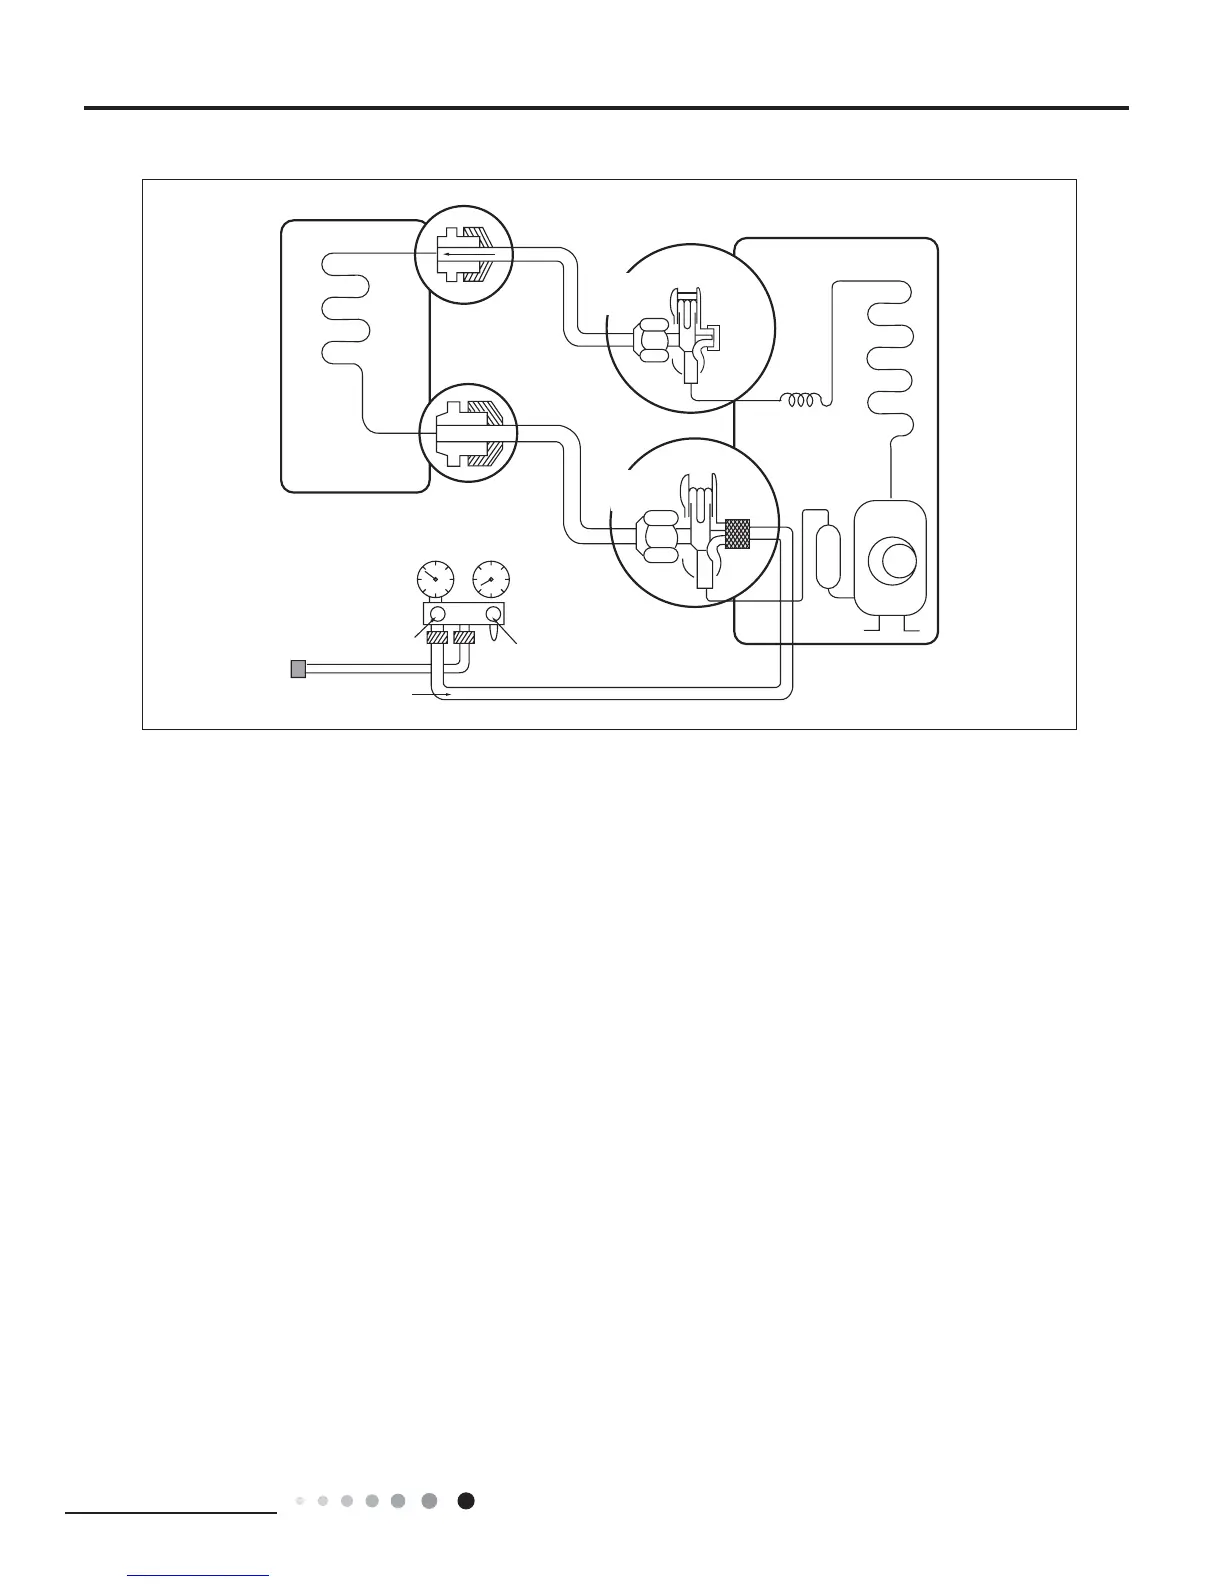
3XPSLQJ'RZQ
Lo
Closed
Purge the air
Outdoor unit
Indoor unit
Liquid side
Gas side
CLOSE
Open
2-Way
valve
3-Way
valve
CLOSE
3URFHGXUH
&RQ¿UPWKDWERWKWKHZD\DQGZD\YDOYHVDUHVHWWR
WKHRSHQSRVLWLRQ
– Remove the valve stem caps and confirm that the valve stems
are in the raised position.
– Be sure to use a hexagonal wrench to operate the valve stems.
2SHUDWHWKHXQLWIRUWRPLQXWHV
6WRSRSHUDWLRQ DQG ZDLW IRU PLQXWHVWKHQFRQQHFW WKH
FKDUJHVHWWRWKHVHUYLFHSRUWRIWKHZD\YDOYH
– Connect the charge hose with the push pin to the service port.
$LUSXUJLQJRIWKHFKDUJHKRVH
– Open the low-pressure valve on the charge set slightly to air
purge from the charge hose.
6HWWKHZD\YDOYHWRWKHFORVHGSRVLWLRQ
2SHUDWHWKHDLUFRQGLWLRQHUDWWKHFRROLQJF\FOHDQGVWRS
LWZKHQWKHJDXJHLQGLFDWHVNJFP
J
,PPHGLDWHO\VHWWKHZD\YDOYHWRWKHFORVHGSRVLWLRQ
– Do this quickly so that the gauge ends up indicating 3 to 5kg/
cm
2
g.
'LVFRQQHFWWKH FKDUJHVHW DQGPRXQW WKHZD\ DQG
ZD\YDOYHVVWHPQXWVDQGWKHVHUYLFHSRUWQXW
– Use torque wrench to tighten the service port nut to a torque
of 1.8 kg.m.
– Be sure to check for gas leakage.
 Loading...