B.Thesurfaceburnershouldlightwhengasisavailable
tothetopburner.Eachburnershouldlightwithin
four(4)secondsafterairhasbeenpurgedfrom
supplylines.Visuallycheckthatburnerhaslit.
c.Oncetheburnerlights,thecontrolknobshouldbe
rotatedoutoftheLITEposition.
Thereareseparateignitiondevicesforeachburner.Try
eachknobseparatelyuntilallburnervalveshavebeen
checked.
Adjust the "LOW" Setting of Surface
Burner Valves (see Figure 9)
a.Pushinandturneachcontrolto LITEuntilburner
ignites.
b.QuicklyturnknobtoLOWESTPOSITION.
c.If burnergoesout,readjustvalveasfollows:
ResetcontroltoOFF.Removethesurfaceburner
controlknob,insertathin-bladedscrewdriverintothe
hollowvalvestemandengagetheslottedscrewinside.
Flamesizecanbeincreasedordecreasedwiththe
turnofthescrew.Adjustflameuntilyoucanquickly
turnknobfromLITEto LOWESTPOSITIONwithout
extinguishingtheflame.Flameshouldbeassmallas
possiblewithoutgoingout.
displaysetting,theglowingigniterwillgooff.Theburner
flamewillgo"out"in20to 30secondsafterignitergoes
"OFF".Tomaintainanygivenoventemperature,thiscycle
willcontinueaslongasthedisplayissetto operate.
Afterremovingallpackingmaterialsandliteraturefrom
theoven:
a) Settheovento BAKEat300%SeeUse&CareGuide
foroperatinginstructions.
b) Within60secondstheovenburnershouldignite.
Checkforproperflame,andallowtheburnertocycle
once.Resetcontrolstooff.
c) Ifyourmodelisequippedwithahigh-waistbroiler,
setoventobroil.SeeUse&CareGuideforoperating
instructions.
d)Within60secondsthebroilburnershouldignite.Check
forproperflame.Resetcontrolstooff.
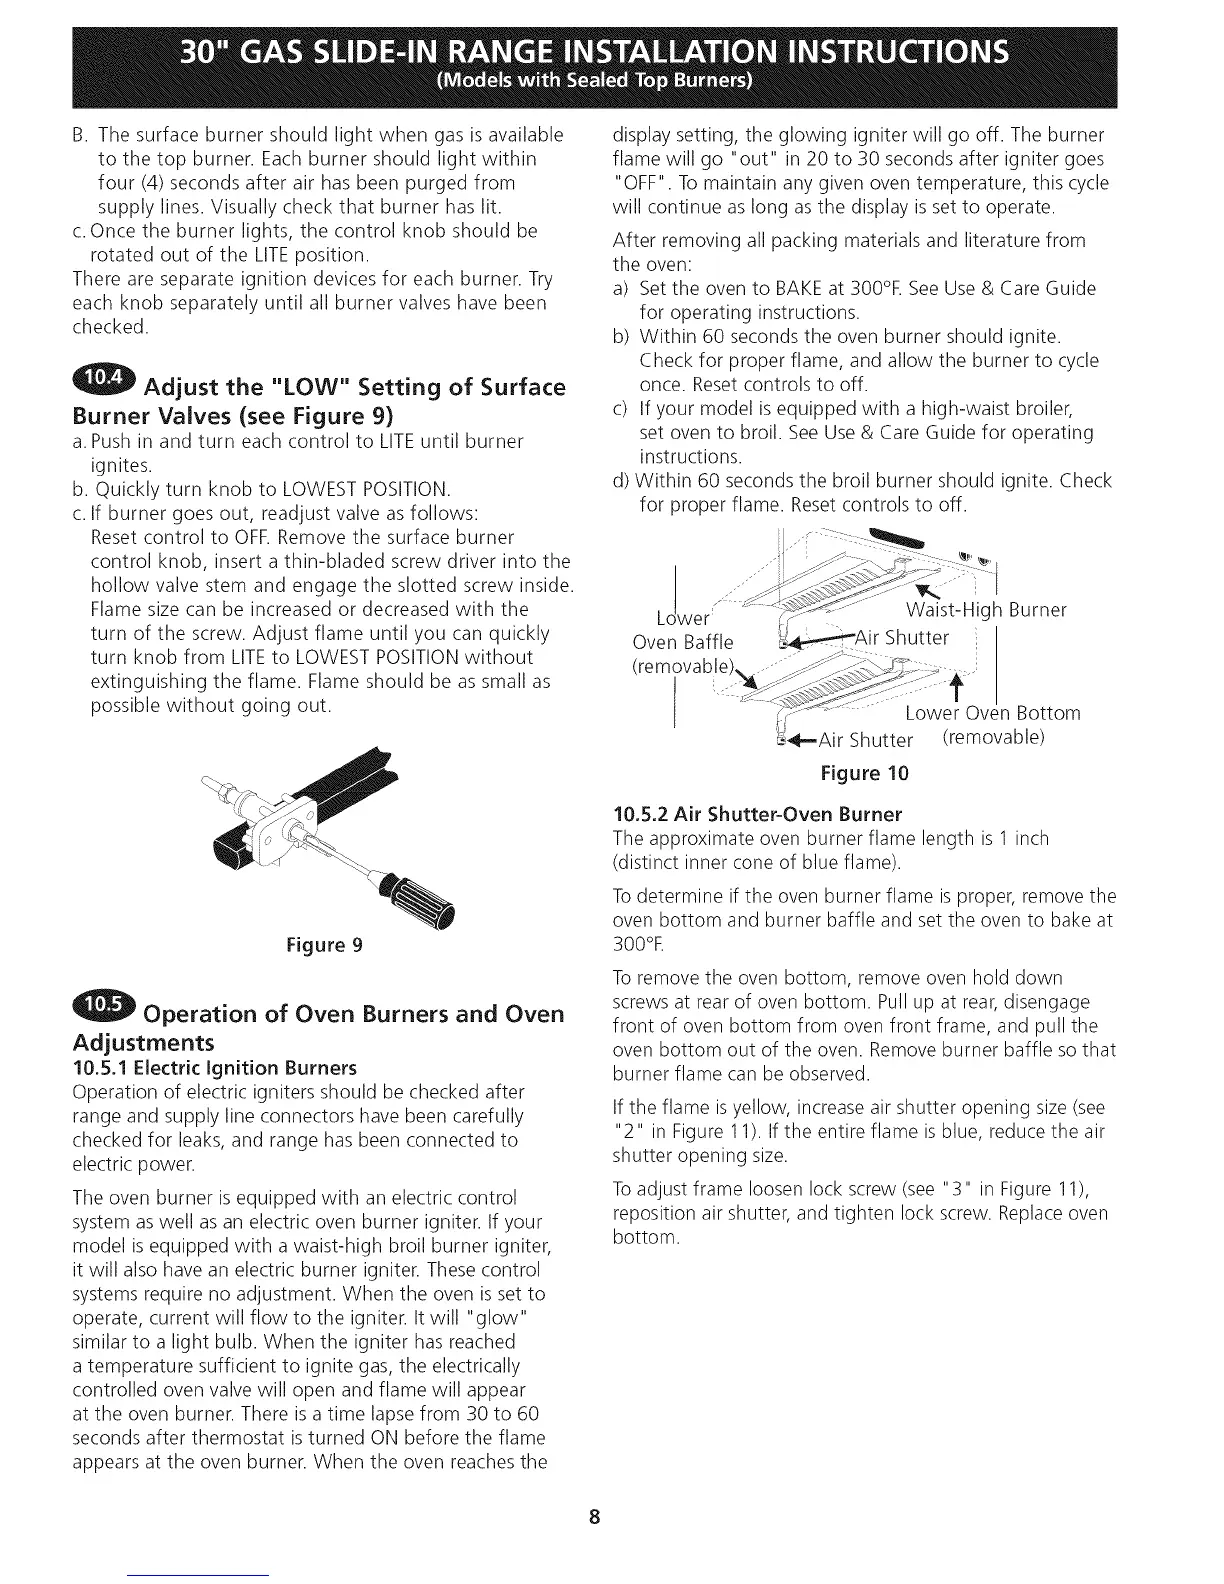
L wer' Waist-HighBurner
OvenBaffle _Air Shutter
( _-
Lower Oven Bottom
,4--Air Shutter (removable)
Figure 10
Figure 9
Operation of Oven Burners and Oven
Adjustments
10,5,1 Electric Ignition Burners
Operation of electric igniters should be checked after
range and supply line connectors have been carefully
checked for leaks, and range has been connected to
electric power.
The oven burner is equipped with an electric control
system aswell as an electric oven burner igniter. If your
model isequipped with a waist-high broil burner igniter,
it will also have an electric burner igniter. These control
systems require no adjustment. When the oven isset to
operate, current will flow to the igniter. It will "glow"
similar to a light bulb. When the igniter has reached
a temperature sufficient to ignite gas, the electrically
controlled oven valve will open and flame will appear
at the oven burner. There is a time lapse from 30 to 60
seconds after thermostat is turned ON before the flame
appears at the oven burner. When the oven reaches the
10,5,2 Air Shutter-Oven Burner
The approximate oven burner flame length is 1 inch
(distinct inner cone of blue flame).
Todetermine if the oven burner flame is proper, remove the
oven bottom and burner baffle and set the oven to bake at
300%
Toremove the oven bottom, remove oven hold down
screws at rear of oven bottom. Pull up at rear, disengage
front of oven bottom from oven front frame, and pull the
oven bottom out of the oven. Remove burner baffle so that
burner flame can be observed.
If the flame is yellow, increase air shutter opening size (see
"2" in Figure 11). If the entire flame is blue, reduce the air
shutter opening size.
Toadjust frame loosen lock screw (see "3" in Figure 11),
reposition air shutter, and tighten lock screw. Replace oven
bottom.